|
|
|
- 饶棒 殷
- 6 years ago
- Views:
Transcription
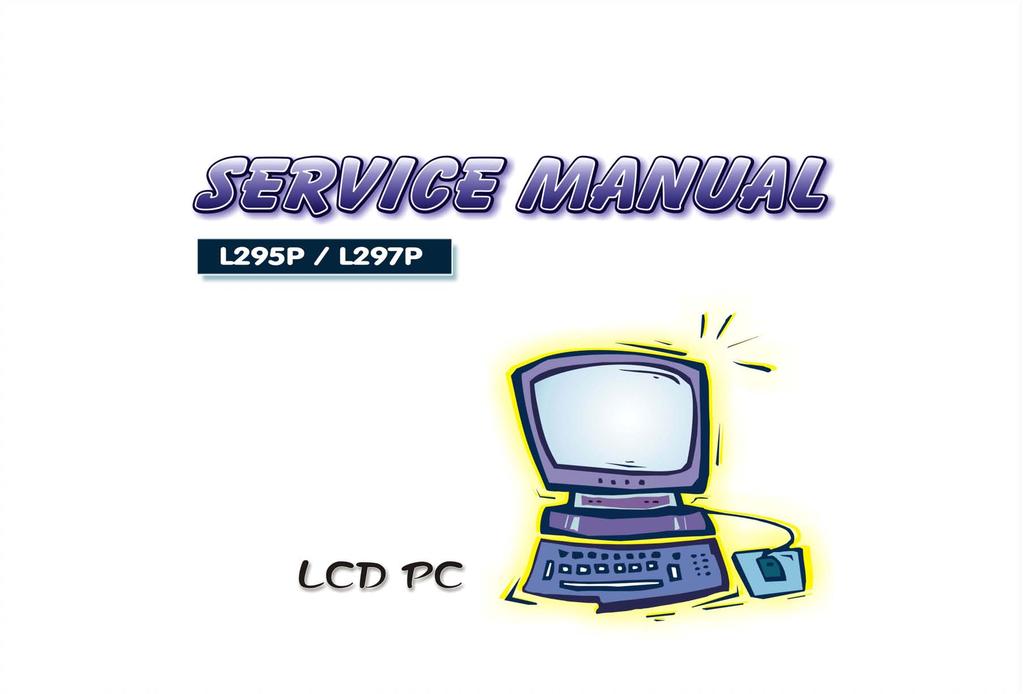
1 LU / LU
2
3 Preface LD omputer LU/LU Series Service Manual Preface I
4 Preface Notice The company reserves the right to revise this publication or to change its contents without notice. Information contained herein is for reference only and does not constitute a commitment on the part of the manufacturer or any subsequent vendor. They assume no responsibility or liability for any errors or inaccuracies that may appear in this publication nor are they in anyway responsible for any loss or damage resulting from the use (or misuse) of this publication. This publication and any accompanying software may not, in whole or in part, be reproduced, translated, transmitted or reduced to any machine readable form without prior consent from the vendor, manufacturer or creators of this publication, except for copies kept by the user for backup purposes. Preface Brand and product names mentioned in this publication may or may not be copyrights and/or registered trademarks of their respective companies. They are mentioned for identification purposes only and are not intended as an endorsement of that product or its manufacturer. Version.0 September 00 Trademarks Intel, Pentium and eleron are US registered trademarks of Intel orporation. Windows is a registered trademark of Microsoft orporation. Other brand and product names are trademarks and/or registered trademarks of their respective companies. II
5 Preface About this Manual This manual is intended for service personnel who have completed sufficient training to undertake the maintenance and inspection of personal computers. It is organized to allow you to look up basic information for servicing and/or upgrading components of the computer. The following information is included: hapter, Introduction, provides general information about the location of system elements and their specifications. hapter, Disassembly, provides step-by-step instructions for disassembling parts and subsystems and how to upgrade elements of the system. Appendix A, Part Lists Appendix B, Schematic Diagrams Preface III
6 Preface Related Documents You may also need to consult the following manual for additional information: User s Manual on D This describes the computer s features and the procedures for operating the computer and its ROM-based setup program. It also describes the installation and operation of the utility programs provided with the computer. Preface IV
7 Preface ontents Introduction...- Overview...- Model Differences...- System Specifications LU/LU...- External Locator - Front View...- External Location - Left & Right Side Views...- External Locator - Rear View...- Mainboard Overview - Top...- Key Parts...- Mainboard Overview - Bottom...-0 Key Parts...-0 Mainboard Overview - Top...- able onnectors and Switches...- Mainboard Overview - Bottom...- able onnectors and Switches...- Disassembly...- Overview...- Maintenance Tools...- onnections...- Maintenance Precautions...- Disassembly Steps...- Removing the Hard Disk Drive Assembly...- Removing the LD Back over...- Removing the System Memory...- Removing the PU...- Removing the I/O Bracket...-0 Removing the Modem...- Removing the Floppy Disk Drive Assembly...- Removing the Mini PI I/F Module...- Removing the D Device Assembly (LU Series)... - Removing the D Device Assembly (LU Series)... - Part Lists...A- Part List Illustration Location... A- LU - Base... A- LU - Back... A- LU - Front... A- LU - ard Reader Module... A- LU - ombo... A- LU - Toshiba DVD... A- LU - FDD... A- LU - HDD... A-0 LU - Base... A- LU - Back... A- LU - Front... A- LU - ard Reader Module... A- LU - D-ROM... A- LU - ombo... A- LU - Toshiba DVD-RW... A- LU - FDD... A- LU - HDD... A- LU - Video apture ard Module... A-0 Schematic Diagrams...B- System Block Diagram...B- Northwood - of...b- Northwood - of...b- lock Generator...B- MH Power...B- MH Host...B- Preface V
8 Preface Preface MH AGP... B- MH Memory... B- MH Memory Termination... B-0 DDR RIMM... B- DVO hrontel H0A... B- LD onnector... B- RT & USB... B- IH (Power, LP, lock, SMbus)... B- IH (PI, IDE, UHB, USB, LAN)... B- Thermal & Fan ontroller... B- ardbus PI0... B- IEEE... B- ardbus Slot & Mini PI... B-0 LAN RTL00BL... B- IDE onnector & Firmware Hub... B- SIO WHF... B- Serial & Parallel Port... B- ODE... B- Amplifiers & Inverter onnector... B- Power... B- Power... B- Power... B- VI
9 : Introduction Introduction Overview This manual covers the information you need to service or upgrade the LU/LU LD computer. Information about operating the computer (e.g. getting started, and the Setup utility) is in the User s Manual. Information about drivers (e.g. VGA & audio) is also found in User s Manual. That manual is shipped with the computer. Operating systems (e.g. DOS, Windows x, Windows NT.0, Windows 000, Windows XP, OS/ Warp, UNIX, etc.) have their own manuals as do application software (e.g. word processing and database programs). If you have questions about those programs, you should consult those manuals. The LU/LU LD computer is designed to be upgradeable. See Disassembly on page - for a detailed description of the upgrade procedures for each specific component. Please note the warning and safety information indicated by the symbol. The balance of this chapter reviews the computer s technical specifications and features..introduction Overview -

 * mm (W) * mm (D mm (H) * mm (W) * mm (D).Introduction Weight. Kg 0.")
10 Introduction Model Differences The differences between the model types are indicated in the table and pictures below. Table - Model Specifications Feature/Model LU Series LU Series LD Size olor TFT " XGA LD Panel (supporting a resolution of 0* K colors) olor TFT " SXGA LD Panel (supporting a resolution of 0*0 million colors) D Device Location Left Side Front Dimensions mm (H) * mm (W) * mm (D mm (H) * mm (W) * mm (D).Introduction Weight. Kg 0. Kg Designs Supported (Additional olors Also supported) - Model Differences
11 Introduction System Specifications LU/LU Feature Specification - LU Specification - LU Processor Types Intel Pentium with HT Technology (0/ 0/ 0) F-PGA Package (-pin) (0nm) - 0 Nanometer Process Technology, MB L ache & 00MHz Front Side Bus./.0/./ GHz Table - LU/LU System Specifications Intel Pentium with HT Technology F-PGA Package (-pin) (0nm) - 0 Nanometer Process Technology, KB L ache & 00MHz Front Side Bus./.0/. GHz ore Logic Intel Pentium F-PGA Package (-pin) (0nm) - 0 Nanometer Process Technology, KB L ache & MHz Front Side Bus. GHz Intel eleron D (/ 0/ / 0/ / 0) F-PGA Package (-pin) (0nm) - 0 Nanometer Process Technology, KB L ache & MHz Front Side Bus././.0/./.0/. GHz Intel eleron F-PGA Package (-pin) (0nm) - 0 Nanometer Process Technology, KB L ache & 00MHz Front Side Bus././././. GHz Intel hipset -GV.Introduction Memory BIOS Two DIMM Sockets Supporting DDR / 00 MHz Expandable Memory up to GB (M/M/M/GB DDR DIMM modules) MB Flash ROM Phoenix BIOS Supports API Intel OSB Support LD olor TFT " XGA LD Panel (supporting a resolution of 0* K colors) olor TFT " SXGA LD Panel (supporting a resolution of 0*0 million colors) System Specifications LU/LU -
12 Introduction Feature Specification - LU Specification - LU Video -GV Integrated hipset Video RAM - Shared Memory Architecture (SMA) Supporting DDR Video Shared Memory up to MB D Hardware Accelerator (for block level transfers of data integrating an extensive set of instructions for D) Video Memory.Introduction Audio Interface The system allocates or shares a portion of system memory for video use. See Dynamic Video Memory Technology on page - for information on the system allocated video memory, and Share Memory (Main Menu) on page - for information on user configurable options. A ompatible SoundBlaster and Windows Sound System ompatible Two Built-In Speakers (W) Three Audio Jacks for Headphone-Out, Line-In, and Microphone-In One Serial Port (0A ompatible, Pin Shell, up to Kbps) One Parallel Port (pin Shell, SPP/Bi-Direction/EP/EPP Mode Support) One External Monitor (VGA) Port (-pin D-sub) Two PS/ Ports (Keyboard & Mouse) Three Audio Jacks For Headphone-out, Line-in, and Microphone-in Four USB.0 Ports One RJ- Jack for 00M/0M Ethernet LAN I/O hip P ard Sockets One RJ- Port for Modem (optional) One Mini-PI /IF IEEE Module (optional) - Enables IEEE Port ( Pin Un-Powered) Winbond WHF Supports Two Type II Slots or One Type III PMIA Slot (ardbus Support) - System Specifications LU/LU
13 Introduction Feature Specification - LU Specification - LU Storage One.",.MB -Mode Floppy Disk Drive (Exchangeable With -in- ard Reader Module or Video-apture Module) One.",.mm Height Hard Disk Drive (Ultra-/00 I/F Support) One Optical Device Bay for the Optional.mm Height ATAPI D-ROM, or D-RW, or DVD-ROM, or DVD-ROM & D-RW ombo, or DVD/RWR Modem LAN Removable Internal k MD Data/Fax Modem (optional) On Board 0/00Mbps Base Auto-Detection Power Power Management Indicators Physical Dimensions mm (H) * mm (W) * mm (D) Internal Switching Power Supply Full Range - A in 0~V, 0W Supports API Supports Hibernate Mode Supports Standby Mode LED Indicators (HDD/FDD/D Device activity, Power) mm (H) * mm (W) * mm (D).Introduction Weight.Kg 0.Kg System Specifications LU/LU -


 LU Series LUT.")
14 Introduction Figure - Front View External Locator - Front View. LD Panel. Speakers. LED Activity indicators. Power Button. D Device (LU Only) LU Series LUT.Introduction LU Series - External Locator - Front View


15 Introduction External Location - Left & Right Side Views Left LU Series LU Series Right Figure - Left & Right Views. Floppy Disk Drive*. Hard Disk Drive (HDD) Bay. D Device (LU Only). LD Brightness ontrol Knob. Volume ontrol Knob. Dual P ard Slots. P ard Eject Buttons. Dual USB Ports. A Power-In Port 0. Security Lock Slot.Introduction *Floppy Disk Drive & Optional Modules 0 If you have either the -in- ard Reader, or Video apture ard options, then the optional module will replace the floppy disk drive module in the slot at point. External Location - Left & Right Side Views -
 0. PS/ Mouse & Keyboard Ports. Printer/Parallel Port. Serial Port. External Monitor (RT) Port.")
16 Introduction Figure - Rear View External Locator - Rear View.Introduction. arrying Handle. Headphone-Out Jack. Line-In Jack. Microphone-In Jack. RJ- LAN Jack. RJ- Phone Jack. Dual USB Ports. Unpowered - IEEE Port. Blocked - IEEE Port (no option installed) 0. PS/ Mouse & Keyboard Ports. Printer/Parallel Port. Serial Port. External Monitor (RT) Port. Vents 0 - External Locator - Rear View
17 Introduction Mainboard Overview - Top Key Parts Figure - Mainboard Overview - Top Key Parts. PU Socket (no PU Installed). Intel Springdale- G (North Bridge). RAM Sockets. Mini PI Socket for WLAN or IEEE. FLASH BIOS. MOS Battery. Realtek RTL00BL. ardbus PI0. MOS Jumper Switch.Introduction Mainboard Overview - Top -
18 Introduction Figure - Mainboard Overview - Bottom Key Parts Mainboard Overview - Bottom Key Parts.Introduction. hrontel H0A. lock Generator. Intel IH- 0 mbga (South Bridge). SUPER I/O Winbond WHF. A MD Module - 0 Mainboard Overview - Bottom
. Modem Module. Speaker (N). Modem able (N). P ARD (N) 0. Touch Screen (N). IEEE (N). USB.0 (N). LED Board (N0). Speaker (N). Power (N). Hard Disk (N).")
19 Introduction Mainboard Overview - Top able onnectors and Switches Figure - Mainboard Top able onnectors & Switches. Floppy Disk Drive (N). ard Reader(N). D/DVD Device (N). Fan Power (N). Inverter (N). Modem Module. Speaker (N). Modem able (N). P ARD (N) 0. Touch Screen (N). IEEE (N). USB.0 (N). LED Board (N0). Speaker (N). Power (N). Hard Disk (N).Introduction 0 Mainboard Overview - Top -
20 Introduction Figure - Mainboard Bottom able onnectors & Switches Mainboard Overview - Bottom able onnectors and Switches. N (LD onnector).introduction - Mainboard Overview - Bottom
21 Disassembly : Disassembly Overview This chapter provides step-by-step instructions for disassembling parts and subsystems. When it comes to reassembly, reverse the procedures (unless otherwise indicated). We suggest you completely review any procedure before you take the computer apart. Procedures such as upgrading/replacing the RAM, D device and hard disk are included in the User s Manual but are repeated here for your convenience. To make the disassembly process easier each section may have a box in the page margin. Information contained under the figure # will give a synopsis of the sequence of procedures involved in the disassembly procedure. A box with a lists the relevant parts you will have after the disassembly process is complete. Note: The parts listed will be for the disassembly procedure listed ONLY, and not any previous disassembly step(s) required. Refer to the part list for the previous disassembly procedure. The amount of screws you should be left with will be listed here also. Information and omponent Parts.Disassembly A box with a will provide any possible helpful information. A box with a contains warnings. An example of these types of boxes are shown in the sidebar. Warning Overview -
22 Disassembly NOTE: All disassembly procedures assume that the system is turned OFF, and disconnected from any power supply, and that all peripheral cables are disconnected (including telephone lines and network cables). Maintenance Tools The following tools are recommended when working on the computer:.disassembly M Philips-head screwdriver M. Philips-head screwdriver (magnetized) M Philips-head screwdriver Small flat-head screwdriver Pair of needle-nose pliers Anti-static wrist-strap onnections onnections within the computer are one of four types: Locking collar sockets for ribbon connectors Pressure sockets for multi-wire connectors Pressure sockets for ribbon connectors Board-to-board or multi-pin sockets To release these connectors, use a small flat-head screwdriver to gently pry the locking collar away from its base. When replacing the connection, make sure the connector is oriented in the same way. The pin side is usually not indicated. To release this connector type, grasp it at its head and gently rock it from side to side as you pull it out. Do not pull on the wires themselves. When replacing the connection, do not try to force it. The socket only fits one way. To release these connectors, use a small pair of needle-nose pliers to gently lift the connector away from its socket. When replacing the connection, make sure the connector is oriented in the same way. The pin side is usually not indicated. To separate the boards, gently rock them from side to side as you pull them apart. If the connection is very tight, use a small flat-head screwdriver - use just enough force to start. - Overview
23 Disassembly Maintenance Precautions The following precautions are a reminder. To avoid personal injury or damage to the computer while performing a removal and/or replacement job, take the following precautions:. Don't drop it. Perform your repairs and/or upgrades on a stable surface. If the computer falls, the case and other components could be damaged.. Don't overheat it. Note the proximity of any heating elements. Keep the computer out of direct sunlight.. Avoid interference. Note the proximity of any high capacity transformers, electric motors, and other strong magnetic fields. These can hinder proper performance and damage components and/or data. You should also monitor the position of magnetized tools (i.e. screwdrivers).. Keep it dry. This is an electrical appliance. If water or any other liquid gets into it, the computer could be badly damaged.. Be careful with power. Avoid accidental shocks, discharges or explosions. Before removing or servicing any part from the computer, turn the computer off and detach any power supplies. When you want to unplug the power cord or any cable/wire, be sure to disconnect it by the plug head. Do not pull on the wire.. Peripherals Turn off and detach any peripherals.. Beware of static discharge. Is, such as the PU and main support chips, are vulnerable to static electricity. Before handling any part in the computer, discharge any static electricity inside the computer. When handling a printed circuit board, do not use gloves or other materials which allow static electricity buildup. We suggest that you use an anti-static wrist strap instead.. Beware of corrosion. As you perform your job, avoid touching any connector leads. Even the cleanest hands produce oils which can attract corrosive elements.. Keep your work environment clean. Tobacco smoke, dust or other air-born particulate matter is often attracted to charged surfaces, reducing performance. 0. Keep track of the components. When removing or replacing any part, be careful not to leave small parts, such as screws, loose inside the computer. Power Safety Warning Before you undertake any upgrade procedures, make sure that you have turned off the power, and disconnected all peripherals and cables (including telephone lines). It is advisable to also remove your battery in order to prevent accidentally turning the machine on..disassembly leaning Do not apply cleaner directly to the computer, use a soft clean cloth. Do not use volatile (petroleum distillates) or abrasive cleaners on any part of the computer. Overview -
24 Disassembly.Disassembly Disassembly Steps The following lists the disassembly steps, and on which page to find the related information. PLEASE PERFORM THE DISASSEMBLY STEPS IN THE ORDER INDIATED. To remove the hard disk drive assembly:. Remove the hard disk drive assembly page - To remove the LD back cover:. Remove the LD back cover page - To remove the system memory:. Remove the LD back cover page -. Remove the system memory page - To remove the PU:. Remove the LD back cover page -. Remove the PU page - To remove the I/O Bracket:. Remove the LD back cover page -. Remove the I/O bracket page - 0 To remove the floppy disk drive assembly:. Remove the LD back cover page -. Remove the floppy disk drive assembly page - To remove the Mini PI I/F module:. Remove the LD back cover page -. Remove the Mini PI I/F module page - To remove the LU series D/DVD Device:. Remove the LD back cover page -. Remove the D/DVD device page - To remove the LU series D/DVD Device:. Remove the LD back cover page -. Remove the D/DVD device page - To remove the modem:. Remove the LD back cover page -. Remove the I/O bracket page - 0. Remove the modem page - - Disassembly Steps


 holding the assembly to the bay cover.")


25 Disassembly Removing the Hard Disk Drive Assembly. Turn OFF the computer and turn it around so that you may comfortably access the left side.. Remove screw from the HDD Bay.. arefully pull the HDD assembly out from the bay and disconnect the IDE cable, and power cable.. Turn the assembly over and remove screws ( - ) holding the assembly to the bay cover.. Remove screws 0 - and separate the hard disk and case.. Insert the new hard disk, and reverse the removal procedures to install the new hard disk. a. b. c. d. e. 0 Figure - Hard Disk Removal Sequence a. Remove the screw from the HDD Bay. b. Slide the HDD assembly in the direction of the arrow. c. Disconnect the IDE and power cables. d. Remove the screws from the assembly. e. Remove the screws and separate the HDD from the case.. HDD Bay over. HDD. HDD case Screws.Disassembly Removing the Hard Disk Drive Assembly -

26 Disassembly Figure - LD Back over Removal Sequence a. Remove the screws from the LD back cover. b. Lift the cover out and set it aside. Removing the LD Back over. Turn OFF the computer and place it with its LD display facing down on a clean, dry, level surface.. Remove screws - from the LD back cover and slide it up towards the top of the computer.. arefully remove the LD back cover from the main unit and set it aside. a. b..disassembly 0. LD back cover Screws - Removing the LD Back over

.disassembly c. ontact Warning Be careful not to touch the metal pins on the module s connecting edge.")
27 Disassembly Removing the System Memory. Remove the LD back cover (page - ).. The memory sockets will be visible at point on the mainboard.. For each module you want to replace, gently pull the latches and toward the sides of the socket to release the module.. The module will pop-up, and you can remove it.. Insert a new module holding it at about a 0 angle and fit the connectors firmly into the memory slot. a. b. Figure - Memory Removal Sequence a. Locate the memory sockets. b. Pull the latch(es) on the memory sockets to release the module(s). c. When the module pops up, lift it out.. Memory module(s).disassembly c. ontact Warning Be careful not to touch the metal pins on the module s connecting edge. Even the cleanest hands have oils which can attract particles, and degrade the module s performance. Removing the System Memory -

.")
, and then ease")

28 Disassembly Figure - PU Removal Sequence a. Release the latches from the top of the PU heat sink and fan unit. b. Remove the latches. c. Release the power cable. d. Lift the heat sink & fan unit out. Removing the PU. Remove the LD back cover (page - ).. Press down and hold each of the latches & (on the top of the PU heat sink and fan unit) in turn.. With the latch held down you will be able to release the brackets (at points & ), and then ease the brackets off the fan unit.. Release the power cable from the board and lift out the PU heat sink fan unit. a. d..disassembly aution The heat sink, and PU area in general, contains parts which are subject to high temperatures - Please allow the area time to cool before removing these parts. b. c.. Brackets. Heat Sink & Fan - Removing the PU
 lift the PU up out of the socket.")
. a. b. Figure - PU Removal Sequence (cont d) a. Lift the latch to unlock the PU. b. Lift the PU out of the socket.")
29 Disassembly. Move the latch fully in the direction indicated in to unlock the PU.. arefully (it may be hot) lift the PU up out of the socket.. When re-inserting the PU pay careful attention to the pin alignment, it will fit only one way (don t force it!). a. b. Figure - PU Removal Sequence (cont d) a. Lift the latch to unlock the PU. b. Lift the PU out of the socket..disassembly. PU Removing the PU -


30 Disassembly Figure - I/O Bracket Removal Sequence a. Remove the screws from the I/O bracket. b. Lift the I/O bracket up off the mainboard. Removing the I/O Bracket. Remove the LD back cover (page - ).. Remove the standard screws -, and use long-nosed pliers or a nutdriver to remove the hex socket connector type screws -.. arefully ease the I/O bracket 0 off the mainboard. a..disassembly b. 0. I/O bracket Screws 0-0 Removing the I/O Bracket


31 Disassembly Removing the Modem. Remove the LD back cover (page - ) and I/O bracket (page - 0).. Remove screws and from the modem module and disconnect the modem cable at point.. Disconnect the modem module from the connector socket, and lift it and the modem and cable off the mainboard. a. b. Figure - Modem Removal Sequence a. Remove the screws from the modem unit, and disconnect the cable. b. Lift the modem and cable off the board..disassembly. Modem module. Modem cable Screws Removing the Modem -


32 Disassembly Figure - Floppy Disk Drive Assembly Removal Sequence a. Remove the screws from the FDD assembly and disconnect the FDD ribbon cable. b. Lift the FDD assembly off the board. Removing the Floppy Disk Drive Assembly. Remove the LD back cover (page - ).. Remove screws - from the floppy disk drive assembly.. arefully disconnect the floppy disk drive ribbon cable at point.. Lift the floppy disk drive assembly off the mainboard. a..disassembly b.. FDD Assembly Screws - Removing the Floppy Disk Drive Assembly
: Disconnect the cable at point (and if necessary), then lift Mini PI I/F module and cable off the mainboard.")

33 Disassembly Removing the Mini PI I/F Module. Remove the LD back cover (page -,).. Release the pins at points & and carefully lift up the Mini PI I/F module.. If the module is the Mini PI/IF (pictured): Disconnect the cable at point (and if necessary), then lift Mini PI I/F module and cable off the mainboard.. If the module is the Mini PI WLAN (not pictured): Disconnect the antenna cables at the RF Main and RF Aux points on the module, then lift Mini PI I/F module off the mainboard. a. b. Figure - Mini PI I/F Module Removal Sequence a. Release the pins and carefully lift the Mini PI I/F module up. b. Disconnect the cable(s) and lift the Mini PI I/F module up and out from the mainboard..disassembly. Mini PI I/F module. able ( module only) Removing the Mini PI I/F Module -


34 Disassembly Figure - 0 LU D Device Assembly Removal Sequence a. Remove the screws and disconnect the cable. b. Remove the D Device. Removing the D Device Assembly (LU Series). Remove the LD back cover (page - ).. Remove screws -, and disconnect cable, from the D device.. Remove the D Device. a. b..disassembly. D Device Screws - Removing the D Device Assembly (LU Series)


35 Disassembly Removing the D Device Assembly (LU Series). Turn the computer OFF and turn it around so that you may comfortably access the rear.. Locate the D-ROM eject switch and remove screw.. Push the D-ROM eject switch to slide the D device assembly out of the bay.. Remove the D Device. a. b. d. Figure - LU D Device Assembly Removal Sequence a. Locate the D-ROM eject switch at the rear of the computer. b. Remove the screw. c. Push the switch to slide the D Device Assembly out of the computer. d. Remove the D Device..Disassembly c.. D Device Screw Removing the D Device Assembly (LU Series) -
36 Disassembly -.Disassembly
37 Appendix A: Part Lists Part Lists This appendix breaks down the computer s construction into a series of illustrations. The component part numbers are indicated in the tables opposite the drawings. Note: This section indicates the manufacturer s part numbers. Your organization may use a different system, so be sure to cross-check any relevant documentation. Note: Some assemblies may have parts in common (especially screws). However, the part lists DO NOT indicate the total number of duplicated parts used. Note: Be sure to check any update notices. The parts shown in these illustrations are appropriate for the system at the time of publication. Over the product life, some parts may be improved or re-configured, resulting in new part numbers. A.Part Lists A-
38 Part Lists Part List Illustration Location The following table indicates where to find the appropriate part list illustration. Part LU - Page # LU - Page # Base page A - page A - Back page A - page A - Front page A - page A - ard Reader Module page A - page A - D-ROM page A - A.Part Lists Table A - Part List Illustration Location ombo page A - page A - DVD page A - DVD-RW page A - FDD page A - page A - HDD page A - 0 page A - Video apture ard Module page A - 0 A - Part List Illustration Location
39 Part Lists LU - Base 深藍色 Figure A - LU - Base A.Part Lists LU - Base A -
40 Part Lists LU - Back A.Part Lists Figure A - LU Back A - LU - Back
41 Part Lists LU - Front Figure A - LU - Front A.Part Lists LU - Front A -
42 Part Lists LU - ard Reader Module A.Part Lists Figure A - LU - ard Reader Module A - LU - ard Reader Module
43 Part Lists LU - ombo Figure A - LU - ombo A.Part Lists LU - ombo A -
44 Part Lists LU - Toshiba DVD A.Part Lists Figure A - LU - Toshiba DVD A - LU - Toshiba DVD
45 Part Lists LU - FDD Figure A - LU - FDD A.Part Lists LU - FDD A -
46 Part Lists LU - HDD A.Part Lists Figure A - LU - HDD A - 0 LU - HDD
47 Part Lists LU - Base 外包外包外包外包 Figure A - LU - Base A.Part Lists 鋁箔遮罩 LU - Base A -
48 Part Lists LU - Back A.Part Lists Figure A - 0 LU - Back A - LU - Back
49 Part Lists LU - Front Figure A - LU - Front A.Part Lists LU - Front A -
50 Part Lists LU - ard Reader Module A.Part Lists Figure A - LU - ard Reader Module A - LU - ard Reader Module
51 Part Lists LU - D-ROM Figure A - LU - D-ROM A.Part Lists LU - D-ROM A -
52 Part Lists LU - ombo A.Part Lists Figure A - LU - ombo A - LU - ombo
53 Part Lists LU - Toshiba DVD-RW Figure A - LU - Toshiba DVD-RW A.Part Lists LU - Toshiba DVD-RW A -
54 Part Lists LU - FDD A.Part Lists Figure A - LU - FDD A - LU - FDD
55 Part Lists LU - HDD Figure A - LU - HDD A.Part Lists LU - HDD A -
56 Part Lists LU - Video apture ard Module A.Part Lists Figure A - LU - Video apture ard Module A - 0 LU - Video apture ard Module
57 Appendix B: Schematic Diagrams Schematic Diagrams This appendix has circuit diagrams of the systems PB s: Diagram - Page Diagram - Page System Block Diagram - Page B - IH (PI, IDE, UHB, USB, LAN) - Page B - Table B - Schematic Diagram Northwood - of - Page B - Thermal & Fan ontroller - Page B - Northwood - of - Page B - ardbus PI0 - Page B - lock Generator - Page B - IEEE - Page B - MH Power - Page B - ardbus Slot & Mini PI - Page B - 0 MH Host - Page B - LAN RTL00BL - Page B - MH AGP - Page B - IDE onnector & Firmware Hub - Page B - MH Memory - Page B - SIO WHF - Page B - MH Memory Termination - Page B - 0 Serial & Parallel Port - Page B - DDR RIMM - Page B - ODE - Page B - DVO hrontel H0A - Page B - Amplifiers & Inverter onnector - Page B - B.Schematic Diagrams LD onnector - Page B - Power - Page B - RT & USB - Page B - Power - Page B - IH (Power, LP, lock, SMbus) - Page B - Power - Page B - B-
58 Schematic Diagrams Sheet of Schematic Diagram System Block Diagram System Block Diagram POWER RT RT SOKET- Intel Pentium processor Prescott or Northwood * PULK * PULKT * PI-MHz * MHz * MHz * MHz LOK GENERATOR. V_ORE GMHVTT DUAL.V.V.V SBV.V P. PWM P.,, REGULATOR B.Schematic Diagrams LD PANEL RJ- RJ- LVDS RT HRONTEL H0A RealTek RTL00BL A' MD MODULE R.G.B. DVO PI Bus A' Bus Intel SPRINGDALE-G 00//00MHz Host Bus ( North Bridge ) Intel IH- 0 mbga ( South Bridge ) MB/s Hub interface. PI Bus A' Bus Dual-hannel DDR Memory - Bus IDE Bus hannel A hannel B DIMM DIMM IDE (ATA-00) ARDBUS PI0 V V V SBV IDE (ATA-00) MINI-PI WLAN or IEEE OPTION P., EXTERNAL POWER P. TOUH PANEL USB USB TV-TUNER USB USB SATA LP Bus SUPER I/O Winbond WHF Firmware HUB ( BIOS ) A' Audio odec MI LINE IN HEAD PHONE SERIAL PARALLEL FLOPPY GPIOs KEYBOARD / MOUSE B - System Block Diagram (-P0-00A)
59 Schematic Diagrams Northwood - of (-P0-00A) B - B.Schematic Diagrams Northwood - of Sheet of Northwood of V_ORE V_ORE V_ORE V_ORE V_ORE V_ORE Z00 Z00 Z00 Z00 Z00 Z00 Z0 Z00 Z00 Z0 Z0 Z00 Z00 SENSE SENSE TZ00 TZ00 TZ00 TZ00 TZ00 TZ00 TZ00 Z0 T u/0v R _% T u/0v T u/0v T0 u/0v T u/0v R _% T u/0v T u/0v T u/0v T u/0v T u/0v T0 u/0v_r T u/0v T u/0v_r R _% R _% T u/0v_r T.u/0V_R T u/0v_r T.u/0V_R T.u/0V_R T.u/0V_R T u/0v PRESOTT/NORTHWOOD POWER & GROUND UA PRESOTT/NORTHWOOD A A A A A A A A A A B B B0 B B B B B0 B B D D D D0 D D D D D0 D D E E E E E E E E E E E A A AD AA A A0 A A AA0 AB U W Y A AD A A A A A A A A A A A AD AD AD AD0 AD AD AD AD AD AD AE AE AE AE AE AE AE AE AE AE AF AF AF AF0 AF AF AF AF AF0 AF A0 A A A A A0 A AA0 AA AA AA AA AA AB AB AB AB AB AB AB A0 A A A A A AD AD AD AD AD AD AD AE0 AE AE AE AE AE0 AE AE AF AF AF AF AF AF AF AF AF AF B B B B B B B 0 0 D D D D D D D E0 E E E E E0 E F F F F F F AB AA Y A AB A F F F F0 F F F F F F G G G G H H H H J J J J K K K K L L L L M M M M N N N N P P P P R R R R T T T T U U U U V V V V W W W W Y Y Y Y AA AA AA AA AA AA AA AA AA AA AA AB AB AB AB0 AB AB AB AB AB0 AB AB AF A AD AF A AE _SENSE _SENSE TESTHI0 TESTHI TESTHI TESTHI TESTHI TESTHI TESTHI TESTHI TESTHI TESTHI TESTHI0 TESTHI TESTHI SKTO# BPM# BPM# BPM# BPM# BPM# BPM0# RESERVED RESERVED VIDPWRGD RESERVED RESERVED RESERVED R _% R _% R _% R _% R _% R _% R _% T0 u/0v T u/0v T u/0v T u/0v T u/0v T u/0v T u/0v T u/0v T u/0v T0 u/0v R _% R _% R _% T u/0v T u/0v V_ORE [,,,,] BOOTSEL [] VID_PWRGD [] SENSE [] SENSE [] Put the cap on the North side of the processor Put the cap in the processor cavity Put at solder side
60 Schematic Diagrams Northwood - of Sheet of Northwood of [] HD#[0..] HD#[0..] V_ORE [,,,,] V [,,,,,,,,,,,0,,,,,,,] V_ORE IERR# FERR# BR0# Z00 Z00 Z00 Z00 Z00 V_ORE DBR# V_ORE VID VID VID VID VID VID0 Z00 Z00 V VID V_ORE [,,] SUSB# V A DBR# VID R SBV FERR# U _% BR0# Vout VID_PWRGD [] V R0 PURST# B A PG 0K V PUPWRGD u Z0 G R Q IERR# N00 MI LOSE PU 0K R0 B - Northwood - of (-P0-00A) B.Schematic Diagrams HA# HA# HA# HA# HA# HA# HA# HA#0 HA# HA# HA# HA# HA# HA# HA# HA# HA# HA#0 HA# HA# HA# HA# HA# HA# HA# HA# HA# HA#0 HA# HD#0 HD# HD# HD# HD# HD# HD# HD# HD# HD# HD#0 HD# HD# HD# HD# HD# HD# HD# HD# HD# HD#0 HD# HD# HD# HD# HD# HD# HD# HD# HD# HD#0 HD# HD# HD# HD# HD# HD# HD# HD# HD# HD#0 HD# HD# HD# HD# HD# HD# HD# HD# HD# HD#0 HD# HD# HD# HD# HD# HD# HD# HD# HD# HD#0 HD# HD# HD# L 0uH_/-_00 L0 0uH_/-_00 u/0v_0 Z00 Z00 Z0 TZ00 TZ00 PRESOTT/NORTHWOOD INTERFAE UB AB B W A B D E B Y F G F H D G J E F G G E H H D F D E HIT# [] ADS# [] BNR# [] HITM# [] DBSY# [] DRDY# [] R 0_% R0 0_% R _% R0._% R._% R 0_% THERMTRIP# THERMDA THERMD 00p_R TZ00 TZ00 TZ00 AB AA V HGTLREF HA#[..] AF AF L P PRESOTT/NORTHWOOD VID0 VID VID VID VID VID TZ00 TZ00 TZ00 TZ00 TZ00 TZ0 TZ0 TZ0 TZ0 TZ0 TZ0 K K L K L M L M M N M N N N T R P P R T U P U T V R W T U V W Y AB L K K J B B A A D B B G H D J D H E G F F E F D L G H M L J K H M N P M N M N N R P R R T T T T U U U V U V V W Y W Y Y Y AA AA AA AE AD AD0 J K J J H E G P V A V AD AD F J P W E K R W SLP# SMI# INIT# A0M# IERR# FERR# LINT0 LINT IGNNE# STPLK# RS0# RS# RS# BR0# BPRI# LOK# TRDY# DEFER# HIT# ADS# BNR# HITM# DBSY# DRDY# PROHOT# TDI TDO TMS TK TRST# AE A B RSP# BINIT# MERR# BLK0 BLK OMP0 OMP A AD F0 F AA AA AF AF AE AE AE AE AE AD A# A# A# A# A# A# A# A0# A# A# A# A# A# A# A# A# A# A0# A# A# A# A# A# A# A# A# A# A0# A# A# A# A# A# DP# DP# DP# DP0# D0# D# D# D# D# D# D# D# D# D# D0# D# D# D# D# D# D# D# D# D# D0# D# D# D# D# D# D# D# D# D# D0# D# D# D# D# D# D# D# D# D# D0# D# D# D# D# D# D# D# D# D# D0# D# D# D# D# D# D# D# D# D# D0# D# D# D# [] [] [] [] [] [] [] [] [] [] [] [] [] [] [] [] [] [] [] HREQ#0 HREQ# HREQ# HREQ# HREQ# HDB#0 HDB# HDB# HDB# FSA FSB HDSTBP#0 HDSTBP# HDSTBP# HDSTBP# HDSTBN#0 HDSTBN# HDSTBN# HDSTBN# u/0v_0 A A IOPLL REQ0# REQ# REQ# REQ# REQ# DB#0 DB# DB# DB# AP0# AP# BSEL0 BSEL DSTBP0# DSTBP# DSTBP# DSTBP# DSTBN0# DSTBN# DSTBN# DSTBN# PUSLP# [] SMI# [] INIT# [,] A0M# [] FERR# [] INTR [] NMI [] IGNNE# [] STPLK# [] RS#0 [] RS# [] RS# [] BR0# [] BPRI# [] HLOK# [] HTRDY# [] DEFER# [] PROHOT# [] DBR# L AB PURST# [] HADSTB#0 R ADSTB0# RESET# PURST# [] AB PUPWRGD [] HADSTB# ADSTB# PWRGOOD PUPWRGD [] ITP_LK0 ITP_LK GTLREF0 GTLREF GTLREF GTLREF VIDLB VID [,] [] THERMTRIP# THERMDA THERMD VID0 VID VID VID VID VID [] THERMTRIP# THERMDA THERMD [] HGTLREF R0 00_% Max. inch mil R _% A 0p LOSE PU HA#[..] [] VID [] VID [,] VID [,] VID [,] VID [,] VID0 [,] PULK [] PULK# [] ITPLK [] ITPLK# [] R._% R._% RN PR*K R0 K R0 K PU SIGNAL TERMINATION LOSE TO PU EN Vin Z0 G Q N00 R 0_R R _% R 00_% R0 _% R0 00_% R0 _%_R S D A00 G Q _R N00 S S D D K VRD_EN []
61 Schematic Diagrams lock Generator FREQUENY SETUP TABLE (FS) (FS) (FS) (FSA) (FSB) PU SR AGP (MHz) (MHz) (MHz) / / /00. PI (MHz)... = HI, 0 = LOW ID ID MBID MBID 0 V.0 V.0 V.0 V R R 0K 0K_R MBID [] MBID [] Sheet of lock Generator ID 0 R R ID 0 0 0_R 0 V L BKHM-0 ohm-00ma_00 [] [] BSEL0 BSEL V T 0u/0V_0 L BKHM-0 ohm-00ma_00 T A A 0u/0V_0 _XR _XR [] [] R.K_% FSA FSB R R0 0.0u R.K_% V K_% K_% R0 A A _XR _XR _% A _XR A T _XR 0u/0V_0 A _XR [0,,,] SMBLK [0,,,] SMBDATA R V V R K_% R K_% A _XR R0 0_%_R Z00 Z00 Z00 K Z00 VTT_PWRGD# Z00 Iref=.mA R _% VDDA VDD VDDREF VDDPI VDDPI VDDV VDDSR VDDPU VDDPU SLK SDATA PD# PI_STOP# PU_STOP# VTT_PWRGD# FS_A FS_B IREF U PULK0 PULK PULK PULKT0 PULKT PULKT PILK0/Reset_EN PILK PILK PILK PILK PILK PILK PILK_FS PILK_FS PILK_F REF0 REF _MHz/SEL_# MHz_0/FS SRLK SRLKT V_0/Reset# V_ V_ V_ V_/VH_LK X X 0 0 Z00 R Z00 R Z00 R Z00 R Z0 R0 Z0 R Z0 R Z0 R Z0 R Z0 R Z0 R Z0 R TZ00 Z0 R Z0 R TZ00 R Z0 R0 Z00 R R Z0 R Z0 R R0 Z0 R Z0 R TZ00 Z0 R Z0 R TZ00 Z0 R R0 Z0 R Z00 0_R 0K 0K R._% _% _% _% _% _% _% _% _% _% _% _% _% P 0p _%_R _% _% 0K _% _% 0K _% LK00# _% LK00 _% _% _%_R _% R R._%._% P P p 0p P0 LK00# [] 0p_R LK00 [] R._% P P 0p 0p P P 0p 0p P P 0p 0p R R._%._% PULK# [] ITPLK# [] MHLK# [] PULK [] ITPLK [] MHLK [] FWHPLK [] LANPLK [0] IHPLK [] PLK [] MINI-PLK [] SIOPLK [] P 0p H0A-LK [] AL0 [] IH-M [] IH-M [] DREFLK [] P P 0p 0p MHLK [] IHLK [] SIO-M [] P 0p B.Schematic Diagrams IS Y V R 0K VTT_PWRGD#.MHz p p LK00# LK00 R R0._%._% V_ORE R0 0 Z00 B Q N0 E V_ORE [,,,,] V [,,,,,,,,,,,0,,,,,,,] V [,,,,,,,,,,,,,,] lock Generator (-P0-00A) B -
62 Schematic Diagrams B - MH Power (-P0-00A) B.Schematic Diagrams MH Power Sheet of MH Power.V.V GMHVTT.V V DUAL.V VSMYR VSMYRO.V.V.V Z00 Z00 A_FSB A_FSB A_DDR A_DDR Z00 Z00 VSMYR Z00 Z00 Z00 Z0 VSMYRO A_DPLL Z00 A_DPLL Z00 A_DA A_DA Z00 TZ00 L 0.uH T.u/V_0 A0 _XR 0.u 0.u A _XR 0.u 0 0.u 0.u SPRINGDALE-GMH POWER & GROUND UA SPRINGDALE-G A A A A A A B B D D D E E F AA AL AL AL AM AM AM AM AM AM AM AN AN AN AN AN AN AP AP AP AP AP AR AR AR AR AR AR E R G G B B AB A A Y J J J J K K K K L L L L0 L M M M0 M N N0 N P0 P R T T T T T0 U U U0 V V V0 W W W0 Y Y Y Y Y0 J J J J J K K K K L L L L L AG Y L M M M M M M0 M N N N N P P P P P P P P0 P R R R T T T T T T0 T T T T0 T T U U U U V V V V V0 V V V V V V0 V W W W W Y Y Y Y Y0 Y Y Y Y0 Y Y AA AA AA AB AB AB AB AB0 AB AB AB AB0 AB A A A A AD AD AD AD AD0 AD AD0 AD AE AE AE0 AE AE AE AE AE AE AE AF AF AF AF AF AF AF AF0 AF AF AF AF0 AF AG AG AG AG AG AG0 AG AG AG AG AG AG AH AH AH AH0 AH AH AH AH0 AH AH AH0 AH AJ AJ AJ AJ AJ AK AK AK0 AK AK AK AK AK0 AK AK AK AK AL AL AM AM AM AM AM AM AM AM AM AM AM AM AN0 AN AN AN AN AN0 AN AN AN AN AN0 AN AR AR AR AR AR0 AR AR AR AR AR D VTT VTT VTT VTT VTT VTT VTT VTT VTT VTT VTT VTT VTT VTT VTT VTT _DDR _DDR _DDR _DDR _DDR _DDR _DDR _DDR _DDR _DDR _DDR _DDR _DDR _DDR _DDR _DDR _DDR _DDR _DDR _DDR _DDR _DDR _DDR _DDR _DDR _DDR _DDR _DDR _DDR _DDR _DA _DA A_FSB A_DPLL A_DA A_DDR A_DDR A_DDR A_AGP _AGP _AGP _AGP _AGP _AGP _AGP _AGP _AGP _AGP _AGP _AGP _AGP _AGP _AGP _AGP _AGP A_DA T.u/V_0 A _XR T.u/V_0 0u/.V_.* A _XR T 0u/0V_0 A _XR L BEAD BKHS 0_A_00 0.0u A _XR A _XR A _XR 0.u u R _% HOLDER ü / A HEAT SINK HOOK HOLDER ü / A HEAT SINK HOOK 00u/V_.* A _XR T.u/V_0 0u/.V_.* A _XR A _XR A _XR A _XR A _XR L H_00 00u/V_.* A _XR A _XR A0 _XR A _XR R _% 00u/V_.* A _XR L H_00 00u/V_.* A _XR T u/0v_0 VSMYR [] VSMYRO [].V [,,,,,,] GMHVTT [,] DUAL.V [,0,,].V [] NORTHWOOD:.V PRESOTT:.V mil inch inch lose Power Output lose Power Ouput
63 Schematic Diagrams MH Host (-P0-00A) B - B.Schematic Diagrams MH Host Sheet of MH Host GMHVTT GMHVTT V HDSWING HGTLREF HD#0 HD# HD# HD# HD# HD# HD# HD# HD# HD# HD#0 HD# HD# HD# HD# HD# HD# HD# HD# HD# HD#0 HD# HD# HD# HD# HD# HD# HD# HD# HD# HD#0 HD# HD# HD# HD# HD# HD# HD# HD# HD# HD#0 HD# HD# HD# HD# HD# HD# HD# HD# HD# HD#0 HD# HD# HD# HD# HD# HD# HD# HD# HD# HD#0 HD# HD# HD# HD#[0..] HA# HA#0 HA# HA# HA# HA# HA# HA# HA# HA# HA# HA#0 HA# HA# HA# HA# HA# HA# HA# HA# HA# HA#0 HA# HA# HA# HA# HA# HA# HA# HA#[..] Z00 HGTLREF HDSWING GMH-PWROK GMH-PWROK A0 0.0u_R R 0_% R0 0_% 0.0u R 0_% U AHG0(S-A) R 00_% SPRINGDALE-GMH HOST INTERFAE UB SPRINGDALE-G D D0 L E B K 0 J B E0 B J F D F J G F E H K E F G0 J G B J L J F B B B E E L K E E D G L L G B B F AE E B E B D0 B D B0 E E0 B D B B E D G0 F E F J L G G F F E E J G E K J L J F F E K G G0 L E K J H0 G E B E B B B D B D0 E0 B0 B D B B0 D B L G D K F E L0 L L HA# HA# HA# HA# HA# HA# HA# HA0# HA# HA# HA# HA# HA# HA# HA# HA# HA# HA0# HA# HA# HA# HA# HA# HA# HA# HA# HA# HA0# HA# HREQ0# HREQ# HREQ# HREQ# HREQ# ADS# BNR# BPRI# BREQ0# PURST# DBSY# DEFER# HIT# HITM# HLOK# HTRDY# DRDY# DINV0# DINV# DINV# DINV# RS0# RS# RS# HLKN HLKP HDSWING HDVREF PWROK HDROMP HD0# HD# HD# HD# HD# HD# HD# HD# HD# HD# HD0# HD# HD# HD# HD# HD# HD# HD# HD# HD# HD0# HD# HD# HD# HD# HD# HD# HD# HD# HD# HD0# HD# HD# HD# HD# HD# HD# HD# HD# HD# HD0# HD# HD# HD# HD# HD# HD# HD# HD# HD# HD0# HD# HD# HD# HD# HD# HD# HD# HD# HD# HD0# HD# HD# HD# HADSTB0# HADSTB# HDSTBP0# HDSTBP# HDSTBP# HDSTBP# HDSTBN0# HDSTBN# HDSTBN# HDSTBN# PROHOT# BESL0 BSEL V_ORE [,,,,,] HGTLREF [] HD#[0..] [] HA#[..] [] BPRI# [] HIT# [] ADS# [] RS#0 [] DBSY# [] DRDY# [] BR0# [] HLOK# [] RS# [] RS# [] DEFER# [] HTRDY# [] HITM# [] BNR# [] PURST# [] HREQ#0 [] HREQ# [] HREQ# [] HREQ# [] HREQ# [] HADSTB# [] HADSTB#0 [] MHLK [] MHLK# [] HDSTBN#0 [] HDSTBP#0 [] HDB#0 [] HDSTBP# [] HDSTBN# [] HDB# [] HDSTBP# [] HDSTBN# [] HDB# [] HDSTBP# [] HDSTBN# [] HDB# [] PROHOT# [] BSEL [] BSEL0 [] GMHVTT [,] SUSB# [,,] PWROK [,,]. inches max LOSE MH
64 DVO_D[0..] ADDID[0..] MHLK.V MI_LK [] MI_DATA [] Z00 RN Z00 Z00 Z00 Z00 Z00 R 0 PR*.K TZ0 TZ0 Z00 R._%.V TZ0 GVREF R K_%.V DVO_LK [] DVO_LK# [] DVO_HSYN [] DVO_VSYN [] DVO_BLANK# [] DVO_FLDSTL [] DVO_D[0..] [] ADDID[0..] DVOB_LKIN [] ADDID0 ADDID ADDID ADDID ADDID ADDID ADDID ADDID DVO_D0 DVO_D DVO_D DVO_D DVO_D DVO_D DVO_D DVO_D DVO_D DVO_D DVO_D0 DVO_D TZ0 TZ0 TZ0 TZ00 TZ0 TZ0 TZ0 TZ00 TZ0 TZ0 TZ0 TZ0 TZ0 TZ0 TZ0 TZ0 TZ0 TZ0 TZ0 TZ0 TZ0 TZ0 TZ00 TZ00 TZ00 TZ00 TZ00 TZ00 TZ00 TZ00 TZ00 TZ00 TZ0 TZ0 TZ0 TZ0 TZ0 TZ0 TZ0 TZ0 TZ0 TZ00 UD T U AA W P R P R R U U0 U T W Y V W U U T T R T P P V V Y AA Y M Z0.V HI_SWING HI_VREF Schematic Diagrams MH AGP Sheet of MH AGP HI_[0..0] HI_0 AF HI_ AG HI_ AK HI_ AG HI_ AK HI_ AL HI_ AL HI_ AL HI_ AJ HI_ AH HI_0 AJ R._% Z00 AD.V HI_SWING AE HI_VREF AE R._% Z00 AG.V I_SWING AF I_VREF AF.V I_SWING A R _% 0.0u I_VREF B - MH AGP (-P0-00A) B.Schematic Diagrams AA0 AB AB AA Y AA AA AA W0 AE AD A A A AE A W W A A A AF AF AJ AN AP AR AR AR B B B E M R MHLK [] H GLKIN GSBSTBS GSBSTBF GBE V AB AB U W V AB N M A A AD DVOB_LKINT / GAD DVOB_INTR# / GAD0 DVOB_D / GAD DVOB_D / GAD DVOB_D / GAD DVOB_D / GAD DVOB_D / GBE0 DVOB_D / GAD0 DVOB_D / GAD DVOB_D0 / GAD DVOB_D / GAD DVOB_D0 / GAD DVOB_D / GAD DVOB_D / GAD DVOB_LK / GADSTBF0 DVOB_LK# / GADSTBS0 DVOB_HSYN / GAD0 DVOB_VSYN / GAD DVOB_BLANK# / GBE DVOB_FLDSTL / GAD AGP HUB HI_0 HI_ HI_ HI_ HI_ HI_ HI_ HI_ HI_ HI_ HI_0 A TZ0 TZ00 TZ0 TZ0 TZ0 TZ0 TZ0 R0 R M M N N N MI_LK / GIRDY MI_DATA / GDEVSEL MDVI_LK / GTRDY MDVI_DATA / GFRAME MDD_LK / GSTOP MDD_DATA / GAD GPAR/ADD_DETET GREQ GGNT DVOB_ROMP/GROMP GSWING GVREF GRBF GWBF DBI_HI DBI_LO GST0 GST GST ADDID0 / GSBA0# ADDID / GSBA# ADDID / GSBA# ADDID / GSBA# ADDID / GSBA# ADDID / GSBA# ADDID / GSBA# ADDID / GSBA# DVO_D0 / GAD DVO_D / GAD0 DVO_D / GAD DVO_D / GAD DVO_D / GAD DVO_D / GBE DVO_D / GAD DVO_D / GAD DVO_D / GAD DVO_D / GAD DVO_D0 / GAD DVO_D / GAD DVO_LK / GADSTBF DVO_LK# / GADSTBS DVO_HSYN / GAD DVO_VSYN / GAD DVO_BLANK# / GAD DVO_FLDSTL / GAD N_ N_ N_ N_ N_ N_ N_ N_ N_ N_0 N_ N_ N_ N_ N_ N_ N_ N_ N_ N_0 R K_% HISTRF HISTRS HI_ROMP HI_SWING HI_VREF DDDATA [] DDLK [] H F SPRINGDALE-GMH AGP HUB INTERFAE ROUT [] GOUT [] BOUT [] F E H G H G SA HSYN [] VSYN [] R0 _% G E D DDA_DATA DDA_LK RED RED# GREEN GREEN# BLUE BLUE# HSYN VSYN REFSET TZ0 TZ0 TZ0 TZ0 TZ00 AG0 AG AN AP AR RESERVED_ RESERVED_ RESERVED_ RESERVED_ RESERVED_ I0 I I I I I I I I I I0 ISTRF ISTRS I_ROMP I_SWING I_VREF DREFLK EXTTS# IH_SYN# RSTIN# L L L L K K K K F F F0 F F F F F0 F F F G G G H H H H H H H H H0 H H H H0 H J0 J J J J J0 J J J J K K K K K K0 K D D D D D D D D D D E E F F A A A A A A0 A A A A A 0 0 D D D D D SPRINGDALE-G R _% LOSE TO GMH HI_SWING A0 R0 R 0 ADDID _% 0.0u HI_VREF A R _% 0.0u near divider.v [,,,,,,] HI_[0..0] [] AH [] HI_STRF AH [] HI_STRS TZ0 AK TZ0 AH TZ0 AD TZ0 AF TZ0 AD TZ0 A0 TZ00 AF TZ0 AG TZ0 AE TZ0 AH TZ0 AG TZ0 AJ TZ0 AJ G [] DREFLK TZ0 AP AJ [] IHSYN# AK [,] PIRST# P 0p_R LOSE NB R _% LOSE TO GMH A R _% 0.0u
65 Schematic Diagrams MH Memory (-P0-00A) B - B.Schematic Diagrams MH Memory Sheet of MH Memory DUAL.V VSMYRO DUAL.V VSMYRO VSMYR DUAL.V DUAL.V SDQ_B SDQ_B SDQ_B SDQ_B SDQ_B SDQ_B SDQ_B SDQ_B SDQ_B SDQ_B SDQ_B SDQ_B SDQ_B SDQ_B0 SDQ_B SDQ_B SDQ_B SDQ_B SDQ_B SDQ_B SDQ_B SDQ_B SDQ_B0 SDQ_B SDQ_B0 SDQ_B SDQ_B SDQ_B SDQ_B SDQ_B SDQ_B SDQ_B SDQ_B SDQ_B SDQ_B0 SDQ_B SDQ_B SDQ_B SDQ_B0 SDQ_B SDQ_B0 SDQ_B SDQ_B SDQ_B SDQ_B SDQ_B SDQ_B SDQ_B SDQ_B SDQ_B SDQ_B SDQ_B SDQ_B SDQ_B SDQ_B SDQ_B SDQ_B0 SDQ_B SDQ_B SDQ_B SDQ_B SDQ_B SDQ_B SDQ_B SDQ_B[0..] SDQS_A SDQS_A SDQS_A SDQS_A SDQS_A SDQS_A[0..] SDQS_A SDQS_A0 SDQS_A SDM_B0 SDM_B SDM_B SDM_B SDM_B SDM_B SDM_B SDM_B SDQS_B0 SDQS_B SDQS_B SDQS_B SDQS_B SDQS_B SDQS_B SDQS_B SDQS_B[0..] SDM_B[0..] SKE_B SKE_B0 SMAA_B SMAA_B SMAA_B0 SMAA_B SMAA_B SMAA_B SMAA_B SMAA_B SMAA_B SMAA_B SMAA_B SMAA_B SMAA_B0 SWE_B# SAS_B# SRAS_B# SBA_B0 SBA_B SS_B0# SS_B# SMAA_A0 SMAA_A SMAA_A SMAA_A SMAA_A SMAA_A SMAA_A SMAA_A SMAA_A SMAA_A SMAA_A0 SMAA_A SMAA_A SBA_A SRAS_A# SS_A# SS_A0# SWE_A# SBA_A0 SAS_A# SMXROMPVOL SDM_A SDM_A SDM_A SDM_A SDM_A[0..] SDM_A0 SDM_A SDM_A SDM_A SDQ_A SDQ_A SDQ_A SDQ_A SDQ_A SDQ_A SDQ_A SDQ_A SDQ_A SDQ_A SDQ_A SDQ_A SDQ_A SDQ_A SDQ_A SDQ_A SDQ_A SDQ_A SDQ_A SDQ_A0 SDQ_A SDQ_A SDQ_A SDQ_A SDQ_A0 SDQ_A SDQ_A SDQ_A SDQ_A SDQ_A SDQ_A SDQ_A SDQ_A SDQ_A SDQ_A0 SDQ_A0 SDQ_A SDQ_A SDQ_A SDQ_A0 SDQ_A SDQ_A SDQ_A0 SDQ_A[0..] SDQ_A SDQ_A SDQ_A SDQ_A SDQ_A SDQ_A SDQ_A SDQ_A SDQ_A SDQ_A SDQ_A SDQ_A SDQ_A SDQ_A SDQ_A SDQ_A SDQ_A SDQ_A SDQ_A SDQ_A0 SDQ_A SMXROMPVOH SMXROMPVOL SMVREF_A SMYROMPVOH SMYROMPVOL SMVREF_B SMYROMP SMYROMPVOL SMAA_B[0..] SKE_A0 SKE_A SMAA_A[0..] SMVREF_A SMVREF_B TZ00 TZ00 TZ00 TZ00 TZ00 TZ00 TZ00 TZ00 TZ00 TZ00 TZ0 TZ0 TZ0 TZ0 TZ0 TZ0 TZ0 TZ0 TZ0 TZ00 TZ0 TZ0 TZ0 TZ0 TZ0 TZ0 TZ0 TZ0 TZ0 TZ00 SMXROMP SMXROMPVOH SMYROMPVOH SPRINGDALE-GMH MEMORY INTERFAE DDR hannel B DDR hannel A U SPRINGDALE-G AJ AL AK AN AL0 AL AL AN AP AP AJ AN AN AL AM AP AP AM AB Y A AE AH AA Y Y W AL0 AN AM0 AP0 AK AK AP AN N N AK AK AM AL P P E AK AN AL AP0 AP AM AN AM0 AL0 AL AP AP AM AL AP AL AN AP AM AP AM AL AN AP AL AP AP AP AP AP AM AM AN AM AN AH AG AF AD AH AG AE AD A AB V V AD AB U U T T K K T P L L J H E F K J G F AN AP AP AM0 AF V M H AP AP AM AP0 AF W M H AJ0 AE AL AE AL AF AK AG AE AL AK AL AK AJ AJ AJ AE AE0 AG AK AL AK AJ AE AK AH AG AF AJ AJ AD AF AE0 A A0 Y AE AB AA AA AA0 W0 U T AA V U R P R0 K L0 R R P L K0 H F G N M J G AF AG AG AH AD U0 L J0 AG AG AE AJ A U M J AG AJ AD AE AK AG AL AF AL AJ AF AL AJ0 AE AD AL AL AE W W W Y AA U T V W AK AF AG AE AG AG0 AF AG N N AJ0 AH AK AL N N0 AP AA R R SMAA_A0 SMAA_A SMAA_A SMAA_A SMAA_A SMAA_A SMAA_A SMAA_A SMAA_A SMAA_A SMAA_A0 SMAA_A SMAA_A SMAB_A SMAB_A SMAB_A SMAB_A SMAB_A SWE_A# SAS_A# SRAS_A# SBA_A0 SBA_A SS_A0# SS_A# SS_A# SS_A# SKE_A0 SKE_A SKE_A SKE_A SMDLK_A0 SMDLK_A0# SMDLK_A SMDLK_A# SMDLK_A# SMDLK_A SMDLK_A SMDLK_A# SMDLK_A SMDLK_A# SMDLK_A SMDLK_A# SMVREF_A SMXROMP SMXROMPVOH SMXROMPVOL SDQ_A0 SDQ_A SDQ_A SDQ_A SDQ_A SDQ_A SDQ_A SDQ_A SDQ_A SDQ_A SDQ_A0 SDQ_A SDQ_A SDQ_A SDQ_A SDQ_A SDQ_A SDQ_A SDQ_A SDQ_A SDQ_A0 SDQ_A SDQ_A SDQ_A SDQ_A SDQ_A SDQ_A SDQ_A SDQ_A SDQ_A SDQ_A0 SDQ_A SDQ_A SDQ_A SDQ_A SDQ_A SDQ_A SDQ_A SDQ_A SDQ_A SDQ_A0 SDQ_A SDQ_A SDQ_A SDQ_A SDQ_A SDQ_A SDQ_A SDQ_A SDQ_A SDQ_A0 SDQ_A SDQ_A SDQ_A SDQ_A SDQ_A SDQ_A SDQ_A SDQ_A SDQ_A SDQ_A0 SDQ_A SDQ_A SDQ_A SDQS_A0 SDQS_A SDQS_A SDQS_A SDQS_A SDQS_A SDQS_A SDQS_A SDM_A0 SDM_A SDM_A SDM_A SDM_A SDM_A SDM_A SDM_A SDQ_B0 SDQ_B SDQ_B SDQ_B SDQ_B SDQ_B SDQ_B SDQ_B SDQ_B SDQ_B SDQ_B0 SDQ_B SDQ_B SDQ_B SDQ_B SDQ_B SDQ_B SDQ_B SDQ_B SDQ_B SDQ_B0 SDQ_B SDQ_B SDQ_B SDQ_B SDQ_B SDQ_B SDQ_B SDQ_B SDQ_B SDQ_B0 SDQ_B SDQ_B SDQ_B SDQ_B SDQ_B SDQ_B SDQ_B SDQ_B SDQ_B SDQ_B0 SDQ_B SDQ_B SDQ_B SDQ_B SDQ_B SDQ_B SDQ_B SDQ_B SDQ_B SDQ_B0 SDQ_B SDQ_B SDQ_B SDQ_B SDQ_B SDQ_B SDQ_B SDQ_B SDQ_B SDQ_B0 SDQ_B SDQ_B SDQ_B SDQS_B0 SDQS_B SDQS_B SDQS_B SDQS_B SDQS_B SDQS_B SDQS_B SDM_B0 SDM_B SDM_B SDM_B SDM_B SDM_B SDM_B SDM_B SMAA_B0 SMAA_B SMAA_B SMAA_B SMAA_B SMAA_B SMAA_B SMAA_B SMAA_B SMAA_B SMAA_B0 SMAA_B SMAA_B SMAB_B SMAB_B SMAB_B SMAB_B SMAB_B SWE_B# SAS_B# SRAS_B# SBA_B0 SBA_B SS_B0# SS_B# SS_B# SS_B# SKE_B0 SKE_B SKE_B SKE_B SMDLK_B0 SMDLK_B0# SMDLK_B SMDLK_B# SMDLK_B SMDLK_B# SMDLK_B SMDLK_B# SMDLK_B SMDLK_B# SMDLK_B SMDLK_B# SMVREF_B SMYROMP SMYROMPVOH SMYROMPVOL R._% R._%.u_00.u_00 u R 0.K_% R 0K_% A u.u_00.u_00 0.u_00 u R 0.K_% R 0K_% A.u_00 R 0_% R0 0_%.u_00 0.0u R._% R._% 0.u R 0K_% R 0.K_% 0.0u R 0.K_% R 0K_% u 0.u SDQ_A[0..] [,0] SDQ_B[0..] [,0] SDQS_A[0..] [,0] SDQS_B[0..] [,0] SKE_B0 [,0] SKE_B [,0] SDM_A[0..] [,0] SDM_B[0..] [,0] SMDLK_B [0] SMDLK_B [0] SMDLK_B0 [0] SBA_B [,0] SBA_B0 [,0] SMDLK_B0# [0] SMDLK_B# [0] SMDLK_B# [0] SS_B# [,0] SS_B0# [,0] SRAS_B# [,0] SAS_B# [,0] SWE_B# [,0] SMDLK_A# [0] SS_A0# [,0] SRAS_A# [,0] SMDLK_A [0] SBA_A [,0] SMDLK_A [0] SMDLK_A# [0] SS_A# [,0] SMDLK_A0 [0] SMDLK_A0# [0] SWE_A# [,0] SBA_A0 [,0] SAS_A# [,0] SMAA_A[0..] [,0] SKE_A0 [,0] SKE_A [,0] SMAA_B[0..] [,0] VSMYRO [] VSMYR [] DUAL.V [,0,,] close to pin E close to pin AP
66 Schematic Diagrams B - 0 MH Memory Termination (-P0-00A) B.Schematic Diagrams MH Memory Termination Sheet of MH Memory Termination.V.V.V.V.V.V SDQ_B SDQS_B SDM_B SDQ_B SDQ_B SDQ_B SDQ_B SDQ_B0 SDQ_B SDQ_B SDQ_B SDQ_B SDQ_B SDQS_B SDQ_B SDQS_B SDQ_B SDQ_B SDQ_B SDM_B SDQ_B SDQ_B SDM_B SDQ_B SDQ_B SDQ_B SDQ_B SDQ_B0 SDQ_B SDQ_B SDM_B0 SDQ_B SDQ_B0 SDQ_B SBA_B SBA_B0 SS_B0# SS_B# SWE_B# SAS_B# SRAS_B# SDQ_A SDQ_A SKE_A0 SKE_A SDQ_A SDQ_A SDM_A SDQS_A SDQ_A SDQ_A SDQ_B SDQ_B SDQ_B SDQ_B SDQ_B SDQ_B SDQ_B0 SDM_B SKE_B SDQ_B SDQ_B SDQS_B SDQ_B SDQ_B0 SDQ_B SDQ_B SDQ_B SDQS_B SDQ_B SKE_B0 SDQ_B SDQ_B SBA_A SBA_A0 SS_A0# SS_A# SWE_A# SAS_A# SRAS_A# SDQ_A SDQ_A SDQ_A SDQ_A0 SDQ_A SDQ_A SDQ_A SDQ_A SDQ_A SDQ_A0 SDQS_A SDQS_A SDQ_A SDQ_A0 SDQS_A SDQ_A SDQS_A SDQ_A SDQ_A SDQ_A0 SDQ_A SDM_A0 SDM_A SDQ_A SDQ_A SDQ_A SDQ_A SDQ_A SDQ_A SDQ_A SDQ_A SDM_A SDQ_A SDQ_A SDM_A SDQ_A SDQ_A SDQ_A SDM_A SDM_A SDQ_A SDQ_A SDQ_A SDQ_A SDQ_A SDQ_A0 SDQ_A SDQ_A SDQ_A SDQS_A SDM_A SDQ_A SDQ_A SDQ_A0 SDQ_A SDQ_A SDQ_A SDQ_A SDQS_A0 SDQ_A SDQ_A SDQ_A SDQ_A SDQS_A SDQ_B SDQ_B SDQ_B SDQ_B SDQ_B SDQS_B SDM_B SDQS_B SDQ_B SDQ_B SDM_B SDQ_B0 SMAA_B0 SMAA_B SMAA_B SMAA_B SMAA_B0 SMAA_B SMAA_B SMAA_B[0..] SMAA_B SMAA_B SMAA_B SMAA_B SMAA_B SMAA_B SDQ_A SMAA_A0 SDQS_A[0..] SMAA_A SMAA_A SDQ_A SMAA_A SMAA_A SMAA_A0 SDQ_A SDQ_A SDQ_A SMAA_A SMAA_A SMAA_A SMAA_A SDQ_A SMAA_A[0..] SDQ_A0 SMAA_A SMAA_A SDQ_A SMAA_A SDQ_B SDQ_B SDQ_B SDQ_B SDQ_B SDQ_B SDQ_B SDQ_B SDQ_A[0..] SDM_A[0..] SDQ_B[0..] SDQS_B[0..] SDM_B[0..] SDQS_B0 SDQ_B SDQ_B SDQ_B0 SDQ_B SDM_B R R A A A A A0 A A A A A A A A A A A A RN PR* A0 RN PR* A RN PR* A RN PR* A A A A RN0 PR* A RN PR* A RN PR* A RN PR* A RN PR* A RN PR* A RN PR* A RN PR* RN0 PR* RN PR* RN PR* RN PR* RN PR* RN PR* RN PR* A RN PR* R R0 R0 R R R R RN PR* R RN PR* RN PR* R R R R R R R R R R R R R R R.u/V_0.u/V_0 00u/V_* 00u/V_* R 0.u/V_0.u/V_0 0u/0V_0 00u/V_* R RN PR* RN PR* RN PR* RN PR* RN PR* RN PR* RN PR* RN PR* RN0 PR* RN0 PR* RN PR* A RN PR* A RN PR* A RN PR* RN PR* A RN PR* A RN PR* RN PR* RN PR* A0 A RN PR* RN PR* A A A R R R00 R A A A A A A A A A A0 SKE_A0 [,0] SKE_A [,0] SRAS_A# [,0] SWE_A# [,0] SAS_A# [,0] SS_A0# [,0] SS_A# [,0] SBA_A0 [,0] SBA_A [,0] SKE_B0 [,0] SKE_B [,0] SMAA_B[0..] [,0] SBA_B [,0] SBA_B0 [,0] SS_B# [,0] SS_B0# [,0] SRAS_B# [,0] SAS_B# [,0] SWE_B# [,0] SDQ_A[0..] [,0] SMAA_A[0..] [,0] SDQS_A[0..] [,0].V [] SDM_A[0..] [,0] SDQ_B[0..] [,0] SDQS_B[0..] [,0] SDM_B[0..] [,0] close channel B DIMM close channel A DIMM
67 Schematic Diagrams DDR RIMM (-P0-00A) B - B.Schematic Diagrams DDR RIMM Sheet 0 of DDR RIMM ARIMM_VREF BRIMM_VREF DUAL.V DUAL.V DUAL.V DUAL.V DUAL.V BRIMM_VREF DUAL.V ARIMM_VREF SMAA_A0 SMAA_A SMAA_A SMAA_A SMAA_A SMAA_A SMAA_A SMAA_A SMAA_A SMAA_A SMAA_A0 SMAA_A SMAA_A SDQS_A0 SDQS_A SDQS_A SDQS_A SDQS_A SDQS_A SDQS_A SDQS_A SDM_A SDM_A SDM_A SDM_A0 SDM_A SDM_A SDM_A SDM_A SDM_A[0..] SMAA_B0 SMAA_B SMAA_B SMAA_B SMAA_B SMAA_B SMAA_B SMAA_B SMAA_B SMAA_B SMAA_B0 SMAA_B SMAA_B SDQS_B0 SDQS_B SDQS_B SDQS_B SDQS_B SDQS_B SDQS_B SDQS_B SDM_B SDM_B SDM_B SDM_B0 SDM_B SDM_B SDM_B SDM_B SDQ_B SDQ_A0 SDQ_B SDQ_A SDQ_A SDQ_A SDQ_A0 SDQ_A SDQ_A SDQ_B SDQ_B SDQ_A SDQ_A0 SDQ_B SDQ_A SDQ_A SDQ_A SDQ_A SDQ_A SDQ_B SDQ_B SDQ_A SDQ_B SDQ_A SDQ_B SDQ_A SDQ_B SDQ_A0 SDQ_A SDQ_B SDQ_A SDQ_A SDQ_B SDQ_A SDQ_B SDQ_A SDQ_B SDQ_A SDQ_A SDQ_A SDQ_A SDQ_A SDQ_B0 SDQ_A SDQ_A0 SDQ_A SDQ_A SDQ_B SDQ_B SDQ_B SDQ_B SDQ_A SDQ_A SDQ_A SDQ_A SDQ_A SDQ_A SDQ_B SDQ_B SDQ_B SDQ_A SDQ_B SDQ_A SDQ_A SDQ_B0 SDQ_B SDQ_A SDQ_A SDQ_A SDQ_A SDQ_B SDQ_B SDQ_A SDQ_A SDQ_A SDQ_B0 SDQ_A SDQ_A SDQ_B SDQ_B SDQ_B0 SDQ_B SDQ_A SDQ_A SDQ_A SDQ_B SDQ_B SDQ_B SDQ_B SDQ_B SDQ_B SDQ_A SDQ_B SDQ_B SDQ_A SDQ_B SDQ_B SDQ_B SDQ_A SDQ_A SDQ_A0 SDQ_B SDQ_B SDQ_B SDQ_A SDQ_B SDQ_A SDQ_B SDQ_B SDQ_B SDQ_B SDQ_A0 SDQ_B SDQ_B SDQ_B SDQ_B0 SDQ_B SDQ_B SDQ_A SDQ_A SDQ_B SDQ_B SDQ_B SDQ_B0 SDQ_B SDQ_A SDQ_B0 SDQ_B SMAA_A[0..] SDQS_A[0..] SDQ_A[0..] SDQ_B[0..] SMAA_B[0..] SDM_B[0..] SDQS_B[0..] Z00 TZ00 TZ00 TZ00 TZ00 TZ00 TZ00 TZ00 TZ00 TZ00 TZ00 TZ0 TZ0 TZ0 TZ0 TZ0 TZ0 TZ0 TZ0 TZ0 TZ00 TZ0 TZ0 TZ0 TZ0 TZ0 TZ0 TZ0 TZ0 TZ0 TZ00 TZ0 TZ0 TZ0 TZ0 TZ0 TZ0 TZ0 TZ0 TZ0 TZ00 TZ0 TZ0 TZ0 TZ0 R _% R _% A _XR N HAN B DDR_RIMM DQ0 DQ DQ DQ DQ DQ DQ DQ DQ DQ DQ0 DQ DQ DQ DQ DQ DQ DQ DQ DQ0 DQ DQ DQ DQ DQ DQ DQ DQ WP SL SDA SA0 SA SA B B A0 A A A A A A A A VDDQ VDDQ VDDQ VDDQ VDDQ VDDQ VDDQ VDDQ DQ0 DQ DQ DQ DQ DQ DQ DQ DQ DQ DQ0 DQ DQ DQ DQ DQ DQ DQ A0 A A A DQ DQ DQ0 DQ DQ DQ DQ DQ DQ DQ DQ DQ DM DQ DQ DQ DQ0 DQ DQ VDDQ VDDQ VDDQ VDDQ VDDQ VDDQ VDDQ VDDQ VDD VDD VDD VDD VDD VDD VDD VDD N N/RESET# S#/N N N S#/N N/FETEN N A DM0 DM DM DM DM DM DM B0 B B B B B DQS0 DQS DQS DQS DQS DQS DQS DQS DQS DM K0 K0# K K# K K# VDD BA0 BA BA KE0 KE S0# S# WE# AS# RAS# VDDSPD VREF VDDID R _% R _% A _XR A _XR A _XR A _XR R0.K A _XR 0u/.V_.* A _XR A _XR A _XR A _XR A _XR 0u/.V_.* A _XR A _XR A _XR A _XR A _XR A _XR A _XR A _XR A0 _XR A _XR A _XR A0 _XR A _XR A _XR N HAN A DDR_RIMM DQ0 DQ DQ DQ DQ DQ DQ DQ DQ DQ DQ0 DQ DQ DQ DQ DQ DQ DQ DQ DQ0 DQ DQ DQ DQ DQ DQ DQ DQ WP SL SDA SA0 SA SA B B A0 A A A A A A A A VDDQ VDDQ VDDQ VDDQ VDDQ VDDQ VDDQ VDDQ DQ0 DQ DQ DQ DQ DQ DQ DQ DQ DQ DQ0 DQ DQ DQ DQ DQ DQ DQ A0 A A A DQ DQ DQ0 DQ DQ DQ DQ DQ DQ DQ DQ DQ DM DQ DQ DQ DQ0 DQ DQ VDDQ VDDQ VDDQ VDDQ VDDQ VDDQ VDDQ VDDQ VDD VDD VDD VDD VDD VDD VDD VDD N N/RESET# S#/N N N S#/N N/FETEN N A DM0 DM DM DM DM DM DM B0 B B B B B DQS0 DQS DQS DQS DQS DQS DQS DQS DQS DM K0 K0# K K# K K# VDD BA0 BA BA KE0 KE S0# S# WE# AS# RAS# VDDSPD VREF VDDID A _XR SDM_A[0..] [,] SDQS_A[0..] [,] SMAA_A[0..] [,] SKE_B0 [,] SKE_B [,] SMDLK_B0 [] SMDLK_B0# [] SMDLK_B [] SMDLK_B# [] SMDLK_B [] SMDLK_B# [] SS_B0# [,] SS_B# [,] SAS_B# [,] SWE_B# [,] SBA_B0 [,] SBA_B [,] SRAS_B# [,] SMBDATA [,,,] SMBLK [,,,] SWE_A# [,] SMDLK_A0# [] SS_A0# [,] SBA_A [,] SMBDATA [,,,] SKE_A [,] SKE_A0 [,] SMDLK_A [] SMDLK_A0 [] SS_A# [,] SBA_A0 [,] SRAS_A# [,] SMDLK_A# [] SMBLK [,,,] SAS_A# [,] DUAL.V [,,,] SMDLK_A# [] SMDLK_A [] SDQ_A[0..] [,] SDM_B[0..] [,] SDQS_B[0..] [,] SMAA_B[0..] [,] SDQ_B[0..] [,] Place close to RIMM Place close to RIMM
1.ai
 HDMI camera ARTRAY CO,. LTD Introduction Thank you for purchasing the ARTCAM HDMI camera series. This manual shows the direction how to use the viewer software. Please refer other instructions or contact
Logitech Wireless Combo MK45 English
 Logitech Wireless Combo MK45 Setup Guide Logitech Wireless Combo MK45 English................................................................................... 7..........................................
P3B-F Pentium III/II/Celeron TM
 P3B-F Pentium III/II/Celeron TM 1999 2 3 4 5 6 7 8 9 10 11 12 1 2 3 4 5 22 21 20 19 18 17 16 15 14 13 12 11 10 9 8 7 6 13 R PS2 KBMS USB COM1 COM2 JTPWR ATXPWR PWR_FAN CPU_FAN Row 0 1 2 3 4 5 6 7 DSW JP20
BC04 Module_antenna__ doc
 http://www.infobluetooth.com TEL:+86-23-68798999 Fax: +86-23-68889515 Page 1 of 10 http://www.infobluetooth.com TEL:+86-23-68798999 Fax: +86-23-68889515 Page 2 of 10 http://www.infobluetooth.com TEL:+86-23-68798999
1. 請 先 檢 查 包 裝 內 容 物 AC750 多 模 式 無 線 分 享 器 安 裝 指 南 安 裝 指 南 CD 光 碟 BR-6208AC 電 源 供 應 器 網 路 線 2. 將 設 備 接 上 電 源, 即 可 使 用 智 慧 型 無 線 裝 置 進 行 設 定 A. 接 上 電 源
 1. 請 先 檢 查 包 裝 內 容 物 AC750 多 模 式 無 線 分 享 器 安 裝 指 南 安 裝 指 南 CD 光 碟 BR-6208AC 電 源 供 應 器 網 路 線 2. 將 設 備 接 上 電 源, 即 可 使 用 智 慧 型 無 線 裝 置 進 行 設 定 A. 接 上 電 源 B. 啟 用 智 慧 型 裝 置 的 無 線 Wi-Fi C. 選 擇 無 線 網 路 名 稱 "edimax.setup"
CANVIO_AEROCAST_CS_EN.indd
 简 体 中 文...2 English...4 SC5151-A0 简 体 中 文 步 骤 2: 了 解 您 的 CANVIO AeroCast CANVIO AeroCast 无 线 移 动 硬 盘 快 速 入 门 指 南 欢 迎 并 感 谢 您 选 择 TOSHIBA 产 品 有 关 您 的 TOSHIBA 产 品 的 详 情, 请 参 阅 包 含 更 多 信 息 的 用 户 手 册 () 安
01CP-WX3030WNetc_CO_ENG.indd
 Data Video Projector User s Manual (Concise) ModelS: 8928A/8930A/8931WA/ 8933W Information in this Guide may change due to product improvements. To obtain the latest manuals, literature, and software please
热设计网
 例 例 Agenda Popular Simulation software in PC industry * CFD software -- Flotherm * Advantage of Flotherm Flotherm apply to Cooler design * How to build up the model * Optimal parameter in cooler design
LH_Series_Rev2014.pdf
 REMINDERS Product information in this catalog is as of October 2013. All of the contents specified herein are subject to change without notice due to technical improvements, etc. Therefore, please check
K301Q-D VRT中英文说明书141009
 THE INSTALLING INSTRUCTION FOR CONCEALED TANK Important instuction:.. Please confirm the structure and shape before installing the toilet bowl. Meanwhile measure the exact size H between outfall and infall
Panaboard Overlayer help
 Panaboard Overlayer Image Capture Software for Electronic Whiteboard (Panaboard) ... 3... 5... 6... 13...14 Panaboard Overlayer 1. 2. 3. 4. 4-1. 4-2. [ / ] ( ) 4-3. 5. 6. 6-1. 6-2. [ / ] ( ) 7. Panaboard
Guide to Install SATA Hard Disks
 SATA RAID 1. SATA. 2 1.1 SATA. 2 1.2 SATA 2 2. RAID (RAID 0 / RAID 1 / JBOD).. 4 2.1 RAID. 4 2.2 RAID 5 2.3 RAID 0 6 2.4 RAID 1.. 10 2.5 JBOD.. 16 3. Windows 2000 / Windows XP 20 1. SATA 1.1 SATA Serial
HOIE WITH PREISION is also the Easy choice! Easy-Laser Easy-Laser
 E915 1 HOIE WITH PREISION is also the Easy choice! Easy-Laser Easy-Laser SIMPLE ND EFFETIVE Easy-Laser D23 Easy-Laser E5 TEHNIL DT System Relative humidity 10 95% (complete system) 12.1 kg [26.7 lbs] arrying
P4VM800_BIOS_CN.p65
 1 Main H/W Monitor Boot Security Exit System Overview System Time System Date [ 17:00:09] [Fri 02/25/2005] BIOS Version : P4VM800 BIOS P1.00 Processor Type : Intel (R) Pentium (R) 4 CPU 2.40 GHz Processor
P4V88+_BIOS_CN.p65
 1 Main H/W Monitor Boot Security Exit System Overview System Time System Date [ 17:00:09] [Wed 12/22/2004] BIOS Version : P4V88+ BIOS P1.00 Processor Type : Intel (R) Pentium (R) 4 CPU 2.40 GHz Processor
Serial ATA ( Nvidia nforce430)...2 (1) SATA... 2 (2) B I O S S A T A... 3 (3) RAID BIOS RAID... 6 (4) S A T A... 9 (5) S A T A (6) Microsoft Win
...2 (1) SATA... 2 (2) B I O S S A T A... 3 (3) RAID BIOS RAID... 6 (4) S A T A... 9 (5) S A T A (6) Microsoft Win") Serial ATA ( Nvidia nforce430)...2 (1) SATA... 2 (2) B I O S S A T A... 3 (3) RAID BIOS RAID... 6 (4) S A T A... 9 (5) S A T A... 11 (6) Microsoft Windows 2000... 14 Ác Åé å Serial ATA ( Nvidia nforce430)
Serial ATA ( Nvidia nforce430)...2 (1) SATA... 2 (2) B I O S S A T A... 3 (3) RAID BIOS RAID... 6 (4) S A T A... 9 (5) S A T A... 11 (6) Microsoft Windows 2000... 14 Ác Åé å Serial ATA ( Nvidia nforce430)
OA-253_H1~H4_OL.ai
 WARNINGS Note: Read ALL the following BEFORE using this product. Follow all Guidelines at all times while using this product. CAUTION This warning indicates possibility of personal injury and material
<4D6963726F736F667420576F7264202D2032303130C4EAC0EDB9A4C0E04142BCB6D4C4B6C1C5D0B6CFC0FDCCE2BEABD1A15F325F2E646F63>
 2010 年 理 工 类 AB 级 阅 读 判 断 例 题 精 选 (2) Computer mouse How does the mouse work? We have to start at the bottom, so think upside down for now. It all starts with mouse ball. As the mouse ball in the bottom
Important Notice SUNPLUS TECHNOLOGY CO. reserves the right to change this documentation without prior notice. Information provided by SUNPLUS TECHNOLO
 Car DVD New GUI IR Flow User Manual V0.1 Jan 25, 2008 19, Innovation First Road Science Park Hsin-Chu Taiwan 300 R.O.C. Tel: 886-3-578-6005 Fax: 886-3-578-4418 Web: www.sunplus.com Important Notice SUNPLUS
K7VT2_QIG_v3
 ............ 1 2 3 4 5 [R] : Enter Raid setup utility 6 Press[A]keytocreateRAID RAID Type: JBOD RAID 0 RAID 1: 2 7 RAID 0 Auto Create Manual Create: 2 RAID 0 Block Size: 16K 32K
Preface This guide is intended to standardize the use of the WeChat brand and ensure the brand's integrity and consistency. The guide applies to all d
 WeChat Search Visual Identity Guidelines WEDESIGN 2018. 04 Preface This guide is intended to standardize the use of the WeChat brand and ensure the brand's integrity and consistency. The guide applies
TX-NR3030_BAS_Cs_ indd
 TX-NR3030 http://www.onkyo.com/manual/txnr3030/adv/cs.html Cs 1 2 3 Speaker Cable 2 HDMI OUT HDMI IN HDMI OUT HDMI OUT HDMI OUT HDMI OUT 1 DIGITAL OPTICAL OUT AUDIO OUT TV 3 1 5 4 6 1 2 3 3 2 2 4 3 2 5
Ác Åé å Serial ATA ( Sil3132) S A T A (1) SATA (2) BIOS SATA (3)* RAID BIOS RAID (4) SATA (5) SATA (a) S A T A ( S A T A R A I D ) (b) (c) Windows XP
 S A T A (1) SATA (2) BIOS SATA (3)* RAID BIOS RAID (4) SATA (5) SATA (a) S A T A ( S A T A R A I D ) (b) (c) Windows XP") Serial ATA ( Sil3132)...2 (1) SATA... 2 (2) B I O S S A T A... 3 (3) RAID BIOS RAID... 6 (4) S A T A... 10 (5) S A T A... 12 Ác Åé å Serial ATA ( Sil3132) S A T A (1) SATA (2) BIOS SATA (3)* RAID BIOS
Serial ATA ( Sil3132)...2 (1) SATA... 2 (2) B I O S S A T A... 3 (3) RAID BIOS RAID... 6 (4) S A T A... 10 (5) S A T A... 12 Ác Åé å Serial ATA ( Sil3132) S A T A (1) SATA (2) BIOS SATA (3)* RAID BIOS
Gerotor Motors Series Dimensions A,B C T L L G1/2 M G1/ A 4 C H4 E
 Gerotor Motors Series Size CC-A Flange Options-B Shaft Options-C Ports Features 0 0 5 5 1 0 1 0 3 3 0 0 SAE A 2 Bolt - (2) 4 Bolt Magneto (4) 4 Bolt Square (H4) 1.0" Keyed (C) 25mm Keyed (A) 1.0' 6T Spline
RAID RAID 0 RAID 1 RAID 5 RAID * ( -1)* ( /2)* No Yes Yes Yes A. B. BIOS SATA C. RAID BIOS RAID ( ) D. SATA RAID/AHCI ( ) SATA M.2 SSD ( )
* ( /2)* No Yes Yes Yes A. B. BIOS SATA C. RAID BIOS RAID ( ) D. SATA RAID/AHCI ( ) SATA M.2 SSD ( )") RAID RAID 0 RAID 1 RAID 5 RAID 10 2 2 3 4 * (-1)* (/2)* No Yes Yes Yes A. B. BIOS SATA C. RAID BIOS RAID ( ) D. SATA RAID/AHCI ( ) SATA M.2 SSD ( ) ( ) ( ) Windows USB 1 SATA A. SATASATAIntel SATA (SATA3
RAID RAID 0 RAID 1 RAID 5 RAID 10 2 2 3 4 * (-1)* (/2)* No Yes Yes Yes A. B. BIOS SATA C. RAID BIOS RAID ( ) D. SATA RAID/AHCI ( ) SATA M.2 SSD ( ) ( ) ( ) Windows USB 1 SATA A. SATASATAIntel SATA (SATA3
Microsoft Word - template.doc
 HGC efax Service User Guide I. Getting Started Page 1 II. Fax Forward Page 2 4 III. Web Viewing Page 5 7 IV. General Management Page 8 12 V. Help Desk Page 13 VI. Logout Page 13 Page 0 I. Getting Started
SPHE8202R Design Guide Important Notice SUNPLUS TECHNOLOGY CO. reserves the right to change this documentation without prior notice. Information provi
 SPHE8202R Design Guide V2.0 JUN, 2007 19, Innovation First Road Science Park Hsin-Chu Taiwan 300 R.O.C. Tel: 886-3-578-6005 Fax: 886-3-578-4418 Web: www.sunplus.com SPHE8202R Design Guide Important Notice
ch_code_infoaccess
 地 產 代 理 監 管 局 公 開 資 料 守 則 2014 年 5 月 目 錄 引 言 第 1 部 段 數 適 用 範 圍 1.1-1.2 監 管 局 部 門 1.1 紀 律 研 訊 1.2 提 供 資 料 1.3-1.6 按 慣 例 公 布 或 供 查 閱 的 資 料 1.3-1.4 應 要 求 提 供 的 資 料 1.5 法 定 義 務 及 限 制 1.6 程 序 1.7-1.19 公 開 資
MODEL COLOR LIST UZ125D2 YMW GRAY YNF RED YRG BLUE 30H WHITE
 MODEL COLOR LIST UZ125D2 YMW GRAY YNF RED YRG BLUE 30H WHITE MODEL COLOR LIST UZ125D2K K13 BLACK YRG BLUE YPK WHITE MODEL COLOR LIST UZ125X2 G22 Q05 GRAY ORANGE GREEN WHITE N28 W08 PREFACE When it becomes
Gerolor Motors Series Dimensions A,B C T L L G1/2 M8 G1/ A 4 C H4 E
 Gerolor Motors Series Size CC-A Flange Options-B Shaft Options-C Ports Features 0 0 12 12 1 1 0 0 2 2 31 31 0 0 SAE A 2 Bolt - (2) 4 Bolt Magneto (4) 4 Bolt Square (H4) 1.0" Keyed (C) 2mm Keyed (A) 1.0'
T1028_Manual_KO_V3 0.pdf
 2009 : 2009/09 PC Microsoft, MS-DOS, Windows, Windows Sound System Microsoft Corporation Intel, Atom Intel Corporation Sound Blaster, Sound Blaster ProCreative Technology I AC AC AC AC AC - 115 V/60 Hz
WFC40810
 9000086873 (PD 85 05 10) Operating and Installation Instructions Please read this specification carefully before you use the product. Any failure and losses caused by ignoring the above mentioned items
8idml_20_1_q
 Chapter 2 GIGA-BYTE TECHNOLOGY CO, LTD GBT ( ) GBT GBT, GBT 2002 3 15 1 1 11 3 12 AP64D(-H) 3 2 21 4 22 5 23 6 3 31 Win 98/98SE, WinME Win XP 8 311 8 312 Direct X 9 313 11 314 14 315 14 316 18 32 Windows
KDC-U5049 KDC-U4049 Made for ipod, and Made for iphone mean that an electronic accessory has been designed to connect specifically to ipod, or iphone,
 KDC-U5049 KDC-U4049 Made for ipod, and Made for iphone mean that an electronic accessory has been designed to connect specifically to ipod, or iphone, respectively, and has been certified by the developer
Serial ATA ( nvidia nforce4 Ultra/SLI)...2 (1) SATA... 2 (2) B I O S S A T A... 3 (3) RAID BIOS RAID... 6 (4) S A T A... 9 (5) S A T A (6) Micro
...2 (1) SATA... 2 (2) B I O S S A T A... 3 (3) RAID BIOS RAID... 6 (4) S A T A... 9 (5) S A T A (6) Micro") Serial ATA ( nvidia nforce4 Ultra/SLI)...2 (1) SATA... 2 (2) B I O S S A T A... 3 (3) RAID BIOS RAID... 6 (4) S A T A... 9 (5) S A T A... 11 (6) Microsoft Windows 2000... 14 Ác Åé å Serial ATA ( nvidia
Serial ATA ( nvidia nforce4 Ultra/SLI)...2 (1) SATA... 2 (2) B I O S S A T A... 3 (3) RAID BIOS RAID... 6 (4) S A T A... 9 (5) S A T A... 11 (6) Microsoft Windows 2000... 14 Ác Åé å Serial ATA ( nvidia
AS4610 Series QSG-EN_SC_TC R02.book
 Quick Start Guide 4/48-Port GE Data Center Switch AS460-0T AS460-0P AS460-54T AS460-54P. Unpack the Switch and Check Contents AS460-0T AS460-0P Note: The switch can also be installed on a desktop or shelf
Cube20S small, speedy, safe Eextremely modular Up to 64 modules per bus node Quick reaction time: up to 20 µs Cube20S A new Member of the Cube Family
 small, speedy, safe Eextremely modular Up to 64 modules per bus de Quick reaction time: up to 20 µs A new Member of the Cube Family Murrelektronik s modular I/O system expands the field-tested Cube family
Windows XP
 Windows XP What is Windows XP Windows is an Operating System An Operating System is the program that controls the hardware of your computer, and gives you an interface that allows you and other programs
 Ryobi 10 in. Sliding Compound Miter Saw With Laser Model No. TSS102L Repair Sheet 0 1 2 3 4 62 65 5 6 36 68 6 8 69 6 9 80 81 6 66 40 82 23 3 4 6 44 43 4 45 50 46 52 48 49 51 59 55 54 53 60 5 61 40 58 63
AP128DG-H AP128DG-H 3 13 ATiRADEON TM Win 98/98SE, WinME Win XP Direct X
 Chapter 2 GIGA-BYTE TECHNOLOGY CO, LTD ( GBT ) GBT GBT, GBT 2002 4 12 1 AP128DG-H 1 11 3 12 AP128DG-H 3 13 ATiRADEON TM 8500 4 2 21 5 22 6 23 7 3 31 Win 98/98SE, WinME Win XP 9 311 9 312 Direct X 10 313
WVT new
 Operating and Installation Instructions 5120 004601 (PD 84 09 25) Please read this specification carefully before you use the product. Any failure and losses caused by ignoring the above mentioned items
(Quad-Core Intel Xeon 2.0GHz) ()(SAS) (Quad-Core Intel Xeon 2.0GHz) (Windows )(Serial ATA) (Quad-Core Intel Xeon 2.0GHz) (Linux)(Serial ATA)
 ()(SAS) (Quad-Core Intel Xeon 2.0GHz) (Windows )(Serial ATA) (Quad-Core Intel Xeon 2.0GHz) (Linux)(Serial ATA)") LP5-970060 HP (EDA) HP (GIS) HP OEM HP z400 z600/xw6000 z800 xw9000 CPU 8 intel base 6SATA channel SAS Hard Disk PCI-X 192GB Memory CAE D H D SDHD CPU APRAM CPU, AMD Dual core Model 3D 64GB Memory SCI
LP5-970060 HP (EDA) HP (GIS) HP OEM HP z400 z600/xw6000 z800 xw9000 CPU 8 intel base 6SATA channel SAS Hard Disk PCI-X 192GB Memory CAE D H D SDHD CPU APRAM CPU, AMD Dual core Model 3D 64GB Memory SCI
r_09hr_practical_guide_kor.pdf
 PRACTICAL GUIDE TO THE EDIROL R-09HR 3 4 PRACTICAL GUIDE TO THE EDIROL R-09HR 5 Situation 1 6 1 2 3 PRACTICAL GUIDE TO THE EDIROL R-09HR WAV MP3 WAV 24 bit/96 khz WAV 16 bit/44.1 khz MP3 128 kbps/44.1
ebook140-8
 8 Microsoft VPN Windows NT 4 V P N Windows 98 Client 7 Vintage Air V P N 7 Wi n d o w s NT V P N 7 VPN ( ) 7 Novell NetWare VPN 8.1 PPTP NT4 VPN Q 154091 M i c r o s o f t Windows NT RAS [ ] Windows NT4
Product Type Batteries (only) Circuit Breatkers & Load Protection Connection Devices Contactors Ethernet Switches, Stratix Switches I/O Modules; PLC N
 Circuit Breatkers & Load Protection Connection Devices Contactors Ethernet Switches, Stratix Switches I/O Modules; PLC N") 1201 South Second Street Milwaukee, Wisconsin U.S.A. 53204 Tel 414-382-2000 1 July 2016 RE: China Restriction of Hazardous Substances (RoHS) Dear Customer, Rockwell Automation is committed to demonstrating
1201 South Second Street Milwaukee, Wisconsin U.S.A. 53204 Tel 414-382-2000 1 July 2016 RE: China Restriction of Hazardous Substances (RoHS) Dear Customer, Rockwell Automation is committed to demonstrating
Captive Screws Styled knob series M3 thread size Smooth knob meets UL-1950 Designed for hand operation Spring ejected Wide variety of sizes, re
 440 47 Captive Screws d knob series M3 thread size Smooth knob meets U-1950 Designed for hand operation Spring ejected Wide variety of sizes, recesses and installation options Material and Finish : Press-in:
 THE INSTLLING INSTRUCTION FOR CONCELED TNK Important instuction:.. Please confirm the structure and shape before installing the toilet bowl. Meanwhile measure the exact size H between outfall and infall
软件测试(TA07)第一学期考试
第一学期考试") 一 判 断 题 ( 每 题 1 分, 正 确 的, 错 误 的,20 道 ) 1. 软 件 测 试 按 照 测 试 过 程 分 类 为 黑 盒 白 盒 测 试 ( ) 2. 在 设 计 测 试 用 例 时, 应 包 括 合 理 的 输 入 条 件 和 不 合 理 的 输 入 条 件 ( ) 3. 集 成 测 试 计 划 在 需 求 分 析 阶 段 末 提 交 ( ) 4. 单 元 测 试 属 于 动
一 判 断 题 ( 每 题 1 分, 正 确 的, 错 误 的,20 道 ) 1. 软 件 测 试 按 照 测 试 过 程 分 类 为 黑 盒 白 盒 测 试 ( ) 2. 在 设 计 测 试 用 例 时, 应 包 括 合 理 的 输 入 条 件 和 不 合 理 的 输 入 条 件 ( ) 3. 集 成 测 试 计 划 在 需 求 分 析 阶 段 末 提 交 ( ) 4. 单 元 测 试 属 于 动
User’s Manual
 SNAP 500 打 印 机 用 户 手 册 1 用 户 手 册 SNAP TM 500 打 印 机 2015 年 8 月 24 日 AVERY DENNISON Manual Edition 2.5 2 SNAP 500 打 印 机 用 户 手 册 WARNING This device complies with Part 15 of the FCC Rules. Operation is subject
000
 Style and Usage Application of Pogo Pin Connector Portable Electronic Products ( Notebook, MP3, DSC, GPS, TV Game Peripherals...) Telecommunication Products (Cell phone, Two-Way Radio, Blue tooth..) Automotive
Chapter 2 GIGA-BYTE TECHNOLOGY CO., LTD. ("GBT") GBT GBT GBT
 GBT GBT GBT") Chapter 2 GIGA-BYTE TECHNOLOGY CO., LTD. ("GBT") GBT GBT GBT 2003 6 13-1 - 1.... 3 1.1....3 1.2. GV-R98P256D...3 2.... 4 2.1....4 2.2....5 2.3....6 3.... 8 3.1. Windows 98/98SEWindows MEWindows XP...8
Chapter 2 GIGA-BYTE TECHNOLOGY CO., LTD. ("GBT") GBT GBT GBT 2003 6 13-1 - 1.... 3 1.1....3 1.2. GV-R98P256D...3 2.... 4 2.1....4 2.2....5 2.3....6 3.... 8 3.1. Windows 98/98SEWindows MEWindows XP...8
FIGURE A
 RYOBI in. TABLE SAW MODEL NUMBER RTS1 REPAIR SHEET 5 5 51 1 5 50 55 5 5 5 5 0 0 0 55 5 5 5 5 0 1 1 1 1 1 5 0 1 5 1 0 5 0 1 1 0 1 1 1 11 1 1 1 15 FIGURE A The model number will be found on a label attached
目次
 軟 體 工 程 期 末 報 告 網 路 麻 將 91703014 資 科 三 黃 偉 嘉 91703024 資 科 三 丘 祐 瑋 91703030 資 科 三 江 致 廣 1 目 次 壹 前 言 (Preface) P.4 貳 計 畫 簡 述 及 預 期 效 益 (Project Description and Expected Results) P.4 參 系 統 開 發 需 求 (System
Ác Åé å Serial ATA ( nvidia nforce4 SLI) S A T A (1) SATA (2) BIOS SATA (3)* RAID BIOS RAID (4) SATA (5) SATA (a) S A T A ( S A T A R A I D ) (b) (c)
 S A T A (1) SATA (2) BIOS SATA (3)* RAID BIOS RAID (4) SATA (5) SATA (a) S A T A ( S A T A R A I D ) (b) (c)") Serial ATA ( nvidia nforce4 SLI)...2 (1) SATA... 2 (2) B I O S S A T A... 3 (3) RAID BIOS RAID... 6 (4) S A T A... 9 (5) S A T A... 11 (6) Microsoft Windows 2000... 14 Ác Åé å Serial ATA ( nvidia nforce4
Serial ATA ( nvidia nforce4 SLI)...2 (1) SATA... 2 (2) B I O S S A T A... 3 (3) RAID BIOS RAID... 6 (4) S A T A... 9 (5) S A T A... 11 (6) Microsoft Windows 2000... 14 Ác Åé å Serial ATA ( nvidia nforce4
关 于 瓶 装 水, 你 不 得 不 知 的 8 件 事 情 关 于 瓶 装 水, 你 不 得 不 知 的 8 件 事 情 1 水 质 : 瓶 装 的, 不 一 定 就 是 更 好 的 2 生 产 : 监 管 缺 位, 消 费 者 暴 露 于 风 险 之 中 人 们 往 往 假 定 瓶 装 水 是
 关 于 瓶 装 水, 你 不 得 不 知 的 件 事 情 关 于 瓶 装 水, 你 不 得 不 知 的 8 件 事 情 关 于 瓶 装 水, 你 不 得 不 知 的 8 件 事 情 1 水 质 : 瓶 装 的, 不 一 定 就 是 更 好 的 2 生 产 : 监 管 缺 位, 消 费 者 暴 露 于 风 险 之 中 人 们 往 往 假 定 瓶 装 水 是 干 净 安 全 健 康 的, 广 告 传 递
E15-3D1 1. Specifications Compact 4-Way Cassette type Model name MMU- AP0071MH2UL AP0091MH2UL AP0121MH2UL AP0151MH2UL AP0181MH2UL Cooling Capacity kbt
 E15-3D1 Compact 4-Way Cassette type MMU-AP0071MH2UL MMU-AP0091MH2UL MMU-AP0121MH2UL MMU-AP0151MH2UL MMU-AP0181MH2UL Contents 1. Specifications 2. Dimensions 3. Center of gravity 4. Piping diagram 5. Wiring
Product Type Batteries (only) Circuit Breakers & Load Protection Connection Devices Contactors Ethernet Switches, Stratix Switches I/O Modules; PLC Ne
 Circuit Breakers & Load Protection Connection Devices Contactors Ethernet Switches, Stratix Switches I/O Modules; PLC Ne") 1201 South Second Street Milwaukee, Wisconsin U.S.A. 53204 Tel 414-382-2000 1 July 2016 RE: China Restriction of Hazardous Substances (RoHS) Dear Customer, Rockwell Automation is committed to demonstrating
1201 South Second Street Milwaukee, Wisconsin U.S.A. 53204 Tel 414-382-2000 1 July 2016 RE: China Restriction of Hazardous Substances (RoHS) Dear Customer, Rockwell Automation is committed to demonstrating
NORCO-740 CPU M/00M NORCO-740 NORCO-740E NORCO-740G NORCO-740GE Intel 845GL Intel 845G
 3. 4.2 4 2. 2.. 8 2..2 VGA 8 2..3 (J2,J3,J5) 9 2..4 9 2..5 USB 20 2..6 MS KB 20 2..7 (J) 20 2..8 2 2..9 2 2..0 22 2.. (IDE,2) 22 2..2 22 2..3 AC 97 23 2.2 2.2. FSB :JFS 24 2.2.2 Watchdog Timer :JWD 24
IP505SM_manual_cn.doc
 IP505SM 1 Introduction 1...4...4...4...5 LAN...5...5...6...6...7 LED...7...7 2...9...9...9 3...11...11...12...12...12...14...18 LAN...19 DHCP...20...21 4 PC...22...22 Windows...22 TCP/IP -...22 TCP/IP
Product Specification Chip Intel DSL6540 Thunderbolt 3 Controller Connectors 2 x Thunderbolt 3 ports (Thunderbolt 3 Port 1/Thunderbolt 3 Port 2), supp
, supp") GC-ALPINE RIDGE Installation Guide/ 12WE6-ALPINER-10AR Product Specification Chip Intel DSL6540 Thunderbolt 3 Controller Connectors 2 x Thunderbolt 3 ports (Thunderbolt 3 Port 1/Thunderbolt 3 Port 2),
GC-ALPINE RIDGE Installation Guide/ 12WE6-ALPINER-10AR Product Specification Chip Intel DSL6540 Thunderbolt 3 Controller Connectors 2 x Thunderbolt 3 ports (Thunderbolt 3 Port 1/Thunderbolt 3 Port 2),
Microsoft Word - AP1515V02
 Document No. Rev.: V0.20 Page: 1 of 9 Revision History Rev. DRN # History Initiator Effective Date V01 V02 Initial document 黃宗文 Add second package description 葉宗榮 2014/05/15 2015/09/08 Initiator: 雷晨妤 (DCC)
iml88-0v C / 8W T Tube EVM - pplication Notes. IC Description The iml88 is a Three Terminal Current Controller (TTCC) for regulating the current flowi
 for regulating the current flowi") iml88-0v C / 8W T Tube EVM - pplication Notes iml88 0V C 8W T Tube EVM pplication Notes Table of Content. IC Description.... Features.... Package and Pin Diagrams.... pplication Circuit.... PCB Layout
iml88-0v C / 8W T Tube EVM - pplication Notes iml88 0V C 8W T Tube EVM pplication Notes Table of Content. IC Description.... Features.... Package and Pin Diagrams.... pplication Circuit.... PCB Layout
Microsoft Word - PZ series.doc
 叠 层 片 式 铁 氧 体 磁 珠 P 系 列 Multilayer Chip Ferrite Bead P Series Operating Temp. : -4 ~ +8 特 征 FEATUES 内 部 印 有 银 电 极 的 叠 层 结 构, 铁 氧 体 屏 蔽 无 串 扰 Internal silver printed layers and magnetic shielded structures
Male Circumcision - Traditional Chinese
 Male Circumcision Male circumcision is the removal of the foreskin around the end of the penis. If you decide on circumcision, your baby s doctor will do it in the hospital s nursery. If your baby is small
Male Circumcision - Simplified Chinese
 Male Circumcision Male circumcision is the removal of the foreskin around the end of the penis. If you decide on circumcision, your baby s doctor will do it in the hospital s nursery. If your baby is small
LTTH-product-bro
 海 南 海 航 汉 莎 技 术 培 训 有 限 公 司 培 训 课 程 介 绍 飞 机 维 修 培 训 课 程 海 航 汉 莎 培 训 产 品 产 品 选 择 培 训 目 标 海 南 海 航 汉 莎 技 术 培 训 有 限 公 司 是 于 2007 年 由 德 国 汉 莎 技 术 培 训 和 海 航 集 团 共 同 出 资 建 立 的 一 家 专 门 从 事 民 用 航 空 维 修 培 训 的 中
WARNING: TO REDUCE THE RISK OF FIRE OR ELECTRIC SHOCK, DO NOT EXPOSE THIS APPLIANCE TO RAIN OR MOISTURE. CAUTION: TO REDUCE THE RISK OF ELECTRIC SHOCK
 DV-SP302 Ct WARNING: TO REDUCE THE RISK OF FIRE OR ELECTRIC SHOCK, DO NOT EXPOSE THIS APPLIANCE TO RAIN OR MOISTURE. CAUTION: TO REDUCE THE RISK OF ELECTRIC SHOCK, DO NOT REMOVE COVER (OR BACK). NO USER-SERVICEABLE
正崴受讓公開說明書final.doc
 2392 CHENG UEI PRECISION INDUSTRY CO., LTD. () ( ) () () 5,333,333 () 53,333,330 () () 4.8 1 5,333,333 () () 52 2 http://newmops.tse.com.tw http://www.foxlink.com.tw % 18,000 0.61% 724,000 24.46% 1,554,726
入學考試網上報名指南
 入 學 考 試 網 上 報 名 指 南 On-line Application Guide for Admission Examination 16/01/2015 University of Macau Table of Contents Table of Contents... 1 A. 新 申 請 網 上 登 記 帳 戶 /Register for New Account... 2 B. 填
Cadence SPB 15.2 VOICE Cadence SPB 15.2 PC Cadence 3 (1) CD1 1of 2 (2) CD2 2of 2 (3) CD3 Concept HDL 1of 1
 CD1 1of 2 (2) CD2 2of 2 (3) CD3 Concept HDL 1of 1") Cadence SPB 15.2 VOICE 2005-05-07 Cadence SPB 15.2 PC Cadence 3 (1) CD1 1of 2 (2) CD2 2of 2 (3) CD3 Concept HDL 1of 1 1 1.1 Cadence SPB 15.2 2 Microsoft 1.1.1 Windows 2000 1.1.2 Windows XP Pro Windows
Cadence SPB 15.2 VOICE 2005-05-07 Cadence SPB 15.2 PC Cadence 3 (1) CD1 1of 2 (2) CD2 2of 2 (3) CD3 Concept HDL 1of 1 1 1.1 Cadence SPB 15.2 2 Microsoft 1.1.1 Windows 2000 1.1.2 Windows XP Pro Windows
Microsoft Word - Atmel-45136A-Pick-Best-Microcontroller-Strom-Eiland-Flodell_Article_CS
 如 何 为 您 的 下 一 款 设 计 选 出 最 好 的 8 位 或 32 位 微 控 制 器 作 者 : Atmel 产 品 营 销 高 级 总 监 Oyvind Strom Atmel 产 品 营 销 总 监 Andreas Eieland Atmel 研 发 工 具 部 门 高 级 产 品 营 销 经 理 Henrik Flodell 不 久 之 前, 嵌 入 式 系 统 还 是 既 昂 贵
AL-M200 Series
 NPD4754-00 TC ( ) Windows 7 1. [Start ( )] [Control Panel ()] [Network and Internet ( )] 2. [Network and Sharing Center ( )] 3. [Change adapter settings ( )] 4. 3 Windows XP 1. [Start ( )] [Control Panel
Chapter 2 GIGA-BYTE TECHNOLOGY CO., LTD. ("GBT") GBT GBT GBT
 GBT GBT GBT") Chapter 2 GIGA-BYTE TECHNOLOGY CO., LTD. ("GBT") GBT GBT GBT 2004 5 31-1 - 1.... 3 1.1....3 1.2. GV-R80P256D/GV-R80P256V...3 2.... 4 2.1....4 2.2....5 2.3....6 3.... 8 3.1. Win XP...8 3.1.1....8 3.1.2.
Chapter 2 GIGA-BYTE TECHNOLOGY CO., LTD. ("GBT") GBT GBT GBT 2004 5 31-1 - 1.... 3 1.1....3 1.2. GV-R80P256D/GV-R80P256V...3 2.... 4 2.1....4 2.2....5 2.3....6 3.... 8 3.1. Win XP...8 3.1.1....8 3.1.2.
LSI U320 SCSI卡用户手册.doc
 V1.0 Ultra320 SCSI SCSI 2004 7 PentiumIntel MS-DOS Windows Novell Netware Novell Sco Unix Santa Cruz Operation LSI U320 SCSI SCSI SCSI Integrated Mirroring/Integrated Striping BIOS Firmware LSI U320 SCSI
HC50246_2009
 Page: 1 of 7 Date: June 2, 2009 WINMATE COMMUNICATION INC. 9 F, NO. 111-6, SHING-DE RD., SAN-CHUNG CITY, TAIPEI, TAIWAN, R.O.C. The following merchandise was submitted and identified by the vendor as:
2 : ; :
 4 CH 1 2 : ; : 1 2 2 3 3 4 4 5 5 6 1 6 2 8 3 11 6 13 1 13 2 14 14 1 15 2 16 3 17 4 18 5 22 6 23 7 24 7 CF 32 8 46 9 : 80GB HD 48 3 3 1 : 4 / / 4 9 2 CHANNEL 1 : 1 3 CHANNEL 2 : 2 4 CHANNEL 3 : 3 5 CHANNEL
典型自编教材
 河 南 科 技 大 学 计 算 机 实 验 教 学 中 心 1. 计 算 机 文 化 基 础 实 验 指 导 书 2. 数 据 结 构 实 验 指 导 书 3. 操 作 系 统 实 验 指 导 书 4. 面 向 对 象 程 序 设 计 实 验 指 导 书 5. 数 据 库 原 理 实 验 指 导 书 6. 编 译 原 理 实 验 指 导 书 7. JAVA 程 序 设 计 实 验 指 导 书 8.
2015 Chinese FL Written examination
 Victorian Certificate of Education 2015 SUPERVISOR TO ATTACH PROCESSING LABEL HERE Letter STUDENT NUMBER CHINESE FIRST LANGUAGE Written examination Monday 16 November 2015 Reading time: 11.45 am to 12.00
LSC操作说明
 1 C H R I S T A L P H A 1-4 LSC 型 Part. No. 102041 A L P H A 2-4 LSC 型 Part. No. 10204 冷 冻 干 燥 机 操 作 说 明 新 研 制 的 LSC-8 控 制 器, 具 备 图 形 显 示 功 能, 能 以 数 据 表 形 式 显 示 参 数, 并 可 选 配 控 制 软 件 LSC-8 1/4 VGA 大 屏 幕
Microsoft Word - (web)_F.1_Notes_&_Application_Form(Chi)(non-SPCCPS)_16-17.doc
_F.1_Notes_&_Application_Form(Chi)(non-SPCCPS)_16-17.doc") 聖 保 羅 男 女 中 學 學 年 中 一 入 學 申 請 申 請 須 知 申 請 程 序 : 請 將 下 列 文 件 交 回 本 校 ( 麥 當 勞 道 33 號 ( 請 以 A4 紙 張 雙 面 影 印, 並 用 魚 尾 夾 夾 起 : 填 妥 申 請 表 並 貼 上 近 照 小 學 五 年 級 上 下 學 期 成 績 表 影 印 本 課 外 活 動 表 現 及 服 務 的 證 明 文 件 及
聖 保 羅 男 女 中 學 學 年 中 一 入 學 申 請 申 請 須 知 申 請 程 序 : 請 將 下 列 文 件 交 回 本 校 ( 麥 當 勞 道 33 號 ( 請 以 A4 紙 張 雙 面 影 印, 並 用 魚 尾 夾 夾 起 : 填 妥 申 請 表 並 貼 上 近 照 小 學 五 年 級 上 下 學 期 成 績 表 影 印 本 課 外 活 動 表 現 及 服 務 的 證 明 文 件 及
Bus Hound 5
 Bus Hound 5.0 ( 1.0) 21IC 2007 7 BusHound perisoft PC hound Bus Hound 6.0 5.0 5.0 Bus Hound, IDE SCSI USB 1394 DVD Windows9X,WindowsMe,NT4.0,2000,2003,XP XP IRP Html ZIP SCSI sense USB Bus Hound 1 Bus
AI-AUTO-011 Saflex® Advanced PVB - Color Interlayer (Chinese)
") Saflex Saflex (PVB) / Saflex B Saflex PVB 96% Saflex PVB Saflex PVB Saflex Saflex PVB * RB47 367700 x x x x x RB47 377800 / x x x x x RB47 547800 x x x x x RB47 147800 x x x x x RB47 156100 x x x x RB47
Saflex Saflex (PVB) / Saflex B Saflex PVB 96% Saflex PVB Saflex PVB Saflex Saflex PVB * RB47 367700 x x x x x RB47 377800 / x x x x x RB47 547800 x x x x x RB47 147800 x x x x x RB47 156100 x x x x RB47
《计算机应用基础》学习材料(讲义)
") 计 算 机 应 用 基 础 学 习 材 料 ( 讲 义 ) Fundamentals of Computer Application 2014-3-22 JIANGSU OPEN UNIVERSITY 第 二 学 习 周 计 算 机 基 础 知 识 ( 一 ) 导 学 在 本 学 习 周, 我 们 主 要 的 任 务 是 认 识 计 算 机 你 将 知 道 计 算 机 是 什 么 时 候 产 生 的,
计 算 机 应 用 基 础 学 习 材 料 ( 讲 义 ) Fundamentals of Computer Application 2014-3-22 JIANGSU OPEN UNIVERSITY 第 二 学 习 周 计 算 机 基 础 知 识 ( 一 ) 导 学 在 本 学 习 周, 我 们 主 要 的 任 务 是 认 识 计 算 机 你 将 知 道 计 算 机 是 什 么 时 候 产 生 的,
Chapter 2 GIGA-BYTE TECHNOLOGY CO., LTD. ("GBT") GBT GBT GBT
 GBT GBT GBT") Chapter 2 GIGA-BYTE TECHNOLOGY CO., LTD. ("GBT") GBT GBT GBT 2003 6 20-1 - 1.... 3 1.1....3 1.2. GV-R96P128D...3 2.... 4 2.1....4 2.2....5 2.3....6 3.... 8 3.1. Windows 98/98SEWindows MEWindows XP...8
Chapter 2 GIGA-BYTE TECHNOLOGY CO., LTD. ("GBT") GBT GBT GBT 2003 6 20-1 - 1.... 3 1.1....3 1.2. GV-R96P128D...3 2.... 4 2.1....4 2.2....5 2.3....6 3.... 8 3.1. Windows 98/98SEWindows MEWindows XP...8
68369 (ppp quickstart guide)
") Printed in USA 04/02 P/N 68369 rev. B PresencePLUS Pro PC PresencePLUS Pro PresencePLUS Pro CD Pass/Fails page 2 1 1. C-PPCAM 2. PPC.. PPCAMPPCTL 3. DB9D.. STPX.. STP.. 01 Trigger Ready Power 02 03 TRIGGER
Printed in USA 04/02 P/N 68369 rev. B PresencePLUS Pro PC PresencePLUS Pro PresencePLUS Pro CD Pass/Fails page 2 1 1. C-PPCAM 2. PPC.. PPCAMPPCTL 3. DB9D.. STPX.. STP.. 01 Trigger Ready Power 02 03 TRIGGER
GV-R7500L Win 98/ 98SE, WinME Win XP Direct X Windows NT WINDO
 Chapter 2 GIGA-BYTE TECHNOLOGY CO, LTD (GBT ) GBT GBT, GBT 2002 10 31-1 - 1 11 3 12 GV-R7500L 3 2 21 4 22 5 23 6 3 31 Win 98/ 98SE, WinME Win XP 8 311 8 312 Direct X 9 313 11 314 15 315 15 316 22 32 Windows
Microsoft Word - 301E高温样本封面.doc
 无锡卓尔阀业有限公司 301E 三偏心高温 蝶阀 Triple Eccentric High Temperature Butterfly Valves STANDARD SPECIFICATION 301E GENERAL 301E Triple Eccentric High Temperature Butterfly valve 301E Triple eccentric high temperature
SA-DK2-U3Rユーザーズマニュアル
 USB3.0 SA-DK2-U3R 2007.0 2 3 4 5 6 7 8 System Info. Manual Rebuild Delete RAID RAID Alarm Rebuild Rate Auto compare Temp Management Load Default Elapse time Event Log 0 2 3 4 2 3 4 ESC 5
Microsoft Word - ws-chp06輸入輸出notes.doc
 6.1 輸 入 設 備 : 輸 入 設 備 Purpose 目 的 Applications 應 用 1 鍵 盤 keyboard 輸 入 文 本 text 文 書 處 理 ( 編 制 書 信 文 件 ) 程 式 編 寫 programming 讀 取 卡 背 磁 帶 上 的 資 料 讀 取 信 用 咭 資 料 讀 取 銀 行 ATM 卡 背 面 的 磁 帶 資 料 地 鐵 車 票 背 面 的 磁
1377_SNAP_Selection_Guide.fm
 I/O? PC OptoTerminal Form 377-040325 www.opto-tech.com.cn support@opto-tech.com.cn 2 www.opto-tech.com.cn support@opto-tech.com.cn Form 377-040325 4 3 2 ÎÒ 5 ioproject FactoryFloor ioproject FactoryFloor
Microsoft Word - ChineseSATII .doc
 中 文 SAT II 冯 瑶 一 什 么 是 SAT II 中 文 (SAT Subject Test in Chinese with Listening)? SAT Subject Test 是 美 国 大 学 理 事 会 (College Board) 为 美 国 高 中 生 举 办 的 全 国 性 专 科 标 准 测 试 考 生 的 成 绩 是 美 国 大 学 录 取 新 生 的 重 要 依
CL-68x00,00,00,00,00, CL-78x00,00,00,00,6000 Spindle 181mm mm Spindle bore 181mm is standard. 255,5 or 5mm is option. Chuck is optional. You ca
 CNC KINWA FLAT BED CNC LATHE CL-68x00 CL-68/CL-78 Series Swing 11, mm Between centers 00~7000mm Spindle bore 181, 255, 5, 5mm Spindle motor 60HP CL-68x00,00,00,00,00, CL-78x00,00,00,00,6000 Spindle 181mm
Pin Configurations Figure2. Pin Configuration of FS2012 (Top View) Table 1 Pin Description Pin Number Pin Name Description 1 GND 2 FB 3 SW Ground Pin.
 Table 1 Pin Description Pin Number Pin Name Description 1 GND 2 FB 3 SW Ground Pin.") Features Wide 3.6V to 32V Input Voltage Range Output Adjustable from 0.8V to 30V Maximum Duty Cycle 100% Minimum Drop Out 0.6V Fixed 300KHz Switching Frequency 12A Constant Output Current Capability Internal
Features Wide 3.6V to 32V Input Voltage Range Output Adjustable from 0.8V to 30V Maximum Duty Cycle 100% Minimum Drop Out 0.6V Fixed 300KHz Switching Frequency 12A Constant Output Current Capability Internal
8260
 Manual and Pilot Operated Spool Valves 6L Stainless Steel and Brass Bodies /4" to " NPT / / 6/6 Features Ideal for valve automation for the oil and gas market Reliable, robust design with high flow performance
OVLFx3C7_Series_A3_bgry-KB.pub
 (5 mm) x High brightness with well-defined spatial radiation patterns x U-resistant epoxy lens x Blue, green, red, yellow Product Photo Here Each device in the OLFx3C7 series is a high-intensity LED mounted
Chapter 2
 2 (Setup) ETAP PowerStation ETAP ETAP PowerStation PowerStation PowerPlot ODBC SQL Server Oracle SQL Server Oracle Windows SQL Server Oracle PowerStation PowerStation PowerStation PowerStation ETAP PowerStation
untitled
 DOP www.deltaww.com DOP (RS232/RS485/ RS422) DOP USB SD 30 100 PLC Best Performance Huma Beautiful Display Beneficial Feature 1 DOP LED 65536 2D n Machine Interface s 2 DOP-B DOP-B 4.3 inches Wide B03S211
Chapter 2 GIGA-BYTE TECHNOLOGY CO., LTD. ("GBT") GBT GBT GBT
 GBT GBT GBT") Chapter 2 GIGA-BYTE TECHNOLOGY CO., LTD. ("GBT") GBT GBT GBT 2003 6 5-1 - 1....3 1.1....3 1.2. GV-R9200...3 2....4 2.1....4 2.2....5 2.3....7 3....9 3.1. Windows 98/98SE Windows ME Windows XP 9 3.1.1....
Chapter 2 GIGA-BYTE TECHNOLOGY CO., LTD. ("GBT") GBT GBT GBT 2003 6 5-1 - 1....3 1.1....3 1.2. GV-R9200...3 2....4 2.1....4 2.2....5 2.3....7 3....9 3.1. Windows 98/98SE Windows ME Windows XP 9 3.1.1....
PCM-3386用户手册.doc
 PCM-3386 BBPC-4x86 10/100M PC/104 (Lanry technology Co. Ltd. Zhuhai) 38 1012836 (Address: Room 1012,Linhai Building,No. 38,west of Shihua Road,Zhuhai City,Guangdong Province,China) (post code)519015 (phone)0756-3366659