WHY 科学上网漫游指南 NOTE: 指南里的图片若无法显示, 请下载 PDF : WHY 战争即和平 自由即奴役 无知即力量 乔治 奥威尔
|
|
|
- 钜 从
- 5 years ago
- Views:
Transcription
1 Table of Contents WHY HOW :shadowsocks 服务端测速 speed test HOW :shadowsocks 客户端 Windows Linux MAC OS Android ios WHAT :PAC mode HOW : 浏览器代理插件 Firefox Chrome HOW :kcptun Dante SOCKS server HOW :ssh HOW :ocserv HOW :openwrt UCI ChinaDNS + Shadowsocks HOW : 收集 HOW : 赞助

2 WHY 科学上网漫游指南 NOTE: 指南里的图片若无法显示, 请下载 PDF : WHY 战争即和平 自由即奴役 无知即力量 乔治 奥威尔
3 WHY 图片出处 : 大友克洋 大炮之街 1995 WHAT 图片出处 : 深入理解 GFW: 内部结构 HOW 3

4 WHY 图片出处 胡武功 告别老西安 普通用户 介绍常见平台 ( Windows, Mac OS X, android, ios ) 科学上网方法 shadowsocks 客户端 配置 求知用户 配置浏览器 代理插件 实现自定义翻墙 搞机用户 介绍 shadowsocks 和 ocserv SSL VPN 服务 的搭建 openwrt + shadowsocks 路由器智能科学上网 4
5 WHY 5
6 HOW :shadowsocks 服务端 Shadowsocks 服务端 使用 shadowsocks-libev 软件包来部署 Shadowsocks 服务端 github 的 README.md 里面详细介绍了不同发行版的安装方法, 其他发行版可以参考 README.md 方法安装 install CentOS7 介绍 Redhat 系系统 ( CentOS7 / Fedora 25 ) 下安装 shadowsocks-libev 安装方法 : 手动编译 rpm 包 直接安装 copr 打包平台编译好的 rpm 二进制包 rpmbuild 自动动手源码打包, 不求人, 就几条命令 SPECS 文件增加 --disable-documentation 编译参数 不再依赖 asciidoc 和 xmlto 软件包 : +./configure --build=x86_64-redhat-linux-gnu --host=x86_64-redhat-linux-gn u \ --program-prefix= --disable-dependency-tracking --prefix=/usr --exec-prefix =/usr \ --bindir=/usr/bin --sbindir=/usr/sbin --sysconfdir=/etc --datadir=/usr/shar e \ --includedir=/usr/include --libdir=/usr/lib64 --libexecdir=/usr/libexec \ --localstatedir=/var --sharedstatedir=/var/lib --mandir=/usr/share/man \ --infodir=/usr/share/info --enable-shared --disable-documentation 创建打包目录 : 6
7 HOW :shadowsocks 服务端 mdkir -pv ~/rpmbuild/{specs,sources} 安装编译打包相关依赖包 : yum install -y gcc make openssl-devel rpm-build rpmdevtools 下载 SPEC 文件 : spec_url=' shadowsocks-libev.spec' wget -c -nv -t5 -T5 "$spec_url" -O ~/rpmbuild/specs/shadowsocks-libev.spec 更新为 X.X.X 版本号 : sed -i 's/^\(version:\s\+\).*$/\1x.x.x/g' ~/rpmbuild/specs/shadowsocks-libe v.spec 下载源码 : # spectool -l -A -R ~/rpmbuild/specs/shadowsocks-libev.spec Source0: r.gz # spectool -g -A -R ~/rpmbuild/specs/shadowsocks-libev.spec Getting to /root/rpmbuild/sources/v2.5.6.tar.gz % Total % Received % Xferd Average Speed Time Time Time Curre nt Dload Upload Total Spent Left Speed :--:-- 0:00:01 --:--: k k k 0 0:00:04 0:00:04 --:--: k 编译打包 : 7
8 HOW :shadowsocks 服务端 # rpmbuild -bb --clean ~/rpmbuild/specs/shadowsocks-libev.spec Checking for unpackaged file(s): /usr/lib/rpm/check-files /root/rpmbuild/bu ILDROOT/shadowsocks-libev el7.centos.x86_64 Wrote: /root/rpmbuild/rpms/x86_64/shadowsocks-libev el7.centos.x86_ 64.rpm Executing(%clean): /bin/sh -e /var/tmp/rpm-tmp.7m3lgu + umask cd /root/rpmbuild/build + cd shadowsocks-libev /usr/bin/rm -rf /root/rpmbuild/buildroot/shadowsocks-libev el7.ce ntos.x86_64 + exit 0 Executing(--clean): /bin/sh -e /var/tmp/rpm-tmp.teqr8h + umask cd /root/rpmbuild/build + rm -rf shadowsocks-libev exit 0 打包完成后 : # tree -F ~/rpmbuild /root/rpmbuild/ BUILD/ BUILDROOT/ RPMS/ x86_64/ shadowsocks-libev el7.centos.x86_64.rpm SOURCES/ v2.5.6.tar.gz SPECS/ shadowsocks-libev.spec SRPMS/ 7 directories, 3 files 查看 rpm 内容 : 8
9 HOW :shadowsocks 服务端 # rpm -qlp ~/rpmbuild/rpms/x86_64/shadowsocks-libev el7.centos.x86_ 64.rpm /etc/default/shadowsocks-libev /etc/shadowsocks-libev/config.json /usr/bin/ss-local /usr/bin/ss-manager /usr/bin/ss-nat /usr/bin/ss-redir /usr/bin/ss-server /usr/bin/ss-tunnel /usr/include/shadowsocks.h /usr/lib/systemd/system/shadowsocks-libev-local@.service /usr/lib/systemd/system/shadowsocks-libev-redir@.service /usr/lib/systemd/system/shadowsocks-libev-server@.service /usr/lib/systemd/system/shadowsocks-libev-tunnel@.service /usr/lib/systemd/system/shadowsocks-libev.service /usr/lib64/libshadowsocks-libev.la /usr/lib64/libshadowsocks-libev.so /usr/lib64/libshadowsocks-libev.so.2 /usr/lib64/libshadowsocks-libev.so /usr/lib64/pkgconfig /usr/lib64/pkgconfig/shadowsocks-libev.pc 安装 rpm 包 : rpm -Uvh ~/rpmbuild/rpms/x86_64/shadowsocks-libev el7.centos.x86_64.rpm binary 在 Fedora Project 的 copr 自动打包平台上创建了 RedHat 系发行版 ( Fedora / CentOS ) yum 仓库 : 编译好的 rpm 包位于 : 打好的 rpm 包可以直接使用 rpm 命令安装, 依赖 openssl 已系统自带 ( base 软件包组 ) : 9
10 HOW :shadowsocks 服务端 ## CentOS7 rpm -Uvh -libev/epel-7-x86_64/ shadowsocks-libev/shadowsocks-libev e l7.centos.x86_64.rpm ## Fedora 25 rpm -Uvh -libev/fedora-25-x86_64/ shadowsocks-libev/shadowsocks-libev fc25.x86_64.rpm 或是使用 yum 源安装 : ## CentOS7 repo_url=' repo/epel-7/outman-shadowsocks-libev-epel-7.repo' wget -c -nv -t5 -T5 "$repo_url" -O /etc/yum.repos.d/outman-shadowsocks-libe v.repo yum install -y shadowsocks-libev copr rpmbuild 创建 src.rpm 源码包和上面手动编译打包类似, 仅仅换用 -bs 参数 : # rpmbuild -bs --clean ~/rpmbuild/specs/shadowsocks-libev.spec Wrote: /root/rpmbuild/srpms/shadowsocks-libev el7.centos.src.rpm Executing(--clean): /bin/sh -e /var/tmp/rpm-tmp.rovgrv + umask cd /root/rpmbuild/build + rm -rf shadowsocks-libev exit 0 打好的 src.rpm 源码包仅包含 SPEC 文件和源码包 : # rpm -qlp ~/rpmbuild/srpms/shadowsocks-libev el7.centos.src.rpm shadowsocks-libev.spec v2.5.6.tar.gz 将 src.rpm 上传到 copr 平台即可完成打包 10
11 HOW :shadowsocks 服务端 config 查看 shadowsocks-libev 包含的配置文件和相关命令 : # rpm -ql shadowsocks-libev egrep 'etc bin service' /etc/default/shadowsocks-libev /etc/shadowsocks-libev/config.json /usr/bin/ss-local /usr/bin/ss-manager /usr/bin/ss-nat /usr/bin/ss-redir /usr/bin/ss-server /usr/bin/ss-tunnel /usr/lib/systemd/system/shadowsocks-libev.service 修改默认配置文件 : { } "server":" ", "server_port":8388, "local_port":1080, "password":"your_password", "timeout":60, "method":"rc4-md5" 设置 shadowsocks-libev 服务开机自启动 : # systemctl enable shadowsocks-libev Created symlink from /etc/systemd/system/multi-user.target.wants/shadowsock s-libev.service to /usr/lib/systemd/system/shadowsocks-libev.service. 启动 shadowsocks-libev 服务 : 11
12 HOW :shadowsocks 服务端 # systemctl start shadowsocks-libev # systemctl status shadowsocks-libev shadowsocks-libev.service - Shadowsocks-libev Default Server Service Loaded: loaded (/usr/lib/systemd/system/shadowsocks-libev.service; enabl ed; vendor preset: disabled) Active: active (running) since Tue :03:19 CST; 7min ago Docs: man:shadowsocks-libev(8) Main PID: (ss-server) CGroup: /system.slice/shadowsocks-libev.service /usr/bin/ss-server -a root -c /etc/shadowsocks-libev/con fig.json -u Sep 20 14:03:19 centos systemd[1]: Started Shadowsocks-libev Default Server Service. Sep 20 14:03:19 centos systemd[1]: Starting Shadowsocks-libev Default Serve r Service... Sep 20 14:03:19 centos ss-server[39565]: :03:19 INFO: UDP rela y enabled Sep 20 14:03:19 centos ss-server[39565]: :03:19 INFO: initiali zing ciphers... rc4-md5 Sep 20 14:03:19 centos ss-server[39565]: :03:19 INFO: tcp port reuse enabled Sep 20 14:03:19 centos ss-server[39565]: :03:19 INFO: udp port reuse enabled Sep 20 14:03:19 centos ss-server[39565]: :03:19 INFO: listenin g at :8388 确认服务进程和端口 : # pgrep -af ss-server /usr/bin/ss-server -a root -c /etc/shadowsocks-libev/config.json -u # netstat -lntup grep ss-server tcp : :* LISTEN 39565/ss-ser ver udp : :* 39565/ss-ser ver 12
13 HOW :shadowsocks 服务端 security OTA 服务端和客户端启用 OTA 一次认证特性 : One-time authentication (shortened as OTA) is a new experimental feature designed to improve the security against CCA. You should understand the protocol before reading this document. By default, the server that supports OTA should run in the compatible mode. OTA is only applied if the client's request header has a flag set. However, if the server switch on OTA explicitly, all clients must switch on OTA, otherwise connections will be denied. The authentication method is HMAC-SHA1 which has wide supports among all major platforms and fairly good speed. Shadowsocks 各分支的安全性 : Shadowsocks 开启 OTA : 关于 ShadowsocksR 和 Shadowsocks 的安全性 Shadowsocks 通过加入一次验证提高了对抗 CCA 的安全性, 各大 ports 已经陆续完成了支持 这里需要重申的是 Shadowsocks 的目标不是 100% bug-free 或 100% bullet-proof, 而是保证连接轻量快速的同时让主流攻击手段的成本高到一般无法实施 random port shadowsocks 多端口随机 远程 ss 服务端 : 13
14 HOW :shadowsocks 服务端 #ss-server 服务端 ( 假设你的目前的服务端 ss 端口已经监听在 23 端口 ): # 开始 iptables -t nat -A PREROUTING -p tcp -m multiport --dport 81:1023 -j REDIRE CT --to-ports 23 iptables -t nat -A PREROUTING -p udp -m multiport --dport 81:1023 -j REDIRE CT --to-ports 23 # 以下两条命令可选 service iptables save service iptables restart # 结束 本地 openwrt 路由器 : #ss-redir 本地端 ( 自行修改成自己服务器 ip): # 开始 iptables -t nat -I OUTPUT 1 -d p tcp --dport 23 -j DNAT -- to-destination : random iptables -t nat -I OUTPUT 1 -d p udp --dport 23 -j DNAT -- to-destination : random # 以下两条命令可选 service iptables save service iptables restart #openwrt #/etc/init.d/firewall restart # 结束 可使用 iptables -t nat -L -n --line-numbers 命令查看 nat 规则是否已经生效 network optimize TCP Fast Open 14
15 HOW :shadowsocks 服务端 net-speeder 对于海外高延时的 VPS 可以安装 net-speeder 来提速 net-speeder 作者写的原理介绍 : net-speeder 网速优化 / 加速器 ( 适用于高延迟不稳定链路加速 ) 15
16 HOW :shadowsocks 服务端 由于光速的局限性, 延迟会比较高 ( 即使光沿直线传播, 太平洋一个往返也要一百多毫秒 ) 并且由于距离较远, 途径路由跳数较多, 并且网络拥堵的原因 经常会发生丢包的情况 对于平时使用最广泛的 TCP 协议来讲, 发送端发出包后, 接收端会回复 ACK 表示自己收到了 用这种机制来保证可靠性 但对于高延迟链路来讲, 如果每发送一个包都等待应答, 那么大部分时间都在等待数据包到达, 而链路则空置了 为此一般会采用滑动窗口技术 即在窗口满之前, 发送端一直发送包, 然后收到应答后将确认收到的包从窗口中移除 这样可以提高链路利用率 TCP 还有一个特性则是拥塞控制 当发送端检测到链路发生丢包时, 则会主动缩小窗口大小以减慢发送速度, 避免拥塞 不过对于跳数较多的链路来讲, 只要有一个路由不够稳定丢包, 就会被发送端判断为拥塞, 从而影响网络速度 为了解决丢包问题, 最简单粗暴的方法就是双倍发送, 即同一份数据包发送两份 这样的话在服务器带宽充足情况下, 丢包率会平方级降低 这种方式下, 直接优点是降低丢包率, 直接缺点是耗费双倍流量 一些延伸影响是更容易触发快速恢复逻辑, 避免了丢包时窗口缩减过快 一定程度也能提高网络速度 最近比较忙, 空闲时间做了一个最简单的程序, 试用效果很好, 在一台 VPS 上测试后发现, 未开启时单线程下载 ssh 管道速度在十几 K 级别 开启后可以达到平均 300KB+ 的速度 效果非常明显 但对于不加速就可以跑满带宽的类型来讲 ( 多线程下载 ), 开启后反而由于多出来的无效流量, 导致速度减半 所以对于多线程 / 高速链路, 这个方案是不适合的 目前版本是最简单的逻辑, 未来会进行细化 ( 主动触发快速恢复 快速重传等 ), 降低流量浪费, 提升加速效果 目前程序起名 net-speeder 相对于修改协议栈来讲, 由于后者需要重新升级编译内核, 使用用户态程序部署更方便, 稳定性更高, 兼容性更好 缺点则是性能开销稍大和自由度有损失 总体比较起来, 个人使用还是使用用户态程序更合适一些, 特别是在虚拟机中使用 (OpenVZ,LXC 等虚拟机无法自己定制内核 ) install 安装方法参考 github 的 README.md 即可, 编译完成后, 放在后台运行即可 : 16
17 HOW :shadowsocks 服务端 # /root/net-speeder-master/net_speeder venet0 "ip" 2>&1 > /dev/null & # pgrep -af 'net_speeder venet0' /root/net-speeder-master/net_speeder venet0 ip crontab net_speeder 程序运行一段时间会崩溃, 所以写了个 crontab 自动检查启动 : $ cat /root/net-speeder-master/net_speeder.cron.sh #!/bin/bash /bin/pgrep -af 'net_speeder venet0' /root/net-speeder-master/net_speeder venet0 "ip" 2>&1 > /dev/null & crontab 任务每隔 15 分钟运行一次 : # crontab -l MAILTO='' */15 * * * * bash /root/net-speeder-master/net_speeder.cron.sh troubleshooting ERROR: Failed to open DNS resolver socket 如果系统禁用 ipv6 但是 /etc/resolv.conf 还有 ipv6 的 DNS 地址会导致服务无法启动 : 17
18 HOW :shadowsocks 服务端 # cat /etc/resolv.conf nameserver nameserver 2001:4860:4860::8844 nameserver 2001:4860:4860::8888 # ss-server -c config.json :47:39 INFO: using tcp fast open :47:39 INFO: initializing ciphers... rc4-md :47:39 ERROR: Failed to open DNS resolver socket 系统已经禁用 IPV6 : # ip a 1: lo: <LOOPBACK,UP,LOWER_UP> mtu qdisc noqueue state UNKNOWN qlen 1 link/loopback 00:00:00:00:00:00 brd 00:00:00:00:00:00 inet /8 scope host lo valid_lft forever preferred_lft forever 2: eth0: <BROADCAST,MULTICAST,UP,LOWER_UP> mtu 1500 qdisc pfifo_fast state UP qlen 1000 link/ether x4:x1:x4:xa:6a:x0 brd ff:ff:ff:ff:ff:ff inet /24 brd scope global eth0 valid_lft forever preferred_lft forever 修改 /etc/resolv.conf 配置文件, 重启服务, 测试恢复正常 : # cat /etc/resolv.conf nameserver # chattr +i /etc/resolv.conf # ss-server -c config.json :51:28 INFO: using tcp fast open :51:28 INFO: initializing ciphers... rc4-md :51:28 INFO: tcp port reuse enabled :51:28 INFO: listening at :
19 测速 speed test HOW : 测速 speed test traceroute 手机上下载 BestTrace app 测试连接翻墙服务节点的路由跳数, 并绘制地图 : 1. 路由跳数 2. 地图 : 是否有绕路 Download 下载 官方网站下载 : Windows / Mac OS X 客户端 android / ios 客户端 google play 下载 : apple store 下载 : 下图是连接新加坡节点的路由地图 : 19

20 测速 speed test 20

21 测速 speed test 带宽 还有比 YouTube 1080p 更有说服力的么? 简单, 粗暴, 最有效 : 视频右键菜单 详细统计信息 查看视频下载速率 iftop Linux 可以使用 iftop 命令监控连接的带宽 : sudo iftop -i wlan0 -B -F /24 -B 设置 Byte 为单位 默认是 bit -F 过滤指定网段按大写 P 键, 即可暂停, 方便查看流量监控 : 21
22 测速 speed test Display paused 4KB 488KB 732KB 977KB 1.19MB => fedora.lan 596KB 366KB 295KB <= 11.4KB 6.12KB 5.02KB TX: cum: 78.8MB peak: 5rates: 596KB 366KB 295KB RX: 1.63MB 11.4KB 11.4KB 6.12KB 5.02KB TOTAL: 80.4MB 607KB 607KB 373KB 300KB 22
23 HOW :shadowsocks 客户端 HOW :shadowsocks 客户端 下面主要介绍各个系统下 shadowsocks 客户端的使用 : Windows Linux Mac OS X Android 23
24 Windows shadowsocks on Windows 注意 : 请不要使用 360 / 搜狗 / QQ... 等国内浏览器, 它们收集用户访问的 URL 上报国家 (GFW) 请使用 chrome 或 firefox 等开源浏览器 下载 download shadowsocks github release 下载地址 : 项目 master 分支 : 解压 Shadowsocks-X.X.X.zip 得到 Shadowsocks.exe 可执行程序, 绿色无需安装, 直接运行.NET Framework 依赖 shadowsocks 之后的版本依赖.NET Framework 及以上版本如果运行提示报错, 从官网下载.NET Framework 离线安装包 : Microsoft.NET Framework (Offline Installer) for Windows 7 SP Version: File Name: NDP462-KB x86-x64-AllOS-ENU.exe File Size: 59.1 MB Date Published: 安装.NET Framework 4.5.X / 4.6.X 24
25 Windows hash check 请牢记 XcodeGhost 教训 github 每个版本都带有校验值, 下面是很早之前基于 的示例 版本之后 github 提供 hash 值, 下面是之前在 Linux 下载的 版本 MD5 哈希校验 : $ md5sum Shadowsocks-win zip 78aa11456e6616b4f419f2f95ebd8efb Shadowsocks-win zip $ md5sum Shadowsocks.exe e8fed3539e5e0e1866a59c444265db57 Shadowsocks.exe Windows 上 Ctrl +R 运行 powershell 使用 CertUtil 命令校验 : PS C:\Users\SM> cd D:\soft PS D:\soft> CertUtil -hashfile.\shadowsocks-win zip MD5 MD5 哈希 ( 文件.\Shadowsocks-win zip): 78 aa e b4 f4 19 f2 f9 5e bd 8e fb CertUtil: -hashfile 命令成功完成 PS D:\soft> CertUtil -hashfile.\shadowsocks.exe MD5 MD5 哈希 ( 文件.\Shadowsocks.exe): e8 fe d3 53 9e 5e 0e a5 9c db 57 CertUtil: -hashfile 命令成功完成 CertUtil 命令支持的哈稀算法 : MD2 MD4 MD5 SHA1 SHA256 SHA384 SHA512 CertUtil -hashfile pathtofiletocheck [HashAlgorithm] CertUtil -hashfile C:\TEMP\MyDataFile.img MD5 25


26 Windows HOWTO 1. 运行 shadowsocks 2. 配置代理服务 3. 连接代理服务 4. 开启系统代理 5. 科学上网 ing 6. 从 GFWList 更新本地 PAC 文件 运行 shadowsocks 解压下载好的文件 : 第一次运行 Shadowsocks.exe 会自动打开 编辑服务器 窗口 : 26

27 Windows 在通知栏图标区域会出现纸飞机图标 : 右键 纸飞机图标会弹出 主菜单 : 配置 代理服务 shadowsocks 服务端配置文件格式 : 27
 根据上面的")
28 Windows { } "server":" ", ## 服务器 IP 地址 "server_port":37210, ## 服务器端口 "password":"v_vl_fuck_gfw", ## 服务器密码 "method":"rc4-md5", ## 加密方案 "timeout":600, "fast_open": true, "local_port":7070 ## 本地代理端口 ( 默认 1080 即可 ) 根据上面的 shadowsocks 服务器端配置, 填写对应客户端配置 : shadowsocks 服务端配置 "server":" " "server_port":37210 "password":"v_vl_fuck_gfw" "method":"rc4-md5" windows 客户端对应配置项服务器 IP 地址服务器端口服务器密码加密方案 "local_port":7070 本地代理端口 ( 不用修改, 默认 1080 即可 ) 连接 代理服务 填写好配置后, 在 服务器 菜单中可以看到刚创建提交的代理服务配置 : 选中菜单中的代理服务器配置, 确认出现对号 [ ] 后, 表示与服务器建立连接 28

 如果浏览器安装了代理插件, 需要禁用代理插件或把插件设置为使用系统代理")
29 Windows 启用 系统代理 启动 系统代理 : 点击主菜单的 启用系统代理 选项, 连接远程服务端 : 若不启动 系统代理 上一步成功连接代理服务器后 shadowsocks 仅创建 SOCKS5 代理 系统代理与 SOCKS5 代理区别 : 系统代理浏览器的访问请求全部由 shadowsocks 创建的系统代理处理浏览器默认不需要任何设置, 也无需安装代理插件 (Firefox 除外 ) 如果浏览器安装了代理插件, 需要禁用代理插件或把插件设置为使用系统代理 SOCKS5 代理 29
30 Windows 若不 启用系统代理 shadowsocks 成功连接代理服务器后, 仅创建了 SOCKS5 代理 浏览器需要安装代理插件或设置浏览器的代理配置, 才能科学上网 测试 科学上网 如果代理成功, 可以打开 Google 首页 Feeling Your Lucky : 更新 PAC 文件 更新 PAC 文件, 点击主菜单的 PAC 选择 从 GFWlist 更新本地 PAC 选项 : 30

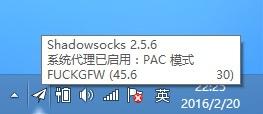
31 Windows 状态及故障诊断 鼠标悬停在通知栏图标会显示当前代理状态 : 若代理失败, 选择 服务器 菜单中的 编辑服务器 选项, 重新确认配置 31


32 Windows 网络连接超时, 中断导致代理失败, 查看日志的详细信息, 根据情况重启代理 : security hash 检查工具 微软自家的校验工具 Microsoft File Checksum Integrity Verifier ( fciv ) 上一次更新是 : 32

33 Windows 图片出处 : HashTab 右键属性查看文件 hash : version 事件 : shadowsocks 作者在警方压力下删除项目 : 原维护者最后一次更新的版本是 2.5.6, 随后 github issue 出现关于新版本信任的讨论 : 及之后版本是否可以信任? FOR 强迫症 : 还有安全顾虑的可到 virustotal 上传文件进行病毒扫描 : 33
34 Windows 现在 shadowsocks 已经更新至 版本, 可以自行下载升级
35 Linux HOW : Linux shadowsocks on GNU Linux GNU Linux 用户需要借助浏览器代理插件科学漫游 : 1. 安装 shadowsocks-libev 或 python-shadowsocks 软件包 2. 执行 ss-local -c ss.json 命令创建 SOCKS5 代理 3. 配置浏览器代理插件后 have fun... 软件包 shadowsocks-libev python-shadowsocks SS 客户端命令 ss-local -c ss.json sslocal -c ss.json 浏览器代理插件 Firefox 代理插件 :FoxyProxy Standard Chrome 代理插件 :Proxy SwitchyOmega 35
36 MAC OS shadowsocks on Mac OS X 下载 download github release 下载地址 : Mac 新版客户端 : Mac 旧版客户端 : 旧版 版本下载 :ShadowsocksX dmg 旧版没法更新 PAC 文件列表 (GFWList) 手动解决方法请参考 issue 212 : MD5 hash 请牢记 XcodeGhost 教训 打开终端应用, 使用 md5 命令校验下载文件的 MD5 哈希值 : $ md5 Downloads/ShadowsocksX dmg MD5 (Downloads/ShadowsocksX dmg) = c3406e8d4a5009efaa74d3a37b53fed8 HOWTO 1. 运行 ShadowsocksX 2. 配置代理服务器 3. 连接代理服务器 4. 开启系统代理 5. 测试科学上网 6. 从 GFWList 更新 PAC 文件 36
37 MAC OS 运行 ShadowsocksX 运行 ShadowsocksX 后, 会在 menubar 显示 纸飞机 图标 默认图标为灰色表示 系统代理 未启动 编辑 代理服务器 点击 纸飞机 选择 服务器 菜单, 然后点击 打开服务器设定 选项 : 弹出 服务器设定 窗口 : 37

38 MAC OS 根据服务端配置, 填写对应的客户端配置 : shadowsocks 服务端配置 "server":" " "server_port":37210 "password":"v_vl_fuck_gfw" "method":"rc4-md5" mac 客户端对应配置项服务器 IP 地址服务器端口服务器密码加密方案 连接 代理服务器 选中 服务器 菜单创建的代理服务器配置, 出现对号 表示与代理服务器建立连接成功与代理服务器建立连接后, 便会创建 SOCKS5 代理 使用 lsof -Pn -i4 grep LISTEN 命令可以查看端口 38
 系统代理 启动前后 主菜单 第一行代理状态和第二行运行开关选项变化 : 菜单 启动代理前 启动代理后 menubar 图标颜色 灰色 黑色 第一行 : 系统代理状态 Shadowsocks: 关闭")
39 MAC OS 开启 系统代理 点击 主菜单 第二行 打开 shadowsocks 启用 系统代理 : 1. 第一行 : 系统代理运行状态, 显示 关闭 状态 2. 第二行 : 系统代理运行开关, 默认系统代理没有启动 ( 图标为灰色 ) 系统代理 启动前后 主菜单 第一行代理状态和第二行运行开关选项变化 : 菜单 启动代理前 启动代理后 menubar 图标颜色 灰色 黑色 第一行 : 系统代理状态 Shadowsocks: 关闭 Shadowsocks: 打开 第二行 : 代理开关 打开 Shadowsocks 关闭 Shadowsocks 系统代理 启动前 : 39

40 MAC OS 系统代理 启动后 : 系统代理启动后 menubar 的 纸飞机 图标也变为黑色 : 系统代理 vs SOCK5 代理 系统代理 与 SOCKS5 代理 区别 : 40

41 MAC OS 系统代理 shadowsocks 创建的 系统代理 将自动接管浏览器的访问全部请求浏览器默认不需要任何设置, 也无需安装代理插件 (Firefox 除外 ) 如果浏览器安装了代理插件, 需要禁用代理插件或将代理插件设置为使用系统代理 SOCKS5 代理若不 启用系统代理 shadowsocks 成功连接代理服务器后, 仅创建了 SOCKS5 代理 浏览器需要安装代理插件并设置 shadowsocks 创建的 SOCKS5 代理端口, 才能科学上网 测试 科学上网 如果系统代理运行成功, 就可以访问 google 如果失败, 请检查 服务器配置 是否正确 : 41
42 MAC OS 更新 PAC 文件 最后在主菜单中点击 从 GFWList 更新 PAC 文件 更新翻墙列表 : SOCKS5 代理 Mac 下 shadowsocks 客户端启用的端口 : $ lsof -itcp -stcp:listen -n -P COMMAND PID USER FD TYPE DEVICE SIZE/OFF NODE NAME privoxy 526 i 3u IPv4 0xa3a011e7 0t0 TCP :1087 (LIS TEN) ## 系统代理 ss-local 537 i 5u IPv4 0xa322b3d7 0t0 TCP :1086 (LIS TEN) Shadowsoc 759 i 4u IPv4 0xa3f1dadf 0t0 TCP *:8090 (LISTEN) Shadowsoc 759 i 9u IPv4 0xa3a5aff7 0t0 TCP :1080 (LIS TEN) ## socks5 端口 使用 curl --socks : 命令确认 SOCKS5 代理是否正常可 用 : 42
43 MAC OS $ curl --socks : ## 指定 socks5 代理参数 IP : 地址 : 美国加利福尼亚 数据二 : 美国 洛杉矶 URL : $ curl IP : 地址 : 中国北京 数据二 : 北京市 联通 URL : 终端启动 chrome 指定 SOCKS5 代理参数 : open -a "Google Chrome" --args \ --proxy-server="socks5:// :1080" \ --host-resolver-rules="map * , EXCLUDE localhost" 然后就可以在应用商店下载 Proxy SwitchyOmega 插件 本地端口 旧版 ShadowsocksX 创建的 SOCKS5 代理 端口默认是 1080 : $ grep 127 ~/.ShadowsocksX/gfwlist.js var proxy = "SOCKS :1080; SOCKS :1080; DIRECT;"; 新版 ShadowsocksX-NG 创建的 SOCKS5 代理 端口默认改成 1086 升级后别忘了修改代 理插件对应的端口 : 43
44 MAC OS $ cat "/Users/yourname/Library/Application Support/ShadowsocksX-NG/ss-local -config.json" { } "method" : "rc4-md5", "server" : "IP", "password" : "...", "local_address" : " ", "server_port" :..., "auth" : false, "timeout" : 60, "local_port" : 1086 也可以自行修改 ~/.ShadowsocksX/gfwlist.js 配置文件, 自定义 SOCKS5 代理 端口 44
45 Android shadowsocks-android 客户端使用 Download 下载 shadowsocks-android 是开源 APP 可以从 github 下载 APK 安装文件 : Google Play 下载地址 : setting 设置 点击 配置文件 选项, 创建新的配置文件, 根据服务端配置修改下表的 4 处选项 : shadowsocks 服务端配置 "server":" " "server_port":37210 "password":"v_vl_fuck_gfw" "method":"rc4-md5" Android 客户端对应配置项 服务器 远程端口 密码 加密方法 本地端口 选项默认即可, 不用修改 45

46 Android 46
47 Android 设置完成后, 点击右上角的 飞机 图标, 连接到服务器后 : 1. 图标变为 绿色 2. 手机通知栏出现 钥匙 图标 47
48 Android 48
49 Android 49
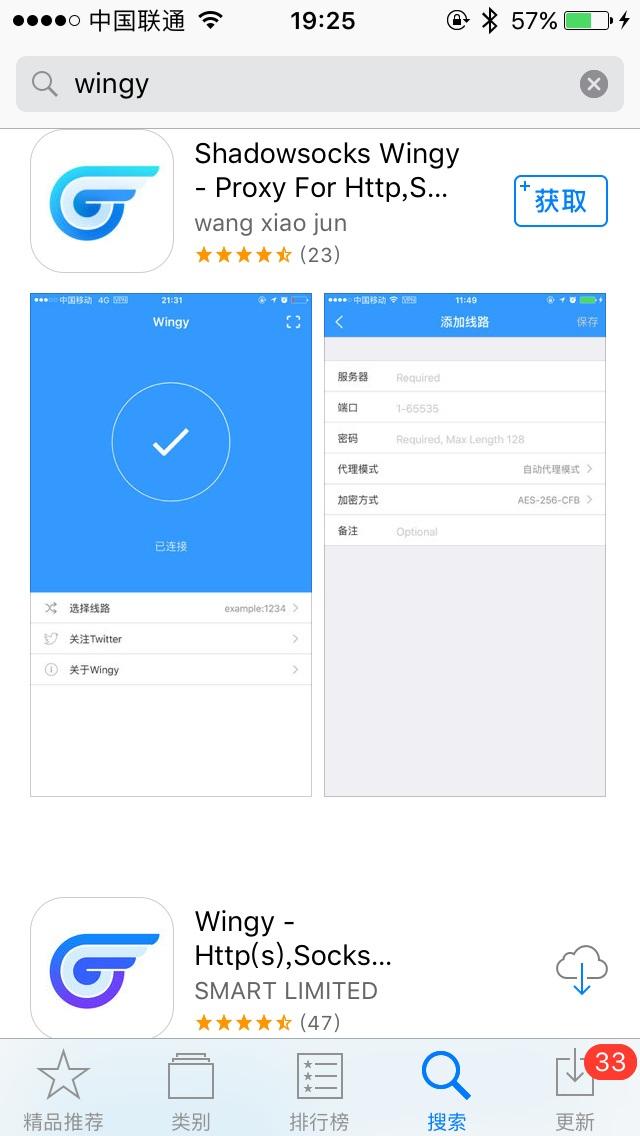
50 ios ios 代理 APP 推荐 wingy : 免费, 配置简单, 功能齐全 wingy wingy 开发者 twitter 帐号 : wingy 是基于 NEKit 开发的网络工具 : 下载 目前有 2 个版本主要是针对不用的 ios 版本, 请根据 APP 兼容性描述下载正确的版本 : 系统版本 开发者 对应 APP 下载链接 ios 9.3+ wang xiao jun ios SMART LIMITED 第一个蓝色图标 APP 适配 ios 9.3 开发者为 wang xiao jun 第二个紫色图标 APP 适配 ios 10.0 开发者为 SMART LIMITED 50
51 ios 51
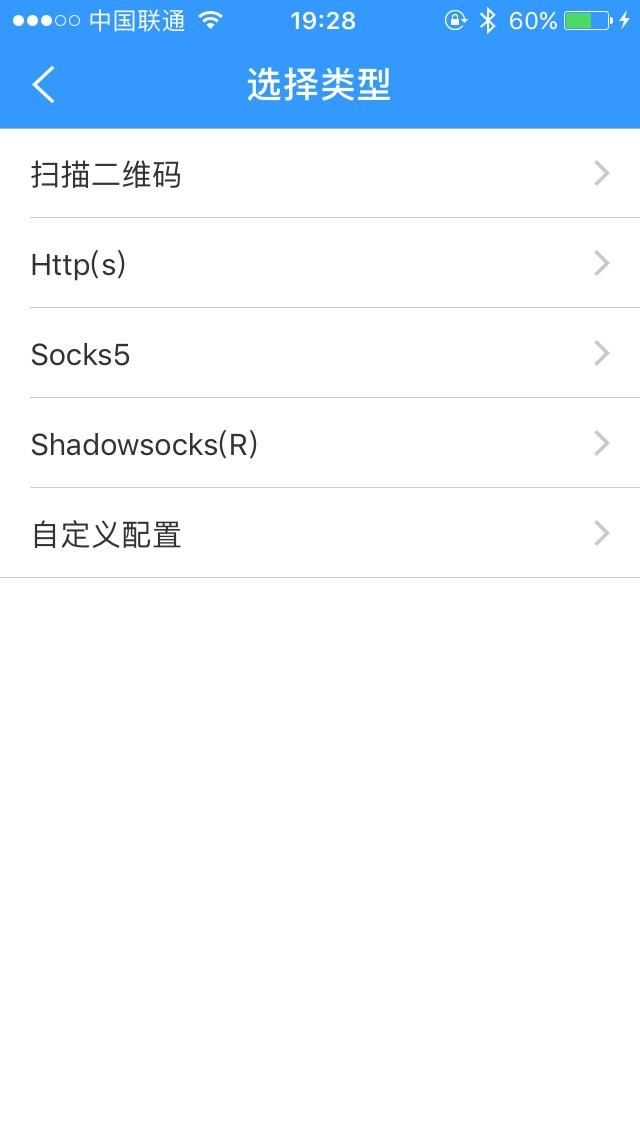
52 ios 添加代理 安装好后打开 APP 点击右上角加号 [+]: 添加代理配置, 代理类型选择 Shadowsocks(R) : 52
53 ios 53
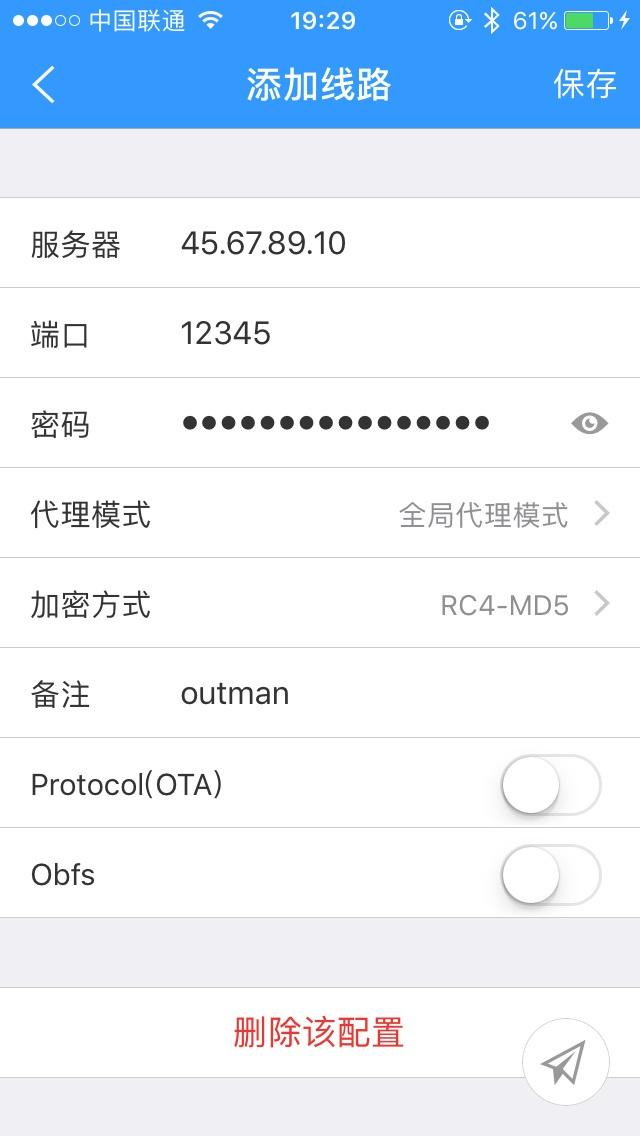
54 ios 配置 shadowsocks 按照 shadowsocks 帐号信息填写配置, 注意代理模式使用 全局代理模式 : 54
55 ios 55
56 ios 创建 VPN 配置 保存代理配置后, 点击 wingy 的开关按钮 第一次启动会弹出是否允许 APP 在 设置 中添加 VPN 配置的对话框 : Allow 允许 ( 左 侧 ) 56
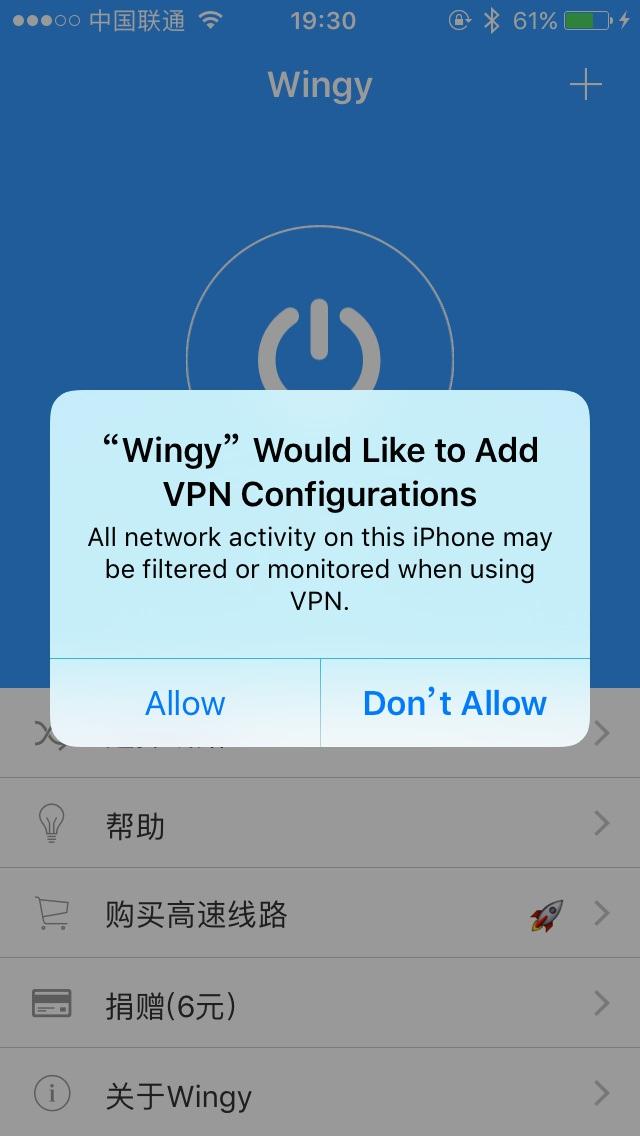
57 ios 57
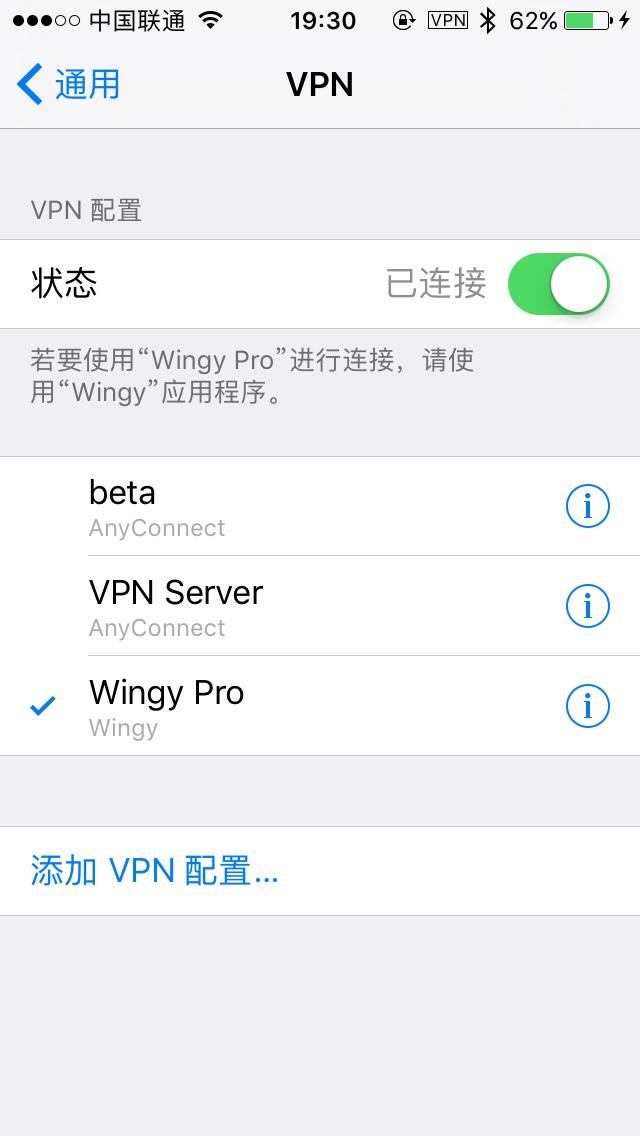
58 ios 之后会自动跳转到 设置 VPN 下, 并提示输入解锁密码二次确认 成功之后 设置 VPN 下出现 wingy 创建的 VPN 配置信息 : 58
59 ios 59
60 ios 成功连接服务器之后 wingy 的开关按钮会变为已连接 状态栏也出现 VPN 图标 : 60

61 ios 61
62 ios 此时就可以科学上网漫游了 : 62

63 ios 63
64 ios 添加 widget wingy 可以添加 widget 来的快速 开关 打开或关闭代理 : 64

65 ios 65
66 ios Potatso APP Store : Mume VPN 基于 Potatso 开发的 Shadowsocks 协议 VPN 客户端 APP Store :
67 WHAT :PAC mode PAC 代理模式 翻墙原理就是通过 shadowsocks 创建的 SOCKS5 代理来访问被和谐的网站 代理模式 shadowsocks 成功连接代理服务器后会创建一个 SOCKS5 代理 : :1080 系统代理 是由 shadowsocks 客户端在 SOCKS5 上层实现的代理功能 系统代理 支持 2 种代理模式 : 1. 自动代理模式 ( 即 PAC 模式, 默认 ) 2. 全局代理模式 PAC 代理模式 PAC 维基百科 : 默认 shadowsocks 启用 系统代理 后使用的是 PAC 代理模式 PAC 代理模式 当浏览器访问某个网站时, 会去匹配 PAC 配置文件 pac.txt 里 URL 列表 如果能匹配到 PAC 文件配置的 URL 就会使用 SOCKS5 代理 访问该网站 ; 否则不使用代理, 直接访问网站 既节省 ss 流量, 也会提高国内网站的访问速度, 不然访问国内网站要绕到国外代理再绕回来 全局代理模式 全局代理模式所有请求全部走 SOCKS5 代理 访问国内网站时, 将会先绕到国外的代理服务器, 然后在绕回来, 南辕北辙了 当访问的网站没有包含在 PAC 文件的匹配规则列表时, 可以临时开启全局代理进行访问 菜单选项 67

68 WHAT :PAC mode Windows 下点击主菜单中的 系统代理模式 可以查看 : Mac OS X 点击 纸飞机 图标, 主菜单的 自动代理模式 即为 PAC 模式 : 编辑 PAC 规则 从 GFWList 同步的 PAC 规则后, 会在本地生成的 PAC 文件 : 68
69 WHAT :PAC mode 系统 PAC 文件路径 Windows pac.txt ( 与 Shadowsocks.exe 同级目录 ) Mac OS X ~/.ShadowsocksX/gfwlist.js 菜单中选择 编辑 GFWList 的用户规则 选项, 创建自定义的匹配规则 : 69
70 HOW : 浏览器代理插件 HOW : 浏览器代理插件 shadowsocks 客户端有两种代理选项 : 代理类型 代理模式 SOCKS5 代理 SOCKS5 ( 关闭 系统代理 后 SOCKS5 代理仍在运行 ) 系统代理 PAC 自动代理模式 global 全局代理模式 启用 系统代理 后 IE Chrome 浏览器无需安装代理插件, 浏览器默认设置使用的系统代理就可以通过 shadowsocks 创建的 系统代理 科学上网了 使用 系统代理 时需要禁用浏览器的代理插件, 或将其设置为使用系统代理如果使用浏览器代理插件上网, 可以关闭 shadowsocks 的系统代理 70
71 HOW : 浏览器代理插件 然后配置浏览器的代理插件通过 shadowsocks 创建的 SOCKS5 代理来科学上网 71


72 Firefox Firefox 配置 Firefox 浏览器 FoxyProxy 插件 + GFWlist 订阅自动代理上网 使用 Firefox + FoxyProxy 插件代理上网, 可以关闭 shadowsocks 的系统代理仅使用 SOCKS5 代理即可 : 设置 Firefox 网络代理连接方式为 : 不使用代理 即通过 Foxyproxy 管理代理 高级 网络 连接 设置 72

73 Firefox 安装 FoxyProxy 插件 : 73

74 Firefox 配置 FoxyProxy 选项, 点击右侧 新建代理服务器 按钮 : 74

75 Firefox 设置新建代理的 常规 标签页的配置选项 : 配置选项 操作步骤 代理名称 使用此代理时的图标颜色 名字随便起, 此处使用 shadowsocks 修改颜色, 方便区分访问时所使用的代理 75

76 Firefox 设置 代理服务器细节 标签页的配置选项 : 配置选项 操作步骤 主机或 IP 地址 端口 1080 SOCKS 代理 SOCKS v5 76

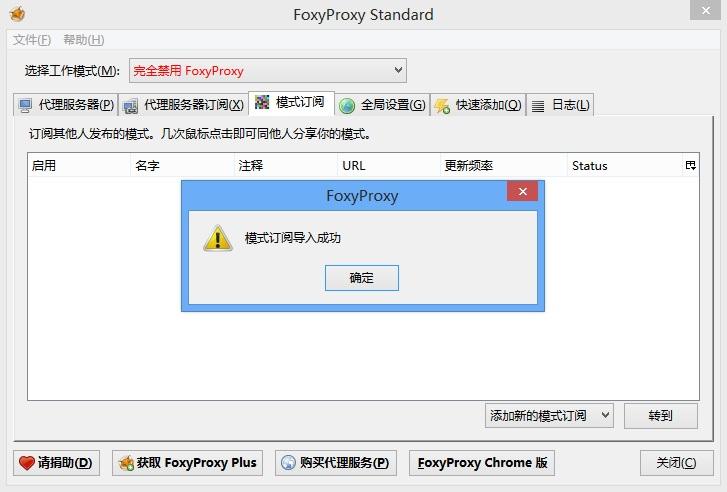
77 Firefox 设置好代理服务器后, 选择 FoxyProxy 的 模式订阅 标签页, 点击右下角的 转到 按 钮, 新建模式订阅 : 77

78 Firefox 配置选项 操作步骤 订阅名称 订阅网址 代理服务器 GFWlist 点击 添加代理服务器 按钮, 选择上面创建的 shadowsocks 代理 更新频率 960 分钟 ( 16 小时 ) Format AutoProxy Obfuscation Base64 78

79 Firefox 79
80 Firefox 最后修改 选择工作模式 : 使用基于其预定义模板的代理服务器就可以匹配 GFWlist 规则自 动代理上网 : 80

81 Firefox 81
82 Firefox 图文教程参考 : 火狐浏览器 + SS 翻墙设置教程 (Firefox+Foxyproxy+Shadowsocks) Firefox 浏览器扩展 FoxyProxy 使用说明 Firefox 配置使用 shadowsocks 服务 firefox 下 foxyproy 使用 82

83 Chrome Chrome Chrome 代理插件 :Proxy SwitchyOmega HOWTO 1. 翻墙从 google store 安装插件 2. 配置 SOCKS5 代理服务器 3. 配置下载 GFWlist 规则, 通过插件匹配规则自动代理上网第一步需要先访问 google store 下载 Proxy SwitchyOmega 插件 : 通过 chrome 命令启动浏览器后全局通过 SOCKS5 代理上网 :Forcing Chrome to Use Socks5 Proxy google-chrome --proxy-server="socks5:// :1080" \ --host-resolver-rules="map * , EXCLUDE localhost" 安装好 Proxy SwitchyOmega 插件之后, 点击图标选择 选项 菜单 : 83
84 Chrome 修改 情景模式 中的 proxy 配置项 : 代理服务器选项 配置 代理协议 SOCKS5 代理服务器 代理端口 1080 最后点击 应用选项 按钮保存配置 继续修改 情景模式 中的 auto switch 配置项 : 配置项规则列表规则规则列表格式规则列表网址立即更新情景模式 操作步骤 匹配规则列表的请求选择使用 proxy 代理默认情景模式选择 直接连接 勾选 AutoProxy 点击按钮更新 gfwlist 84
85 Chrome 然后点击 应用选项 按钮保存配置 点击图标选择 auto switch 菜单即可匹配 GFWlist 规则自动代理上网 : proxy 情景模式 auto switch 代理模式 全局代理, 所有访问请求全部通过 SOCKS5 代理 自动代理, 根据 GFWlist 规则匹配自动代理上网 85
86 Chrome 可以参考下面几篇图文教程 : 科学上网 使用 dai li (Shadowsocks) 之后一些网站无法访问的解决办法 shadowsocks 科学上网 shadowsocks 配合 SwitchyOmega 科学上网 86
87 HOW :kcptun KCPTUN option kcptun 的参数都源自于 kcp 原始协议 : 工作模式 : int ikcp_nodelay(ikcpcb *kcp, int nodelay, int interval, int resend, int nc ) 参数 nodelay interval resend nc 作用 是否启用 nodelay 模式, 0 不启用 ; 1 启用 协议内部工作的 interval 单位毫秒, 比如 10ms 或者 20ms 快速重传模式, 默认 0 关闭, 可以设置 2 ( 2 次 ACK 跨越将会直接重传 ) 是否关闭流控, 默认是 0 代表不关闭 1 代表关闭 normal 普通模式 : ikcp_nodelay(kcp, 0, 40, 0, 0) fast 极速模式 : ikcp_nodelay(kcp, 1, 10, 2, 1) 最大窗口 : int ikcp_wndsize(ikcpcb *kcp, int sndwnd, int rcvwnd); 该调用将会设置协议的最大发送窗口和最大接收窗口大小, 默认为 32 这个可以理解为 TCP 的 SND_BUF 和 RCV_BUF 只不过单位不一样 SND/RCV_BUF 单位是字节, 这个单位是包 87

88 HOW :kcptun 服务端与客户端必须一致的参数 含义 --crypt --key --nocomp --datashard --parityshard 加密算法密钥压缩数据前向纠错前向纠错 其余参数两边可独立设定 --nodelay=0 的多等一下, 具体是多等多久呢, 多等 1/8 RTT nodelay 是控制超时重传的时候是否再多等一会 inteval 是超时重传的间隔, 和下面的 resend 控制的快速重传没有关系 resend 只是控制快速重传, 超过 resend 间隔没收到的包会立刻重传, 无需等到 inteval 到了再发送试下来 的参数,RepeatSegs 明显降低如果 interval 和 repeat 有关, 那么 fastresend 是最大的嫌疑, 因为就这个不受时间控制 nodelay 这个参数俺一直都是关闭的, 感觉太激进, 时常突破窗口设置阈值 interval 估计和设计初衷有关,( 流速 流量 ), 另一个帖子网友也提过这个问题, 就是过大的 interval 会造成传输曲线不稳, 这在 routeros 里看的也很清楚, 例如 20M 的阈值, 那么可能 5M 10M 20M 这样跳, 88
89 HOW :kcptun 而小的 interval 则一直压着阈值上限走, 感觉像是单次的传输 VS 多次传输 FEC 前向纠错 在两端同时设定 -datashard n 和 -parityshard m 参数搭配 : 1. fast + FEC(5,5) 2. fast2 + FEC(10,3) 3. fast2 + FEC(0,0) 注意 : 为了发挥 FEC 最佳效果, 设置 parityshard/(parity+datashard) > packet loss 比如 5/(5+5) > 30% 窗口调整 简易窗口自我调优方法 : 第一步 : 同时在两端逐步增大 CLIENT 的 rcvwnd 和 SERVER 的 sndwnd 第二步 : 尝试下载, 观察如果带宽利用率 ( 服务器 + 客户端两端都要观察 ) 接近物理带宽则停止, 否则跳转到第一步 计算带宽 在不丢包的情况下, 有最大 --rcvwnd 个数据包从网络上向你传输, 以平均数据包大小 avgsize 计算 : network_cap = rcvwnd*avgsize 数据流量, 这个值再除以 ping 值 rtt 等于最大带宽使用量 : max_bandwidth = network_cap/rtt = rcvwnd*avgsize/rtt 举例, 假设 rcvwnd = 1024, avgsize = 1KB, rtt = 400ms 则 : max_bandwidth = 1024 * 1KB / 400ms = 2.5MB/s ~= 25Mbps 89
90 HOW :kcptun 注意 : 以上计算不包括前向纠错的数据量 前向纠错是最大带宽量的一个固定比例增加 : max_bandwidth_fec = max_bandwidth*(datashard+parityshard)/datashard 举例, 设 datashard = 10, partiyshard = 3 则 : max_bandwidth_fec = max_bandwidth * (10 + 3) /10 = 1.3*max_bandwidth = 1.3 * 25Mbps = 32.5Mbps flow 会消耗 5 倍以上流量 1. ISP 对 UDP 丢包极高, 例如 50% 2. 服务器, 客户端本身的带宽较低, 可以适当调低 sndwnd /rcvwnd 3. 可以尝试 -dscp 46 参数降低丢包率 FEC 前向纠错默认参数就会多消耗 30%( 可以调整 ) KCP 协议头部平均多消耗 5% ( 无法调整 ) 加上丢包 2 倍还算正常多半是 sndwnd/rcvwnd 太高, 你可以在 client 先降低到 128 然后慢慢再加, 边加边观察 服务端是 -mtu crypt none -nocomp -dscp 46 -sndwnd rcvwnd mode fast2 客户端是 -crypt none -mtu sndwnd 32 -rcvwnd 128 -mode fast2 -dscp 46 - nocomp 100M 肯定是超卖, 实际一定达不到, 否则不会出现这种程度的重传为什么要降低客户端的 rcvwnd 呢, 我觉得应该降低服务器端的 sndwnd 来调节速度, 客户端的 rcvwnd 应该保持一个较大的值, 服务器发来的数据照单全收带宽不够就不要使用大窗口, 量力而行 取二者的小者 90
91 HOW :kcptun 我的配置 server --crypt none --mtu sndwnd rcvwnd dscp 46 -mode f ast2 client --crypt none --mtu sndwnd rcvwnd 512 -dscp 46 -mode fas t2 实际消耗流量不到两倍两边 -datashard 0 -parityshard 0 还可以更低, 不过响应会慢, 看你的接受程度手动参数设定探讨 策略 1: 通过超时重传 + 快速重传, 响应速度优先 ( 最大化响应时间 ): -mode manual -nodelay 1 -resend 2 -nc 1 -interval 20 策略 2: 仅仅通过超时重传, 带宽效率优先 ( 有效载比优先 ) -mode manual -nodelay 1 -resend 0 -nc 1 -interval 40 或 -mode manual -nodelay 0 -resend 0 -nc 1 -interval 20 策略 3: 尽可能通过 FEC 纠删, 最大化传输速度 ( 推荐 ): -mode fast -datashard 5 -parityshard 5 响应速度, 传输带宽, 高载荷比三者是跷跷板 : 比如响应速度, 一个数据包发出后, 判断对方是否接收到了, 是等待一个 RTT 时间没有收到 ACK 就重发, 还是说要再等等看 真实的情况始终未知 -nodelay 1 就是不多等了, 结果 ACK 晚到了一点点, 就多发包了 ; -nodelay 0 就是已经等了 RTT 后, 再等等看, 那么如果再等了还等不到, 这个时间就浪费了, 响应时间就慢了, 整体速度也拖慢了 乐观主义还是悲观主义? 根据香农定理 : 91
92 HOW :kcptun 1. 信道容量由带宽及信噪比决定, 增大带宽 提高信噪比可以增大信道容量 2. 在要求的信道容量一定的情况下, 提高信噪比可以降低带宽的需求, 增加带宽可以降低信噪比的需求 3. 香农公式给出了信道容量的极限, 也就是说, 实际无线制式中单信道容量不可能超过该极限, 只能尽量接近该极限 在卷积编码条件下, 实际信道容量离香农极限还差 3dB; 在 Turbo 编码的条件下, 接近了香农极限 1. 可以理解为, 高丢包率 == 高噪音 2. 可以理解为, 固定丢包率下增大发送带宽 == 更高的传输成功率 ( 比如通过 FEC) 固定传输带宽下降低丢包率 == 更高的传输成功率 ( 比如通过 DSCP) 策略 1 可以理解为, 我非常悲观的判断包一旦超过 RTT 大概率丢失了, 通过一切手段尽快重新发送策略 3 也可以理解为, 我假定我的纠错包能全部把丢失的包还原出来, 每 5 个包,2 个纠错包, 小于 2/7 的均匀丢包率下 ( <28% ), 必定能还原出来, 完全不需要重传策略 1 对于网页访问这种突发性请求, 查询较为友好策略 2 较为中庸策略 3 对于视频流这种较为友好 200Mbps 联通, 日本 vultr, ping 136ms, UDP 丢包 30% 左右 : server -mode manual -nodelay 0 -resend 0 -nc 1 -interval 40 -dscp 46 -nocom p -mtu crypt aes-128 -datashard 70 -parityshard 30 client -mode manual -nodelay 0 -resend 0 -nc 1 -interval 40 -nocomp -dscp 4 6 -mtu crypt aes-128 -datashard 70 -parityshard 30 解释一下另一个问题 : --datashard 70 --parityshard 30 和 --datashard 7 -- parityshard 3 区别回答 : 1. 如果完全随机丢包 ( 在时域上均匀分布 ) 这两者没有差别, 完全等价 2. 如果在时域上不均匀, 丢包一会儿有一会儿没有, 这两者就有差别 70/30 的配置更又可能把数据纠错出来, 7/3 的配置很容易全丢无法恢复选择在 的这个大区间整体丢包 30% 还是在 7+3 的这个小区间整体丢包 30%? 只有试试... FEC 对于大文件传输, 比如用卫星传输 8K 电影到各个影院是非常合适的, 对应 fast.com 测速 92
93 HOW :kcptun 对于突发性, 交互性, 试探性的请求, 快速重传更合适, 对应网页对于 y2b 这种, 只要过了最初的 的点, 会慢慢快起来如果有要快又要突发性好, 那就只能以浪费带宽为代价了 x86 平台推荐默认的 aes(aes-256) 如果性能不行, 考虑 aes192, aes128 其他平台可以考虑 blowfish, cast5, twofish 如果性能还是不行, 考虑 tea, salsa20 另外, 如果承载的数据本身已经加密 salsa20 足以 默认的 kcp 协议, 丢一次包, 退让一次 丢的越多等得越长, 这个是必须做的退让 假如 30s 超时 rtt* ( ) > 30s 就是断线时间 一两句话说不清楚 : fastretrans : 快速重传, 数据包乱序, 中间丢包, fastack,fastresend, earlyretrans: 没有后续包要发送了, 无法触发快速重传阈值, 采用的重传, 参考 Tail loss probe lostseg: 以上条件都不满足, 数据包等待超时后也没到 产生的重传 retranssegs : = fast + early + lost 低丢包网络可以考虑关闭 FEC 关于断流的分析及解决方法 如果对流量不敏感, 客户端性能又足够的话建议始终配置 FEC 对于时常会抽风的网络情况来说 FEC 是一贴良药 我现在一般情况下使用 FEC(30,15), 如果抽风实在严重就改成 FEC(5,5) 基本上可以非常稳定地使用了 FEC(0,0) 在网络情况好的时候确实速度很快且更省流量, 但几乎每到晚高峰都得调整, 太麻烦了 93
94 HOW :kcptun start-stop-daemon -S -q -b -m -p /tmp/var/kcp.pid -x /koolshare/bin/client_ linux_arm5 -- -l :1091 -r $ss_basic_server:$ss_basic_kcp_port $ss_ basic_kcp_parameter 回馈, 简易调节法, 有需要看过来 下载 : 客户端以 rcvwnd 也就是接收为主, 这里设定 256 上传 : 客户端的发送窗口 sndwnd 相对来说就简单点, 一般都是一个固定比例比如上传是下载的 1/3 等等其实窗口大小等同于 tcp 的 sndbuf, rcvbuf, 决定最大可同时发送的数据 : 最大可用带宽 = min( 发送窗口大小, 远端接收窗口大小 ) / rtt 解决了 qos 类型里面要丢大包, 默认是丢 50, 小包是丢 10 有同样困扰的朋友可以试试 一直都按照应该丢小包或者甚至不丢包的思路走, 今天瞎填个 100, 居然把问题解决了 关于 rcvwnd 和 sndwnd 参数 rtt 延迟通常反映了拥塞, 保持 wnd 不变是比较利他的方式 特别是共享宽带 troubleshoot session scavenged 客户端 session scavenged 服务端 broken pipe : server 端没响应 : 防火墙开放 UDP iptables -A INPUT -p tcp -m tcp --dport 443 -j ACCEPT iptables -I INPUT -p udp -m udp --dport 443 -j ACCEPT 94
95 HOW :kcptun 把客户端和服务器端的下面这三个参数逐渐减小 : --rcvwnd sndwnd mtu 500 Kcp 用着用着偶尔就会断开 { 伪解决方案 } : UDP 大流量被运营商自动封这个 ip 的 udp 连接尝试服务端和客户端降低 : MTU=512 对于 UDP 不能使用 nmap 进行批量测试, 因为 UDP 没有三次握手, 从而没有返回包 Server-- > Client 只能使用 echo server 对单一端口进行手动测试随机化端口方案 : 不过这个不是针对每个 packet 随机化端口, 而是针对每一个 connection 随机化端口 client : iptables -t nat -I OUTPUT -d <vps_ip> -p udp --dport <kcp_server_port> -j D NAT --to-destination <vps_ip>: random server : iptables -t nat -A PREROUTING -p udp -m multiport --dport 4000:5000 -j REDI RECT --to-ports <kcp_server_port> 一直断, 所以用了上面的随机端口方案, 但发现, 封的时候不是封服务器的 UDP 而且是对宽带本身的 UDP 进出进行封堵, 重新拨号换 IP 后就能连上了 UDP 上行流量间歇性被封, 下行流量是通的封锁策略又变为封 UDP 下行流量,UDP 上行流量没被封会不会是路由器本身的问题, 比如这个参数太小 net.core.rmem_max =
96 HOW :kcptun 启动的时候, 有没有出现 setsocket buffer 报错 kcptun-raw 使用发 raw socket 和 libev 远端通信为伪 TCP 报文, 重新实现了 kcptun 的最基本功能 ( 未实现加密和纠错等, 仍在测试 ), 只需一个程序即可, 不需要再另外建立 UDP over TCP 隧道, 不容易 卡住 为缓解部分 ISP 对 UDP 断流的问题, 通过伪造 TCP 报文, 实现了简化版的 kcptun 客户端和服务端进程的直接通信方式为带伪 TCP 报头的 IP packet, 通过 raw socket 实现, 需要通过 iptables 绕过内核协议栈 那是 ISP 对 UDP 的封锁有的地区的运营商喜欢封 UDP( 流量一大直接切断 ), 很多 issues 已经反映了这个问题近两日出现断流现象 ( 小的 MTU?): 96
97 Dante SOCKS server dante dante 是款简单的 socks 代理程序, 可以实现透明代理, 配置简单 : Dante is now available. This is a maintenance release with various bug fixes and no new server features 更新的 dante 版本在 Linux 仅修复了 CFLAGS 导致的编译错误 : configure check 'prototypes' FAILED with CFLAGS '-grecord-gcc-switches' 之前其他的 patch 还得继续用 -_-; rpmbuild 安装 rpmbuild 编译环境以及 dante 编译依赖 : yum install -y autoconf automake binutils gcc make rpm-build rpmdevtools yum install -y bison flex glibc-devel libtool pam-devel patch 源码编译安装需要 3 处修改 : 1. socksify 环境变量配置补丁 2. HAVE_SENDBUF_IOCTL 补丁 3. AM_CONFIG_HEADER 宏升级 patch1 修复 socksify 环境变量, 不然安装 rpm 包提示 libsocks.so.0 依赖库缺失错误 : 97
98 Dante SOCKS server # rpm -ivh dante el7.centos.x86_64.rpm error: Failed dependencies: libsocks.so.0()(64bit) is needed by dante el7.centos.x86_64 patch 文件参考 gentoo ebuild 补丁 : patch2 另一个 patch 是修改 HAVE_SENDBUF_IOCTL 参考 gentoo, suse 的补丁 : HAVE_SENDBUF_IOCTL.patch sendbuf_macro.patch patch3 还有 autoconf 已经弃用 AM_CONFIG_HEADER 宏, 替换为 AC_CONFIG_HEADERS : error: 'AM_CONFIG_HEADER': this macro is obsolete. You should use the 'AC_CONFIG_HEADERS' macro instead. touch acinclude.m4 sed -i -e 's:am_config_header:ac_config_headers:' configure.ac autoreconf --force --install --verbose sed -i -e 's:am_config_header:ac_config_headers:' configure.ac configure 98
99 Dante SOCKS server 参考官网的精简版参数以及 gentoo 和 suse 打包的参数, 最终 : %configure --disable-static --enable-shared --with-pic --with-libc=$dante_l IBC \ --enable-preload --enable-clientdl --enable-serverdl --enable-drt-fallb ack \ --without-gssapi --without-libwrap --without-upnp --without-glibc-secur e \ --sysconfdir=/etc/dante --with-socks-conf=/etc/dante/socks.conf \ --with-sockd-conf=/etc/dante/sockd.conf 官网 Prod 版本的二进制编译参数, 主要用作 socks 代理, 去掉扩展参数 : --without-gssapi --without-upnp (UPnP support disabled) --without-libwrap (libwrap support disabled) 源码中自带的 dante-1.4.2/specs/dante.spec 编译参数 : %configure --without-glibc-secure %{_extraflags} gentoo ebuild 的编译依赖以及编译参数 : 99
100 Dante SOCKS server IUSE="debug kerberos pam selinux static-libs tcpd upnp" CDEPEND=" kerberos? ( virtual/krb5 ) pam? ( virtual/pam ) tcpd? ( sys-apps/tcp-wrappers ) upnp? ( net-libs/miniupnpc:= ) userland_gnu? ( virtual/shadow ) " DEPEND="${CDEPEND} sys-devel/bison sys-devel/flex " econf \ --with-socks-conf="${eprefix}"/etc/socks/socks.conf \ --with-sockd-conf="${eprefix}"/etc/socks/sockd.conf \ --enable-preload \ --enable-clientdl \ --enable-serverdl \ --enable-drt-fallback \ --with-libc=libc.so.6 \ $(use_enable debug) \ $(use_with kerberos gssapi) \ $(use_with pam) \ $(use_with upnp) \ $(use_enable static-libs static) \ $(use_with tcpd libwrap) opensuse 的 spec 文 件 : 100
101 Dante SOCKS server %build DANTELIBC=`find /%{_lib}/ -maxdepth 1 -iname "libc.so.*"` %configure \ --disable-static \ --with-pic \ --enable-preload \ --enable-clientdl \ --enable-serverdl \ --enable-drt-fallback \ --enable-shared \ --with-libc=$dantelibc 最终完成的 spec 文件 : 1. 下载 spec 文件到 ~/rpmbuild/specs/ 目录 : 2. 下载补丁和配置文件到 ~/rpmbuild/sources/ 目录 3. 使用 spectool 下载源码 4. 使用 rpmbuild 打包编译所需的源码 : 101
102 Dante SOCKS server # mkdir -pv ~/rpmbuild/{sources,specs} ## 下载 spec, patch 等文件到相关路径 # spectool -l -A -R ~/rpmbuild/specs/dante spec Source0: Source1: sockd.service Source2: sockd.init Patch0: dante sendbuf_macro.patch Patch1: dante socksify.patch # spectool -g -A -R ~/rpmbuild/specs/dante spec Getting to /root/rpmbuil d/sources/dante tar.gz % Total % Received % Xferd Average Speed Time Time Time Cur rent Dload Upload Total Spent Left Spe ed k k k 0 0:00:01 0:00:01 --:--: k # spectool -g -A -R ~/rpmbuild/specs/dante spec # rpmbuild -bb --clean ~/rpmbuild/specs/dante.spec install 编译完成后, 编译好的 rpm 包位于 ~/rpmbuild/rpms/x86_64/ 目录 yum install ~/rpmbuild/rpms/x86_64/dante el7.centos.x86_64.rpm 也可以使用 yum 直接安装在 Fedora Copr 平台上为 CentOS7 打包的 rpm 包 : yum install el-7-x86_64/ dante/dante el7.centos.x86_64.rpm 102
103 Dante SOCKS server dante 运行依赖 glibc-devel 提供的 libdl.so 库 安装好后使用 ldd 即可查看依赖库 : # ldd /usr/sbin/sockd linux-vdso.so.1 => (0x00007ffd67f44000) libm.so.6 => /lib64/libm.so.6 (0x00007fa2a ) libpam.so.0 => /lib64/libpam.so.0 (0x00007fa2a7ff9000) libcrypt.so.1 => /lib64/libcrypt.so.1 (0x00007fa2a7dc1000) libdl.so.2 => /lib64/libdl.so.2 (0x00007fa2a7bbd000) libc.so.6 => /lib64/libc.so.6 (0x00007fa2a77fc000) /lib64/ld-linux-x86-64.so.2 (0x00007fa2a ) libaudit.so.1 => /lib64/libaudit.so.1 (0x00007fa2a75d3000) libfreebl3.so => /lib64/libfreebl3.so (0x00007fa2a73d0000) libcap-ng.so.0 => /lib64/libcap-ng.so.0 (0x00007fa2a71ca000) # rpm -qf /lib64/libdl.so glibc-devel el7_3.1.x86_64 config 修改 sockd 服务配置文件 /etc/dante/sockd.conf 并启动 SOCKS5 代理 : 103
104 Dante SOCKS server logoutput: stderr internal: port = 1080 external: ## <-- 公网 IP clientmethod: none socksmethod: none user.privileged: root user.unprivileged: nobody client pass { from: /0 to: /0 log: error } client block { from: /0 to: /8 log: error } socks pass { from: /0 to: /0 command: bind connect udpassociate } socks pass { from: /0 to: /0 command: bindreply udpreply log: error } socks block { from: /0 to: /8 command: bind connect udpassociate log: connect error } 启动服务 : systemctl enable sockd systemctl start sockd 确认服务端口 : 104
105 Dante SOCKS server # netstat -lntpu Proto Recv-Q Send-Q Local Address Foreign Address State PID/Prog ram name tcp : :* LISTEN 9070/soc kd KCPTUN 使用 kcptun 服务端连接 sockd 服务提供的 SOCKS 代理, 提供给客户端连接使用 创建随机密码 : # cat /dev/urandom tr -cd '[:alnum:]' head -c16 paste NLe6avQOKIhpwxuM 将启动 kcptun 服务脚本 sockd.sh 放到 server_linux_amd64 : 105
106 Dante SOCKS server #!/bin/bash real_path=$(readlink -e $0) exec_path=$(dirname "$real_path") exec_file="${exec_path}/server_linux_amd64" log=/tmp/kcptun.socks.log key='nle6avqokihpwxum' pid=$(pgrep -f -- "--key $key") if [ -n "$pid" ] then kill "$pid" rm -f "$log" fi "$exec_file" --nocomp --crypt salsa20 --key "$key" -t " :1080" -l " :10101" \ --mode manual --nodelay 0 --interval 20 --resend 2 --nc 1 --mtu dscp 46 \ --datashard 64 --parityshard 16 --log "$log" & pgrep -af -- "--key $key kcptun 服务启动后, 可以看到对应端口 : # netstat -lnup Proto Recv-Q Send-Q Local Address Foreign Address State PID/Progra m name udp : :* 9037/./ser ver_linux 在 Linux 客户端可以使用 kcptun 客户端就可以在本地创建 SOCKS5 代理了 : 106
107 Dante SOCKS server #!/bin/bash real_path=$(readlink -e $0) exec_path=$(dirname "$real_path") exec_file="${exec_path}/client_linux_amd64" pass_word="nle6avqokihpwxum" IP= log=/tmp/kcptun.socks.log pid=$(pgrep -f -- "--key $pass_word") if [ -n "$pid" ] then kill "$pid" rm -f /tmp/kcptun.log fi "$exec_file" --nocomp --crypt salsa20 --key "$pass_word" -r "${IP}:10101" - l ":9090" \ --mode manual --nodelay 0 --interval 20 --resend 2 --nc 1 --mtu dscp 46 \ --sndwnd rcvwnd datashard 64 --parityshard 16 --log "$log" & kcptun 客户端启动后出现 9090 端口的 SOCKS5 代理, 配合浏览器代理插件就可以科学上网 了 : # netstat -lntp Proto Recv-Q Send-Q Local Address Foreign Address State PID/Progr am name tcp : :* LISTEN 1898/clie nt_linux_a 107
108 HOW :ssh SOCKS5 socks5 proxy 代理 : 动态端口转发 ( Dynamic port forwardings ) ssh -NTfnq -D 7070 $user@$hosname 参数 作用 -D 7070 建立动态端口转发, 监听在本地 7070 端口 -f 将 ssh 转到后台运行, 即认证之后 ssh 自动以后台运行 不在输出信息 -n 将 stdio 重定向到 /dev/null 与 -f 配合使用 -N 不执行脚本或命令, 即通知 sshd 不运行设定的 shell 通常与 -f 连用 -T 不分配 TTY 只做代理用 -q 安静模式, 不输出错误 / 警告信息 108
109 HOW :ocserv ocserv (OpenConnect VPN Server) 官网 : OpenConnect server (ocserv) is an SSL VPN server. Its purpose is to be a secure, small, fast and configurable VPN server. It implements the OpenConnect SSL VPN protocol, and has also (currently experimental) compatibility with clients using the AnyConnect SSL VPN protocol. The OpenConnect protocol provides a dual TCP/UDP VPN channel, and uses the standard IETF security protocols to secure it. The server is implemented primarily for the GNU/Linux platform but its code is designed to be portable to other UNIX variants as well. 依赖 :VPS 需要支持创建 VPN 的 TUN 设备 any other platform supporting TUN/TAP devices and on which GnuTLS runs. HOWTO 安装 ocserv 软件包, 修改 ocserv 配置文件生成 CA 用来签发客户端证书申请 Let's Encrypt SSL 服务端证书手机安装 anyconnect APP 配置, 下载客户端证书, 配置即可 Let's Encrypt 使用 certbot 生成和续签 Let's Encrypt SSL 证书 : install 109
110 HOW :ocserv 从 EPEL 源中安装 certbot 软件包 : # yum install epel-release # yum install certbot Dependencies Resolved =========================================================================== ===== Package Arch Version Repository Size =========================================================================== ===== Installing: certbot noarch el7 epel 16 k Installing for dependencies: dialog x86_ el7 base 2 08 k pyopenssl x86_ el7 base 1 33 k python-cffi x86_ el7 base 1 31 k python-cryptography x86_ el7 base 4 35 k python-enum34 noarch el7 base 52 k python-ndg_httpsclient noarch el7 epel 43 k python-parsedatetime noarch el7 epel 61 k python-ply noarch el7 base 1 23 k python-psutil x86_ el7 epel 1 14 k python-pycparser noarch el7 base 1 04 k python-requests noarch el7_1 base 94 k 110
111 HOW :ocserv python-urllib3 noarch el7_1 base 1 00 k python-zope-component noarch 1: el7 epel 1 10 k python-zope-event noarch el7 epel 79 k python-zope-interface x86_ el7 base 1 38 k python2-acme noarch el7 epel 1 62 k python2-certbot noarch el7 epel 3 46 k python2-configargparse noarch el7 epel 28 k python2-dialog noarch el7 epel 94 k python2-mock noarch el7 epel 92 k python2-pyrfc3339 noarch el7 epel 13 k pytz noarch 2012d-5.el7 base 38 k Transaction Summary =========================================================================== ===== Install 1 Package (+22 Dependent packages) Total download size: 2.7 M Installed size: 13 M 软件包 certbot 包含的相关命令 : # rpm -ql certbot grep bin /usr/bin/certbot /usr/bin/letsencrypt howto 111
112 HOW :ocserv 帮助手册 : # certbot --help all usage: certbot [SUBCOMMAND] [options] [-d domain] [-d domain]... Certbot can obtain and install HTTPS/TLS/SSL certificates. By default, it will attempt to use a webserver both for obtaining and installing the cert. Major SUBCOMMANDS are: (default) run certonly install renew revoke register rollback stall config_changes on plugins Obtain & install a cert in your current webserver Obtain cert, but do not install it (aka "auth") Install a previously obtained cert in a server Renew previously obtained certs that are near expiry Revoke a previously obtained certificate Perform tasks related to registering with the CA Rollback server configuration changes made during in Show changes made to server config during installati Display information about installed plugins 默认只有两个插件 webroot 和 standalone : # certbot plugins * webroot Description: Place files in webroot directory Interfaces: IAuthenticator, IPlugin Entry point: webroot = certbot.plugins.webroot:authenticator * standalone Description: Automatically use a temporary webserver Interfaces: IAuthenticator, IPlugin Entry point: standalone = certbot.plugins.standalone:authenticator 插件 webroot 需要搭配 nginx / apache 等 web 服务使用, 此处使用 standalone 生成 证书即可 : 注意 : 112
113 HOW :ocserv 执行命令之前关闭 nginx 或 ocserv 等占用 80 和 443 端口的服务, 不然 standalone 模式会报错 # netstat -lntpu egrep '80 443' tcp : :* LISTEN 12245/nginx: master # service nginx stop Redirecting to /bin/systemctl stop nginx.service # netstat -lntpu egrep '80 443' 执行 standalone 模式 : certbot certonly --standalone \ -- user@example.com \ -d example.com -d \ --user-agent "" --noninteractive \ --text --verbose --debug 如果顺利将在 /etc/letsencrypt/live/example.com 目录下生成相关证书 : 113
114 HOW :ocserv # certbot certonly --standalone -- bob@outwall.com -d outwall.com --us er-agent "" --agree-tos --noninteractive --text --verbose --debug certbot.main:saving debug log to /var/log/letsencrypt/letsencrypt.log requests.packages.urllib3.connectionpool:starting new HTTPS connection (1): acme-v01.api.letsencrypt.org certbot.auth_handler:performing the following challenges: certbot.auth_handler:tls-sni-01 challenge for outwall.com certbot.auth_handler:waiting for verification... certbot.auth_handler:cleaning up challenges certbot.crypto_util:generating key (2048 bits): /etc/letsencrypt/keys/0001_ key-certbot.pem certbot.crypto_util:creating CSR: /etc/letsencrypt/csr/0001_csr-certbot.pem certbot.reporter:reporting to user: Congratulations! Your certificate and c hain have been saved at /etc/letsencrypt/live/outwall.com/fullchain.pem. Yo ur cert will expire on To obtain a new or tweaked version of th is certificate in the future, simply run certbot again. To non-interactivel y renew *all* of your certificates, run "certbot renew" certbot.reporter:reporting to user: If you like Certbot, please consider su pporting our work by: Donating to ISRG / Let's Encrypt: Donating to EFF: IMPORTANT NOTES: - Congratulations! Your certificate and chain have been saved at /etc/letsencrypt/live/outwall.com/fullchain.pem. Your cert will expire on To obtain a new or tweaked version of this certificate in the future, simply run certbot again. To non-interactively renew *all* of your certificates, run "certbot renew" - If you like Certbot, please consider supporting our work by: Donating to ISRG / Let's Encrypt: Donating to EFF: 对应目录树 : 114
115 HOW :ocserv # tree /etc/letsencrypt/ /etc/letsencrypt/ accounts acme-v01.api.letsencrypt.org directory 3b24e8b936a d76401ee376cd meta.json private_key.json regr.json archive outwall.com cert1.pem chain1.pem fullchain1.pem privkey1.pem csr 0001_csr-certbot.pem keys 0001_key-certbot.pem live outwall.com cert.pem ->../../archive/outwall.com/cert1.pem chain.pem ->../../archive/outwall.com/chain1.pem fullchain.pem ->../../archive/outwall.com/fullchain1.pem privkey.pem ->../../archive/outwall.com/privkey1.pem root.pem trusted.pem renewal outwall.com.conf 编辑 ocserv 配置文件 /etc/ocserv/ocserv.conf 修改 server-cert 和 server-key 参 数 : server-cert = /etc/letsencrypt/live/example.com/fullchain.pem server-key = /etc/letsencrypt/live/example.com/privkey.pem 重启服务 : 115
116 HOW :ocserv service ocserv restart staging 注意 : --staging 是用来测试申请证书的环境的测试模式 : --test-cert, --staging Use the staging server to obtain test (invalid) certs; equivalent to --server ( default: False) certbot renewal --dry-run 116
117 HOW :ocserv # certbot certonly --standalone -- bob@outwall.com -d outwall.com --us er-agent "" --agree-tos --noninteractive --text --verbose --test-cert --deb ug :42:31,990:INFO:certbot.main:Saving debug log to /var/log/lets encrypt/letsencrypt.log :42:33,107:INFO:requests.packages.urllib3.connectionpool:Start ing new HTTPS connection (1): acme-staging.api.letsencrypt.org :42:33,371:INFO:certbot.auth_handler:Performing the following challenges: :42:33,371:INFO:certbot.auth_handler:tls-sni-01 challenge for outwall.com :42:33,425:INFO:certbot.auth_handler:Waiting for verification :42:36,570:INFO:certbot.auth_handler:Cleaning up challenges :42:36,767:INFO:certbot.crypto_util:Generating key (2048 bits) : /etc/letsencrypt/keys/0000_key-certbot.pem :42:36,773:INFO:certbot.crypto_util:Creating CSR: /etc/letsenc rypt/csr/0000_csr-certbot.pem :42:37,130:INFO:certbot.reporter:Reporting to user: Congratula tions! Your certificate and chain have been saved at /etc/letsencrypt/live/ outwall.com/fullchain.pem. Your cert will expire on To obtain a new or tweaked version of this certificate in the future, simply run certb ot again. To non-interactively renew *all* of your certificates, run "certb ot renew" IMPORTANT NOTES: - Congratulations! Your certificate and chain have been saved at /etc/letsencrypt/live/outwall.com/fullchain.pem. Your cert will expire on To obtain a new or tweaked version of this certificate in the future, simply run certbot again. To non-interactively renew *all* of your certificates, run "certbot renew" /etc/letsencrypt/renewal/outwall.com.conf 配置文件 : 117
118 HOW :ocserv # renew_before_expiry = 30 days version = cert = /etc/letsencrypt/live/outwall.com/cert.pem privkey = /etc/letsencrypt/live/outwall.com/privkey.pem chain = /etc/letsencrypt/live/outwall.com/chain.pem fullchain = /etc/letsencrypt/live/outwall.com/fullchain.pem # Options used in the renewal process [renewalparams] authenticator = standalone installer = None account =... user_agent = "" server = TODO: certbot renew --renew-hook restart_ocerv.sh 在证书续期后重启 ocerv 服务 : --renew-hook RENEW_HOOK Command to be run in a shell once for each successfully renewed certificate.for this command, the shell variable $RENEWED_LINEAGE will point to theconfig live subdirectory containing the new certs and keys; the shell variable $RENEWED_DOMAINS will contain a space-delimited list of renewed cert domains (default: None) 魔兽世界 TCP 和 UDP 端 TCP UPD 3724 ( 一般用不到, 语音聊天 ) 游戏服务器 TCP 3724 登录服务器 TCP 8085 Mozilla SSL Configuration Generator 118
119 HOW :ocserv nginx.conf file comment cert.pem chain.pem server cert only intermediates ssl_certificate fullchain.pem server cert + intermediates ssl_certificate_key privkey.pem private key Qualys SSL Labs 提供了全面的 SSL 安全性测试, 填写你的网站域名, 给自己的 HTTPS 配置打个分 server { listen 80; server_name return } server { listen 443 ssl; server_name root /disk2/wordpress; # certs sent to the client in SERVER HELLO are concatenated in ssl_cert ificate ssl_certificate /etc/letsencrypt/live/ in.pem; ssl_certificate_key /etc/letsencrypt/live/ vkey.pem; ssl_session_timeout 1d; ssl_session_cache shared:ssl:50m; ssl_session_tickets off; # Diffie-Hellman parameter for DHE ciphersuites, recommended 2048 bits ssl_dhparam /etc/ssl/certs/dhparam.pem; # intermediate configuration. tweak to your needs. ssl_protocols TLSv1 TLSv1.1 TLSv1.2; ssl_ciphers 'ECDHE-RSA-AES128-GCM-SHA256:ECDHE-ECDSA-AES128-GCM-SHA256: 119
120 HOW :ocserv ECDHE-RSA-AES256-GCM-SHA384:ECDHE-ECDSA-AES256-GCM-SHA384:DHE-RSA-AES128-GC M-SHA256:DHE-DSS-AES128-GCM-SHA256:kEDH+AESGCM:ECDHE-RSA-AES128-SHA256:ECDH E-ECDSA-AES128-SHA256:ECDHE-RSA-AES128-SHA:ECDHE-ECDSA-AES128-SHA:ECDHE-RSA -AES256-SHA384:ECDHE-ECDSA-AES256-SHA384:ECDHE-RSA-AES256-SHA:ECDHE-ECDSA-A ES256-SHA:DHE-RSA-AES128-SHA256:DHE-RSA-AES128-SHA:DHE-DSS-AES128-SHA256:DH E-RSA-AES256-SHA256:DHE-DSS-AES256-SHA:DHE-RSA-AES256-SHA:ECDHE-RSA-DES-CBC 3-SHA:ECDHE-ECDSA-DES-CBC3-SHA:AES128-GCM-SHA256:AES256-GCM-SHA384:AES128-S HA256:AES256-SHA256:AES128-SHA:AES256-SHA:AES:CAMELLIA:DES-CBC3-SHA:!aNULL:!eNULL:!EXPORT:!DES:!RC4:!MD5:!PSK:!aECDH:!EDH-DSS-DES-CBC3-SHA:!EDH-RSA-DE S-CBC3-SHA:!KRB5-DES-CBC3-SHA'; ssl_prefer_server_ciphers on; hs) # HSTS (ngx_http_headers_module is required) ( seconds = 6 mont add_header Strict-Transport-Security max-age= ; # OCSP Stapling --- # fetch OCSP records from URL in ssl_certificate and cache them ssl_stapling on; ssl_stapling_verify on; ## verify chain of trust of OCSP response using Root CA and Intermediat e certs ssl_trusted_certificate /etc/letsencrypt/live/ /fullchain.pem; } openssl s_client -connect curl -s openssl x509 -inform der -text curl openssl x509 -inform der -o utform pem -text 使用 --test-cert 参数创建的测试证书 : 120
121 HOW :ocserv # certbot certonly --standalone -- bob@outwall.com -d outwall.com --us er-agent "" --agree-tos --noninteractive --text --verbose --test-cert --deb ug :42:31,990:INFO:certbot.main:Saving debug log to /var/log/lets encrypt/letsencrypt.log :42:33,107:INFO:requests.packages.urllib3.connectionpool:Start ing new HTTPS connection (1): acme-staging.api.letsencrypt.org :42:33,371:INFO:certbot.auth_handler:Performing the following challenges: :42:33,371:INFO:certbot.auth_handler:tls-sni-01 challenge for outwall.com :42:33,425:INFO:certbot.auth_handler:Waiting for verification :42:36,570:INFO:certbot.auth_handler:Cleaning up challenges :42:36,767:INFO:certbot.crypto_util:Generating key (2048 bits) : /etc/letsencrypt/keys/0000_key-certbot.pem :42:36,773:INFO:certbot.crypto_util:Creating CSR: /etc/letsenc rypt/csr/0000_csr-certbot.pem :42:37,130:INFO:certbot.reporter:Reporting to user: Congratula tions! Your certificate and chain have been saved at /etc/letsencrypt/live/ outwall.com/fullchain.pem. Your cert will expire on T o obtain a new or tweaked version of this certificate in the future, simply run certbot again. To non-interactively renew *all* of your certificates, run "certbot renew" IMPORTANT NOTES: - Congratulations! Your certificate and chain have been saved at /etc/letsencrypt/live/outwall.com/fullchain.pem. Your cert will expire on To obtain a new or tweaked version of this certificate in the future, simply run certbot again. To non-interactively renew *all* of your certificates, run "certbot renew" 证书的 CN 是 Fake LE Intermediate X1 不给信任的, --test-cert 仅仅用来测试证书 链的 : # openssl x509 -in cert.pem -issuer -noout issuer= /CN=Fake LE Intermediate X1 121
122 HOW :ocserv you are creating your certificate using Let's Encrypt staging (test server) so the cert created for your domain has been issued by happy hacker fake CA. This Let's Encrypt staging server should be used just to test that your client is working fine and can generate the challenges, certificates... and so on but if you want to create a valid cert you should use the right server in letsencrypt-auto command. For staging is: --server For production is: --server In last version of Let's Encrypt client (0.1.1) if you don't specify a server it defaults to production and if you want to use staging you can specify the server for staging or just use one of these switches ( --test-cert or --staging ). This is the help info for these switches: --test-cert, --staging Use the staging server to obtain test (invalid) certs; equivalent to --server (default: False) That means you issued those certificates against the staging server (possibly with --testcert or --dry-run ). Create certificate $ sudo./letsencrypt-auto --apache --test-cert -- me@helloworld.com -- agree-tos -d hi.helloworld.com 122
123 HOW :ocserv If you have an existing apache config with wildcard server alias: $ sudo./letsencrypt-auto certonly -- me@helloworld.com --agree-tos -d hi.helloworld.com --server For --server : acme-v01.api.letsencrypt.org (Production) acme-staging.api.letsencrypt.org (Staging) Need to use --server Not using --server, or using --server the Certificate Issue will be CN=happy hacker fake CA. 重命名 staging 相关的目录和文件, 重新生成正式使用的证书 : /etc/letsencrypt/accounts /etc/letsencrypt/renewal # certbot certonly --standalone -- bob@outwall.com -d outwall.com --us er-agent "" --agree-tos --noninteractive --text --verbose --debug :22:38,177:INFO:certbot.main:Saving debug log to /var/log/lets encrypt/letsencrypt.log :22:39,173:INFO:requests.packages.urllib3.connectionpool:Start ing new HTTPS connection (1): acme-v01.api.letsencrypt.org :22:39,288:WARNING:certbot.main:Renewal conf file /etc/letsenc rypt/renewal/outwall.com.conf is broken. Skipping :22:39,463:INFO:certbot.auth_handler:Performing the following challenges: :22:39,463:INFO:certbot.auth_handler:tls-sni-01 challenge for outwall.com :22:39,526:INFO:certbot.auth_handler:Waiting for verification :22:42,667:INFO:certbot.auth_handler:Cleaning up challenges :22:43,247:INFO:certbot.crypto_util:Generating key (2048 bits) : /etc/letsencrypt/keys/0003_key-certbot.pem :22:43,252:INFO:certbot.crypto_util:Creating CSR: /etc/letsenc rypt/csr/0003_csr-certbot.pem 123
124 HOW :ocserv :22:43,605:INFO:certbot.reporter:Reporting to user: Congratula tions! Your certificate and chain have been saved at /etc/letsencrypt/live/ outwall.com-0001/fullchain.pem. Your cert will expire on To obt ain a new or tweaked version of this certificate in the future, simply run certbot again. To non-interactively renew *all* of your certificates, run " certbot renew" :22:43,605:INFO:certbot.reporter:Reporting to user: If you lik e Certbot, please consider supporting our work by: Donating to ISRG / Let's Encrypt: Donating to EFF: IMPORTANT NOTES: - Congratulations! Your certificate and chain have been saved at /etc/letsencrypt/live/outwall.com-0001/fullchain.pem. Your cert will expire on To obtain a new or tweaked version of this certificate in the future, simply run certbot again. To non-interactively renew *all* of your certificates, run "certbot renew" - If you like Certbot, please consider supporting our work by: Donating to ISRG / Let's Encrypt: Donating to EFF: root@localhost.localdomain /etc/letsencrypt/live/outwall.com # certbot certonly --standalone -- bob@outwall.com -d outwall.com --us er-agent "" --agree-tos --noninteractive --text --verbose --debug :24:13,758:INFO:certbot.main:Saving debug log to /var/log/lets encrypt/letsencrypt.log :24:14,621:INFO:requests.packages.urllib3.connectionpool:Start ing new HTTPS connection (1): acme-v01.api.letsencrypt.org :24:14,736:INFO:certbot.renewal:Cert not yet due for renewal Certificate not yet due for renewal; no action taken # tree. 124
125 HOW :ocserv. accounts acme-staging.api.letsencrypt.org directory d219a b92c10b2c1525ca086b3 meta.json private_key.json regr.json acme-v01.api.letsencrypt.org directory 3b24e8b936a d76401ee376cd meta.json private_key.json regr.json archive outwall.com-0001 cert1.pem chain1.pem fullchain1.pem privkey1.pem outwall.com.bak cert1.pem chain1.pem fullchain1.pem privkey1.pem csr 0000_csr-certbot.pem 0001_csr-certbot.pem 0002_csr-certbot.pem 0003_csr-certbot.pem keys 0000_key-certbot.pem 0001_key-certbot.pem 0002_key-certbot.pem 0003_key-certbot.pem live outwall.com root outwall.com-0001 cert.pem ->../../archive/outwall.com-0001/cert1.pem chain.pem ->../../archive/outwall.com-0001/chain1.pem fullchain.pem ->../../archive/outwall.com-0001/fullchain1.pem 125
126 HOW :ocserv privkey.pem ->../../archive/outwall.com-0001/privkey1.pem renewal outwall.com-0001.conf outwall.com.conf.bak 16 directories, 29 files crontab 126
127 HOW :ocserv #!/bin/sh # # Check if an SSL certificate will expire in less then 30 days. # # # remote ssl domain to monitor HostName="example.org" # certificate expiration, remote check CertificateExpireDate=`echo openssl s_client -connect $HostName:443 2>/de v/null openssl x509 -noout -enddate sed 's/notafter=//'` # certificate expiration, convert to unix time UnixCertExpireDate=`date -d "$CertificateExpireDate" +"%s"` # current date in unix time UnixCurrentDate=`date +%s` # difference of the expiration date and the current date UnixTimeDiff=`expr $UnixCertExpireDate - $UnixCurrentDate` # If certificate expire in less then 30 days ( seconds) send notific ation if [ $UnixTimeDiff -lt ]; then echo "NOTICE: $HostName ssl certificate will expire in less then 30 days." mail -s "$HostName ssl certificate will expire in less then 30 days" u ser@ address.com fi 使用 certtool 查看 cert ( -i 参数 ) 和 private key ( -k 参数 ) 信息 : man certtool -i, --certificate-info Print information on the given certificate. -k, --key-info Print information on a private key. 查看证书信息 : 127
128 HOW :ocserv # certtool --infile=ca.crt -i X.509 Certificate Information: Version: 3 Serial Number (hex): 01 Issuer: CN=outwall,O=outwall club Validity: Not Before: Sat Oct 08 12:54:14 UTC 2016 Not After: Tue Oct 06 12:54:14 UTC 2026 Subject: CN=outwall,O=outwall club Subject Public Key Algorithm: RSA Algorithm Security Level: Medium (2048 bits) 查看私钥信息 : # certtool --infile=ca-key.pem -k Public Key Info: Public Key Algorithm: RSA Key Security Level: Medium (2048 bits) 128
129 HOW :ocserv # diff -y ocserv.conf ocserv.conf egrep -iw '[ <]' #auth = "pam" auth = "pam " auth = "certificate" #auth = "ce rtificate" try-mtu-discovery = true try-mtu-dis covery = false server-cert = /etc/letsencrypt/live/beta.outman.im/fullchain. server-cert = /etc/pki/ocserv/public/server.crt server-key = /etc/letsencrypt/live/beta.outman.im/privkey.pem server-key = /etc/pki/ocserv/private/server.key ca-cert = /etc/ocserv/certs/ca.crt ca-cert = / etc/pki/ocserv/cacerts/ca.crt cert-group-oid = #cert-group -oid = default-domain = beta.outman.im default-dom ain = example.com ipv4-network = #ipv4-netwo rk = ipv4-netmask = #ipv4-netma sk = dns = #dns = dns = < 129
130 HOW :openwrt openwrt opkg opkg install ip Installing ip-full ( ) to root... Downloading sel_24kc/base/ip-full_ _mipsel_24kc.ipk Configuring ip-full. opkg list -A ip-* ip-bridge Bridge configuration utility from iproute2 ip-full Routing control utility (Full) ip-tiny Routing control utility (Minimal) root@lede:~# opkg list ip-* ip-bridge Bridge configuration utility from iproute2 ip-full Routing control utility (Full) ip-tiny Routing control utility (Minimal) root@lede:~# opkg find ip-* ip-bridge Bridge configuration utility from iproute2 ip-full Routing control utility (Full) ip-tiny Routing control utility (Minimal) root@lede:~# opkg info ip-full Package: ip-full Version: Depends: libc, libnl-tiny Provides: ip Status: install user installed Section: net Architecture: mipsel_24kc Size: Filename: ip-full_ _mipsel_24kc.ipk Description: Routing control utility (Full) Installed-Time:
131 HOW :openwrt opkg files ip Package ip-full ( ) is installed on root and has the following files: /usr/sbin/ip opkg files ip-full Package ip-full ( ) is installed on root and has the following files: /usr/sbin/ip opkg files shadowsocks-libev Package shadowsocks-libev ( ) is installed on root and has the follow ing files: /usr/bin/ss-local /usr/bin/ss-redir /usr/bin/ss-tunnel opkg search /usr/bin/ss-redir shadowsocks-libev TP Link WR703N TP Link WR703N 刷好 openwrt 需要配置 : 默认没有启用无线 WIFI 默认为 AP 模式需要改为路由模式 failsafe 开机等待指示灯开始闪烁 ( 大约通电后 10s ) 立即按住 reset 键 3s 指示灯变为快速闪烁 default 设置 root 密码 : 131
132 HOW :openwrt $ telnet Trying Connected to Escape character is '^]'. === IMPORTANT ============================ Use 'passwd' to set your login password this will disable telnet and enable SSH BusyBox v ( :01:44 CET) built-in shell (ash) _ - _ - _ _ W I R E L E S S F R E E D O M CHAOS CALMER ( , r48532) * 1 1/2 oz Gin Shake with a glassful * 1/4 oz Triple Sec of broken ice and pour * 3/4 oz Lime Juice unstrained into a goblet. * 1 1/2 oz Orange Juice * 1 tsp. Grenadine Syrup root@openwrt:/# passwd Changing password for root New password: Retype password: Password for root changed by root 默认 ROM 占用 : 132
133 HOW :openwrt df -ht Filesystem Type Size Used Available Use% Mounted on rootfs rootfs 12.5M 472.0K 12.0M 4% / /dev/root squashfs 2.3M 2.3M 0 100% /rom tmpfs tmpfs 29.8M 300.0K 29.5M 1% /tmp tmpfs tmpfs 29.8M 44.0K 29.8M 0% /tmp/roo t tmpfs tmpfs 512.0K K 0% /dev /dev/mtdblock3 jffs2 12.5M 472.0K 12.0M 4% /overlay overlayfs:/overlay overlay 12.5M 472.0K 12.0M 4% / init 配置 WIFI 无线 删除网桥添加 WAN wireless WIFI 默认配置 : root@openwrt:/# uci show wireless wireless.radio0=wifi-device wireless.radio0.type='mac80211' wireless.radio0.channel='11' wireless.radio0.hwmode='11g' wireless.radio0.path='platform/ar933x_wmac' wireless.radio0.htmode='ht20' wireless.radio0.disabled='1' wireless.@wifi-iface[0]=wifi-iface wireless.@wifi-iface[0].device='radio0' wireless.@wifi-iface[0].network='lan' wireless.@wifi-iface[0].mode='ap' wireless.@wifi-iface[0].ssid='openwrt' wireless.@wifi-iface[0].encryption='none' root@openwrt:/# cat /etc/config/wireless config wifi-device radio0 133
134 HOW :openwrt option type mac80211 option channel 11 option hwmode 11g option path 'platform/ar933x_wmac' option htmode HT20 # REMOVE THIS LINE TO ENABLE WIFI: option disabled 1 config wifi-iface option device radio0 option network lan option mode ap option ssid OpenWrt option encryption none root@openwrt:/# wifi 'radio0' is disabled 'radio0' is disabled root@openwrt:/# wifi status { "radio0": { "up": false, "pending": false, "autostart": true, "disabled": true, "config": { "channel": "11", "hwmode": "11g", "path": "platform\/ar933x_wmac", "htmode": "HT20", "disabled": true }, "interfaces": [ { "section": "@wifi-iface[0]", "config": { "mode": "ap", "ssid": "OpenWrt", "encryption": "none", "network": [ "lan" 134
135 HOW :openwrt } } ] } } ], "mode": "ap" UCI 配置 WIFI 命令 : ## wireless uci set wireless.@wifi-iface[0].ssid=fuck_gfw uci set wireless.@wifi-iface[0].encryption=psk2 uci set wireless.@wifi-iface[0].key=v_v.fuckgfw uci set wireless.radio0.disabled=0 uci changes uci commit 实例 : 135
136 HOW :openwrt uci set uci set uci set uci set wireless.radio0.disabled=0 uci changes wireless.cfg ssid='fuck_gfw' wireless.cfg encryption='psk2' wireless.cfg key='v_v.fuckgfw' wireless.radio0.disabled='0' uci commit uci changes cat /etc/config/wireless config wifi-device 'radio0' option type 'mac80211' option channel '11' option hwmode '11g' option path 'platform/ar933x_wmac' option htmode 'HT20' option disabled '0' config wifi-iface option device 'radio0' option network 'lan' option mode 'ap' option ssid 'FUCK_GFW' option encryption 'psk2' option key 'v_v.fuckgfw' 使用 wifi 命令启用 WIFI : 136
137 HOW :openwrt wifi wifi status { "radio0": { "up": true, "pending": false, "autostart": true, "disabled": false, "config": { "channel": "11", "hwmode": "11g", "path": "platform\/ar933x_wmac", "htmode": "HT20", "disabled": false }, "interfaces": [ { "section": "@wifi-iface[0]", "ifname": "wlan0", "config": { "mode": "ap", "ssid": "FUCK_GFW", "encryption": "psk2", "key": "v_v.fuckgfw", "network": [ "lan" ], "mode": "ap" } } ] } } Openwrt 使用 wifi 命令启用 重启 关闭无线接口 : 启动 WIFI 不带参数, 直接运行 wifi 命令修改无线配置重启 WIFI 使配置生效, 同样也是不带参数, 直接运行 wifi 命令 137
138 HOW :openwrt 关闭 WIFI 加上 down 参数使用 wifi down network 桥接默认配置 : root@openwrt:~# brctl show bridge name bridge id STP enabled interfaces br-lan 7fff.c8e7d8d4b54e no eth0 wlan0 root@openwrt:~# ifconfig br-lan Link encap:ethernet HWaddr C8:E7:D8:D4:B5:4E inet addr: Bcast: Mask: inet6 addr: fe80::cae7:d8ff:fed4:b54e/64 Scope:Link inet6 addr: fdd9:add4:d5f5::1/60 Scope:Global UP BROADCAST RUNNING MULTICAST MTU:1500 Metric:1 RX packets:345 errors:0 dropped:0 overruns:0 frame:0 TX packets:327 errors:0 dropped:0 overruns:0 carrier:0 collisions:0 txqueuelen:0 RX bytes:37843 (36.9 KiB) TX bytes:31467 (30.7 KiB) eth0 Link encap:ethernet HWaddr C8:E7:D8:D4:B5:4E UP BROADCAST RUNNING MULTICAST MTU:1500 Metric:1 RX packets:0 errors:0 dropped:0 overruns:0 frame:0 TX packets:28 errors:0 dropped:0 overruns:0 carrier:0 collisions:0 txqueuelen:1000 RX bytes:0 (0.0 B) TX bytes:3678 (3.5 KiB) Interrupt:4 lo Link encap:local Loopback inet addr: Mask: inet6 addr: ::1/128 Scope:Host UP LOOPBACK RUNNING MTU:65536 Metric:1 RX packets:48 errors:0 dropped:0 overruns:0 frame:0 TX packets:48 errors:0 dropped:0 overruns:0 carrier:0 collisions:0 txqueuelen:0 RX bytes:3264 (3.1 KiB) TX bytes:3264 (3.1 KiB) wlan0 Link encap:ethernet HWaddr C8:E7:D8:D4:B5:4E inet6 addr: fe80::cae7:d8ff:fed4:b54e/64 Scope:Link UP BROADCAST RUNNING MULTICAST MTU:1500 Metric:1 138
139 HOW :openwrt RX packets:344 errors:0 dropped:0 overruns:0 frame:0 TX packets:343 errors:0 dropped:0 overruns:0 carrier:0 collisions:0 txqueuelen:1000 RX bytes:42653 (41.6 KiB) TX bytes:40587 (39.6 KiB) cat /etc/config/network config interface 'loopback' option ifname 'lo' option proto 'static' option ipaddr ' ' option netmask ' ' config globals 'globals' option ula_prefix 'fdf5:87ce:25a3::/48' config interface 'lan' option ifname 'eth0' option force_link '1' option type 'bridge' option proto 'static' option ipaddr ' ' option netmask ' ' option ip6assign '60' 由 AP 模式改为路由模式 : 删除网桥添加 WAN 设备 139
140 HOW :openwrt ## unbridge LAN uci delete network.lan.type uci delete network.lan.ifname uci set network.lan._orig_bridge=false uci set network.lan._orig_ifname=eth0 uci set network.lan.ipaddr= uci set dhcp.lan.ra_management=1 ## create WAN uci set network.wan=interface uci set network.wan.ifname=eth0 uci set network.wan.proto=dhcp uci set network.wan.peerdns=0 olv.conf ## NOT use upstream DNS as /etc/res 实例 : root@openwrt:/# uci delete network.lan.type root@openwrt:/# uci delete network.lan.ifname root@openwrt:/# uci set network.lan._orig_bridge=false root@openwrt:/# uci set network.lan._orig_ifname=eth0 root@openwrt:/# uci set network.lan.ipaddr= root@openwrt:/# root@openwrt:/# uci set dhcp.lan.ra_management=1 root@openwrt:/# uci set network.wan=interface root@openwrt:/# uci set network.wan.ifname=eth0 root@openwrt:/# uci set network.wan.proto=dhcp root@openwrt:/# uci set network.wan.peerdns=0 root@openwrt:/# uci changes dhcp.lan.ra_management='1' -network.lan.type -network.lan.ifname network.lan._orig_bridge='false' network.lan._orig_ifname='eth0' network.lan.ipaddr=' ' network.wan='interface' network.wan.ifname='eth0' network.wan.proto='dhcp' network.wan.peerdns='0' 140
141 HOW :openwrt ra_management RA management mode value mean 0 no M-Flag but A-Flag 1 both M and A 2 M but not A 重启网络服务 root@openwrt:/# /etc/init.d/network restart 连接 WIFI 使用新 IP 登录 : ssh root@
142 HOW :openwrt brctl show bridge name bridge id STP enabled interfaces ifconfig eth0 Link encap:ethernet HWaddr C8:E7:D8:D4:B5:4E inet addr: Bcast: Mask: inet6 addr: fe80::cae7:d8ff:fed4:b54e/64 Scope:Link UP BROADCAST RUNNING MULTICAST MTU:1500 Metric:1 RX packets:257 errors:0 dropped:0 overruns:0 frame:0 TX packets:220 errors:0 dropped:0 overruns:0 carrier:0 collisions:0 txqueuelen:1000 RX bytes:43320 (42.3 KiB) TX bytes:32401 (31.6 KiB) Interrupt:4 lo Link encap:local Loopback inet addr: Mask: inet6 addr: ::1/128 Scope:Host UP LOOPBACK RUNNING MTU:65536 Metric:1 RX packets:17 errors:0 dropped:0 overruns:0 frame:0 TX packets:17 errors:0 dropped:0 overruns:0 carrier:0 collisions:0 txqueuelen:0 RX bytes:3511 (3.4 KiB) TX bytes:3511 (3.4 KiB) wlan0 Link encap:ethernet HWaddr C8:E7:D8:D4:B5:4E inet addr: Bcast: Mask: inet6 addr: fe80::cae7:d8ff:fed4:b54e/64 Scope:Link inet6 addr: fdd9:add4:d5f5::1/60 Scope:Global UP BROADCAST RUNNING MULTICAST MTU:1500 Metric:1 RX packets:261 errors:0 dropped:0 overruns:0 frame:0 TX packets:250 errors:0 dropped:0 overruns:0 carrier:0 collisions:0 txqueuelen:1000 RX bytes:38999 (38.0 KiB) TX bytes:51107 (49.9 KiB) DHCP DHCP 默认配置 ( 后续配置 ChinaDNS 时再修改 DHCP 配置 ) : root@openwrt:/# uci show dhcp dhcp.@dnsmasq[0]=dnsmasq 142
143 HOW :openwrt dhcp.lan=dhcp dhcp.lan.interface='lan' dhcp.lan.start='100' dhcp.lan.limit='150' dhcp.lan.leasetime='12h' dhcp.lan.dhcpv6='server' dhcp.lan.ra='server' dhcp.wan=dhcp dhcp.wan.interface='wan' dhcp.wan.ignore='1' dhcp.odhcpd=odhcpd dhcp.odhcpd.maindhcp='0' dhcp.odhcpd.leasefile='/tmp/hosts/odhcpd' dhcp.odhcpd.leasetrigger='/usr/sbin/odhcpd-update' cat /etc/config/dhcp config dnsmasq option domainneeded '1' option boguspriv '1' option filterwin2k '0' option localise_queries '1' option rebind_protection '1' option rebind_localhost '1' option local '/lan/' option domain 'lan' option expandhosts '1' 143
144 HOW :openwrt option nonegcache '0' option authoritative '1' option readethers '1' option leasefile '/tmp/dhcp.leases' option resolvfile '/tmp/resolv.conf.auto' option localservice '1' config dhcp 'lan' option interface 'lan' option start '100' option limit '150' option leasetime '12h' option dhcpv6 'server' option ra 'server' config dhcp 'wan' option interface 'wan' option ignore '1' config odhcpd 'odhcpd' option maindhcp '0' option leasefile '/tmp/hosts/odhcpd' option leasetrigger '/usr/sbin/odhcpd-update' cat /var/etc/dnsmasq.conf # auto-generated config file from /etc/config/dhcp conf-file=/etc/dnsmasq.conf dhcp-authoritative domain-needed localise-queries read-ethers bogus-priv expand-hosts local-service domain=lan server=/lan/ dhcp-leasefile=/tmp/dhcp.leases resolv-file=/tmp/resolv.conf.auto addn-hosts=/tmp/hosts conf-dir=/tmp/dnsmasq.d stop-dns-rebind rebind-localhost-ok 144
145 HOW :openwrt dhcp-broadcast=tag:needs-broadcast dhcp-range=lan, , , ,12h Image Generator ImageBuilder Create custom Images without compiling in the build system 如果不想要下载一个预编译好的镜像文件, 或者想要尝试整个编译过程, 替代方案是使用镜像生成器 (Image Generator) ( 以前被叫做 Image Builder) 这是一个预编译好的 OpenWrt 编译环境, 适用于在无需编译的条件下创建自定义镜像 OpenWrt build system Usage Do everything as non-root user 参考 : 使用 Image Builder 编译自动翻墙 OpenWrt 固件 download 下载 TP Link WR703N 对应的 ImageBuilder 打包文件 : 145
146 HOW :openwrt mkdir -pv ~/openwrt cd ~/openwrt $ time wget -nv eneric/openwrt-imagebuilder ar71xx-generic.linux-x86_64.tar.bz :23:34 URL: ar71xx/generic/openwrt-imagebuilder ar71xx-generic.linux-x86_64.tar.bz2 [ / ] -> "OpenWrt-ImageBuilder ar71xx-generic.Linux -x86_64.tar.bz2" [1] real user sys 0m7.381s 0m0.379s 0m2.345s $ time tar xf OpenWrt-ImageBuilder ar71xx-generic.Linux-x86_64.tar. bz2 real user sys 0m24.645s 0m22.718s 0m1.357s $ ll total 138M -rw-r--r-- 1 i i 138M :48 OpenWrt-ImageBuilder ar71xx-generic.Linux-x86_64.tar.bz2 drwxr-xr-x 8 i i 4.0K :45 OpenWrt-ImageBuilder ar71xx-generic.Linux-x86_64/ config 配置软件源 : 修改 repositories.conf 文件, 增加 openwrt-dist (shadowsocks) 源 146
147 HOW :openwrt $ cat repositories.conf ## Place your custom repositories here, they must match the architecture an d version. # src/gz chaos_calmer 1xx/generic/packages # src custom file:///usr/src/openwrt/bin/ar71xx/packages ## Remote package repositories src/gz chaos_calmer_base ar71xx/generic/packages/base src/gz chaos_calmer_luci ar71xx/generic/packages/luci src/gz chaos_calmer_packages 5.1/ar71xx/generic/packages/packages src/gz chaos_calmer_routing src/gz chaos_calmer_telephony /ar71xx/generic/packages/telephony src/gz chaos_calmer_management ## openwrt-dist for shadowsocks src/gz openwrt_dist se/ar71xx src/gz openwrt_dist_luci rt/luci ## This is the local package repository, do not remove! src imagebuilder file:packages 移除软件包 : upnpd ipv6 ppp* luci* uhttpd files 147
148 HOW :openwrt /etc/uci-defaults/ /etc/uci-defaults/ 目录下的脚本用于 openwrt 固件初始化 openwrt network 初始化 /bin/config_generate Openwrt 中在 /etc/init.d/boot 脚本会在开机时逐一执行 /etc/uci-deafults/ 目录下的脚本, 执行完之后再删除它 这就保证了该目录下的脚本只会被执行一次, 以后再重启也不会执行到了 除非恢复初厂设置对应脚本执行代码 : # grep -A7 uci-defaults /etc/init.d/boot cd /etc/uci-defaults return 0 files="$(ls)" [ -z "$files" ] && return 0 mkdir -p /tmp/.uci for file in $files; do (. "./$(basename $file)" ) && rm -f "$file" done uci commit 示例 : 148
149 HOW :openwrt uci set network.wan.proto='pppoe' uci set network.wan.username='wan-username' uci set network.wan.password='wan-password' uci set network.wan.peerdns=0 uci commit network uci set uci set uci set uci set uci set uci set uci set uci set uci commit wireless wifi uci set uci commit dropbear /etc/init.d/dropbear restart uci set # 设置主机名 uci set uci set uci commit system /etc/init.d/system restart #change root password echo -e "fanqiang\nfanqiang" (passwd $USER) /etc/init.d/shadowsocks enable /etc/init.d/network restart TP Link WR703N /etc/uci-defaults/defaults 初始化脚本 : ## WIFI uci set wireless.@wifi-device[0].disabled='0' uci set wireless.@wifi-device[0].country='cn' 149
150 HOW :openwrt uci set uci set uci set uci set uci set uci set uci set uci set uci set uci set uci commit wireless ## start WIFI wifi ## unbridge LAN uci delete network.lan.type uci delete network.lan.ifname uci set network.lan._orig_bridge='false' uci set network.lan._orig_ifname='eth0' uci set network.lan.ipaddr=' ' ## create WAN uci set network.wan='interface' uci set network.wan.ifname='eth0' uci set network.wan.proto='dhcp' uci commit network uci set dhcp.lan.ra_management='1' uci set uci set uci set uci commit dhcp ## restart 'network' and 'DNSmasq' service /etc/init.d/network restart /etc/init.d/dnsmasq restart uci set uci set uci set uci commit system 150
151 HOW :openwrt /etc/init.d/system restart uci set uci set uci commit dropbear /etc/init.d/dropbear restart ## change root passwd echo -e "V_VL.Fuck.GFW\nV_VL.Fuck.GFW" (passwd $USER) ## SS uci set uci set uci set uci set uci set uci set uci set uci set uci set uci set uci set uci set uci set SS_CFGID=$(uci show awk -F '.' '{print $2}') uci set uci set uci set uci set uci set uci set uci set uci set uci set uci set uci set 151
152 HOW :openwrt uci set txt' uci commit shadowsocks /etc/init.d/shadowsocks enable /etc/init.d/shadowsocks start uci set uci set uci set uci set uci set uci commit dns-forwarder /etc/init.d/dns-forwarder enable /etc/init.d/dns-forwarder start uci set uci set uci set uci set uci set uci set uci commit chinadns /etc/init.d/chinadns enable /etc/init.d/chinadns start Sections naming Sections deserve some extra explanation in regards to naming. A section can be named or unnamed. Unnamed sections will get an autogenerated ID/CFGID (like cfg ) and be presented with an anonymous-name ) 152
153 HOW :openwrt # uci show wireless.@wifi-device[0] wireless.radio0=wifi-device wireless.radio0.type='mac80211' wireless.radio0.channel='11' wireless.radio0.hwmode='11g' wireless.radio0.path='platform/ar933x_wmac' wireless.radio0.htmode='ht20' wireless.radio0.disabled='0' wireless.radio0.txpower='18' wireless.radio0.country='cn' openwrt-dist 源中的 shadowsocks-libev 软件包只有 `/bin $ git clone Cloning into 'luci-app-shadowsocks'... remote: Counting objects: 1086, done. remote: Total 1086 (delta 0), reused 0 (delta 0), pack-reused 1086 Receiving objects: 100% (1086/1086), KiB 0 bytes/s, done. Resolving deltas: 100% (402/402), done. $ tree luci-app-shadowsocks/files/root/ luci-app-shadowsocks/files/root/ etc config shadowsocks init.d shadowsocks uci-defaults luci-shadowsocks usr bin ss-rules ss-rules-without-ipset 6 directories, 5 files $ rsync -avp luci-app-shadowsocks/files/root/ sending incremental file list drwxrwxr-x /08/29 00:03:54. drwxrwxr-x /08/29 00:03:54 etc 153
154 HOW :openwrt drwxrwxr-x -rw-rw-r-- drwxrwxr-x -rw-rw-r-- drwxrwxr-x -rw-rw-r-- s drwxrwxr-x drwxrwxr-x -rw-rw-r-- -rw-rw-r /08/29 00:03:54 etc/config /08/29 00:03:54 etc/config/shadowsocks /08/29 00:03:54 etc/init.d /08/29 00:03:54 etc/init.d/shadowsocks /08/29 00:03:54 etc/uci-defaults /08/29 00:03:54 etc/uci-defaults/luci-shadowsock /08/29 00:03:54 usr /08/29 00:03:54 usr/bin /08/29 00:03:54 usr/bin/ss-rules /08/29 00:03:54 usr/bin/ss-rules-without-ipset $ cat luci-app-shadowsocks/files/root/etc/uci-defaults/luci-shadowsocks #!/bin/sh uci get shadowsocks.@general[-1] >/dev/null 2>&1 \ uci add shadowsocks general >/dev/null 2>&1 uci get shadowsocks.@transparent_proxy[-1] >/dev/null 2>&1 \ uci add shadowsocks transparent_proxy >/dev/null 2>&1 uci get shadowsocks.@socks5_proxy[-1] >/dev/null 2>&1 \ uci add shadowsocks socks5_proxy >/dev/null 2>&1 uci get shadowsocks.@port_forward[-1] >/dev/null 2>&1 \ uci add shadowsocks port_forward >/dev/null 2>&1 uci get shadowsocks.@access_control[-1] >/dev/null 2>&1 \ uci add shadowsocks access_control >/dev/null 2>&1 uci commit shadowsocks uci -q batch <<-EOF >/dev/null delete ucitrack.@shadowsocks[-1] add ucitrack shadowsocks set ucitrack.@shadowsocks[-1].init=shadowsocks commit ucitrack delete firewall.shadowsocks set firewall.shadowsocks=include set firewall.shadowsocks.type=script set firewall.shadowsocks.path=/var/etc/shadowsocks.include set firewall.shadowsocks.reload=1 commit firewall EOF exit 0 sent 268 bytes received 18 bytes bytes/sec total size is speedup is
155 HOW :openwrt $ rsync -avp --exclude=uci-defaults luci-app-shadowsocks/files/root/ sending incremental file list drwxrwxr-x /08/29 00:03:54. drwxrwxr-x /08/29 00:03:54 etc drwxrwxr-x /08/29 00:03:54 etc/config -rw-rw-r /08/29 00:03:54 etc/config/shadowsocks drwxrwxr-x /08/29 00:03:54 etc/init.d -rw-rw-r /08/29 00:03:54 etc/init.d/shadowsocks drwxrwxr-x /08/29 00:03:54 usr drwxrwxr-x /08/29 00:03:54 usr/bin -rw-rw-r /08/29 00:03:54 usr/bin/ss-rules -rw-rw-r /08/29 00:03:54 usr/bin/ss-rules-without-ipset sent 211 bytes received 17 bytes bytes/sec total size is speedup is $ rsync -avp --exclude=uci-defaults luci-app-shadowsocks/files/root/ ~/open wrt/openwrt-imagebuilder ar71xx-generic.linux-x86_64/files/ sending incremental file list./ etc/ etc/config/ etc/config/shadowsocks % 0.00kB/s 0:00:00 (xfer#1, to-check=4/10) etc/init.d/ etc/init.d/shadowsocks % 4.83MB/s 0:00:00 (xfer#2, to-check=3/10) usr/ usr/bin/ usr/bin/ss-rules % 6.39MB/s 0:00:00 (xfer#3, to-check=1/10) usr/bin/ss-rules-without-ipset % 5.82MB/s 0:00:00 (xfer#4, to-check=0/10) sent bytes received 111 bytes bytes/sec total size is speedup is 0.97 $ tree ~/openwrt/openwrt-imagebuilder ar71xx-generic.linux-x86_64/f iles/ /home/i/openwrt/openwrt-imagebuilder ar71xx-generic.linux-x86_64/fi les/ etc 155
156 HOW :openwrt config shadowsocks init.d shadowsocks opkg.conf uci-defaults defaults usr bin ss-rules ss-rules-without-ipset 6 directories, 6 files $ chmod 755 files/usr/bin/* files/etc/init.d/* $ ll files/usr/bin/* files/etc/init.d/* -rwxr-xr-x 1 i i 6.6K :03 files/usr/bin/ss-rules* -rwxr-xr-x 1 i i 6.0K :03 files/usr/bin/ss-rules-without-i pset* -rwxr-xr-x 1 i i 5.0K :03 files/etc/init.d/shadowsocks* PROFILE 配置 : $ make info grep -C1 WR703N TLWR703: TP-LINK TL-WR703N Packages: kmod-usb-core kmod-usb2 PACkAGES 软件包 : time make image PROFILE=TLWR703 FILES=files/ PACKAGES="ChinaDNS dns-forward er shadowsocks-libev ip ipset iptables-mod-tproxy -kmod-ipv6 -libip6tc -odh cp6c -ip6tables -kmod-ip6tables -kmod-nf-ipt6 -kmod-nf-conntrack6 -ppp -ppp -mod-pppoe -kmod-ppp -kmod-pppoe -kmod-pppox -luci*" real user sys 1m28.885s 0m15.822s 0m16.358s 156
157 HOW :openwrt 没有集成 bind-dig 不然 ROM 会超过 4M 打包失败 : [ -f /home/i/openwrt/openwrt-imagebuilder ar71xx-generic.linux-x86_ 64/build_dir/target-mips_34kc_uClibc /linux-ar71xx_generic/tl-wr703 n-v1-kernel.bin -a -f /home/i/openwrt/openwrt-imagebuilder ar71xx-generic.Linux-x86_64/build_dir/target-mips_34kc_uClibc / linux-ar71xx_generic/root.squashfs ] dd if=/home/i/openwrt/openwrt-imagebuilder ar71xx-generic.linux-x86 _64/build_dir/target-mips_34kc_uClibc /linux-ar71xx_generic/root.sq uashfs >> /home/i/openwrt/openwrt-imagebuilder ar71xxgeneric.linux-x86_64/build_dir/target-mips_34kc_uclibc /linux-ar71x x_generic/tmp/openwrt ar71xx-generic-tl-wr703n-v1-squashfs-sysupgra de.bin records in records out bytes (3.9 MB) copied, s, 118 MB/s /home/i/openwrt/openwrt-imagebuilder ar71xx-generic.linux-x86_64/st aging_dir/host/bin/mktplinkfw -H 0x W 0x1 -F 4Mlzma -N OpenWrt -V r k /home/i/openwrt/openwrt-imagebuilder ar71xx-g eneric.linux-x86_64/build_dir/target-mips_34kc_uclibc /linux-ar71xx _generic/tl-wr703n-v1-kernel.bin -r /home/i/openwrt/openwrt-imagebuilder ar71xx-generic.linux-x86_64/build_dir/target-mips_34kc_uc libc /linux-ar71xx_generic/tmp/openwrt ar71xx-generic-tl-wr 703n-v1-squashfs-sysupgrade.bin -o /home/i/openwrt/openwrt-imagebuilder ar71xx-generic.Linux-x86_64/build_dir/target-mips_34kc_uCl ibc /linux-ar71xx_generic/tmp/openwrt ar71xx-generic-tl-wr7 03n-v1-squashfs-sysupgrade.bin.new -j -X 0x a 0x4 -s && mv /home/i/op enwrt/openwrt-imagebuilder ar71xx-generic.linux-x86_64/ build_dir/target-mips_34kc_uclibc /linux-ar71xx_generic/tmp/openwrt ar71xx-generic-tl-wr703n-v1-squashfs-sysupgrade.bin.new /home/i/op enwrt/openwrt-imagebuilder ar71xx-generic.linux-x86_64/ build_dir/target-mips_34kc_uclibc /linux-ar71xx_generic/tmp/openwrt ar71xx-generic-tl-wr703n-v1-squashfs-sysupgrade.bin rm -f /home /i/openwrt/openwrt-imagebuilder ar71xx-generic.linux-x8 6_64/build_dir/target-mips_34kc_uClibc /linux-ar71xx_generic/tmp/op enwrt ar71xx-generic-tl-wr703n-v1-squashfs-sysupgrade.bin [mktplinkfw] kernel length aligned to [mktplinkfw] *** error: images are too big ## <-- 成功编译完成后 : 157
158 HOW :openwrt $ ll /home/i/openwrt/openwrt-imagebuilder ar71xx-generic.linux-x86_ 64/bin/ar71xx/ total 26M -rw-rw-r-- 1 i i :16 md5sums -rw-rw-r-- 1 i i 1.5K :16 sha256sums -rw-rw-r-- 1 i i 3.8M :16 openwrt ar71xx-generic-t l-wr703n-v1-squashfs-factory.bin -rw-rw-r-- 1 i i 3.4M :16 openwrt ar71xx-generic-t l-wr703n-v1-squashfs-sysupgrade.bin -rw-rw-r-- 1 i i 1.6M :16 openwrt ar71xx-generic-u Image-gzip.bin -rw-rw-r-- 1 i i 1.2M :16 openwrt ar71xx-generic-u Image-lzma.bin -rwxr-xr-x 1 i i 3.4M :16 openwrt ar71xx-generic-v mlinux.bin* -rwxr-xr-x 1 i i 3.4M :16 openwrt ar71xx-generic-v mlinux.elf* -rwxr-xr-x 1 i i 1.2M :16 openwrt ar71xx-generic-v mlinux-lzma.elf* -rw-rw-r-- 1 i i 1.6M :16 openwrt ar71xx-generic-v mlinux.gz -rw-rw-r-- 1 i i 1.2M :16 openwrt ar71xx-generic-v mlinux.lzma -rw-rw-r-- 1 i i 2.4M :16 openwrt ar71xx-generic-r oot.squashfs -rw-r--r-- 1 i i 2.3M :16 openwrt ar71xx-generic-r oot.squashfs-64k 默认 openwrt 安装软件包 : root@openwrt:/etc# opkg list-installed awk '{print $1}' ChinaDNS base-files bind-dig bind-libs busybox curl dns-forwarder dnsmasq dropbear 158
159 HOW :openwrt firewall fstools hostapd-common ip ip6tables ipset iptables iptables-mod-tproxy iw jshn jsonfilter kernel kmod-ath kmod-ath9k kmod-ath9k-common kmod-cfg80211 kmod-crypto-aes kmod-crypto-arc4 kmod-crypto-core kmod-gpio-button-hotplug kmod-ip6tables kmod-ipt-conntrack kmod-ipt-core kmod-ipt-ipset kmod-ipt-nat kmod-ipt-tproxy kmod-ipv6 kmod-lib-crc-ccitt kmod-mac80211 kmod-nf-conntrack kmod-nf-conntrack6 kmod-nf-ipt kmod-nf-ipt6 kmod-nf-nat kmod-nf-nathelper kmod-nfnetlink kmod-nls-base kmod-ppp kmod-pppoe kmod-pppox kmod-slhc kmod-usb-core 159
160 HOW :openwrt kmod-usb2 libblobmsg-json libc libcurl libev libgcc libip4tc libip6tc libiwinfo libiwinfo-lua libjson-c libjson-script liblua libmbedtls libmnl libnl-tiny libopenssl libpcre libpolarssl libpthread libsodium libubox libubus libubus-lua libuci libuci-lua libudns libxtables lua luci luci-app-chinadns luci-app-dns-forwarder luci-app-firewall luci-app-shadowsocks luci-base luci-lib-ip luci-lib-nixio luci-mod-admin-full luci-proto-ipv6 luci-proto-ppp luci-theme-bootstrap mtd 160
161 HOW :openwrt netifd odhcp6c odhcpd opkg ppp ppp-mod-pppoe procd rpcd shadowsocks-libev swconfig uboot-envtools ubox ubus ubusd uci uhttpd uhttpd-mod-ubus usign wpad-mini zlib 删除 IPv6 PPP LuCI 相关软件包 : # opkg list-installed awk '{print $1}' grep 6 ip6tables kmod-ip6tables kmod-ipv6 kmod-nf-conntrack6 kmod-nf-ipt6 libip6tc luci-proto-ipv6 odhcp6c root@openwrt:/etc# opkg list-installed awk '{print $1}' grep ppp kmod-ppp kmod-pppoe kmod-pppox luci-proto-ppp ppp ppp-mod-pppoe 161
162 HOW :openwrt opkg list-installed awk '{print $1}' grep luci luci luci-app-chinadns luci-app-dns-forwarder luci-app-firewall luci-app-shadowsocks luci-base luci-lib-ip luci-lib-nixio luci-mod-admin-full luci-proto-ipv6 luci-proto-ppp luci-theme-bootstrap opkg find kmod-pppox kmod-pppox Kernel helper module for PPPoE and PPTP support root@openwrt:/etc# opkg find kmod-nf-ipt6 kmod-nf-ipt Ip6tables core root@openwrt:/etc# opkg find odhcp6c odhcp6c c5f6aba3af9b2ef7b3af2f3c14f1db8 - Embedded DH CPv6-client for OpenWrt -kmod-ipv6 -libip6tc -odhcp6c -luci-proto-ipv6 -ip6tables -kmod-ip6tables - kmod-nf-ipt6 -ppp -ppp-mod-pppoe -kmod-ppp -kmod-pppoe -kmod-pppox -luci-pr oto-ppp ADD 'ipset' package 162
163 HOW :openwrt $ time make image PROFILE=TLWR703 FILES=files/ PACKAGES="ChinaDNS dns-forwa rder shadowsocks-libev ipset ip iptables-mod-tproxy -kmod-ipv6 -libip6tc -o dhcp6c -ip6tables -kmod-ip6tables -kmod-nf-ipt6 -kmod-nf-conntrack6 -ppp -p pp-mod-pppoe -kmod-ppp -kmod-pppoe -kmod-pppox -luci*" $ ll /home/i/openwrt/openwrt-imagebuilder ar71xx-generic.linux-x86_ 64/bin/ar71xx/total 26M -rw-rw-r-- 1 i i :45 md5sums -rw-rw-r-- 1 i i 1.5K :45 sha256sums -rw-rw-r-- 1 i i 3.8M :45 openwrt ar71xx-generic-t l-wr703n-v1-squashfs-factory.bin -rw-rw-r-- 1 i i 3.6M :45 openwrt ar71xx-generic-t l-wr703n-v1-squashfs-sysupgrade.bin -rw-rw-r-- 1 i i 1.6M :45 openwrt ar71xx-generic-u Image-gzip.bin -rw-rw-r-- 1 i i 1.2M :45 openwrt ar71xx-generic-u Image-lzma.bin -rwxr-xr-x 1 i i 3.4M :45 openwrt ar71xx-generic-v mlinux.bin* -rwxr-xr-x 1 i i 3.4M :45 openwrt ar71xx-generic-v mlinux.elf* -rwxr-xr-x 1 i i 1.2M :45 openwrt ar71xx-generic-v mlinux-lzma.elf* -rw-rw-r-- 1 i i 1.6M :45 openwrt ar71xx-generic-v mlinux.gz -rw-rw-r-- 1 i i 1.2M :45 openwrt ar71xx-generic-v mlinux.lzma -rw-rw-r-- 1 i i 2.7M :45 openwrt ar71xx-generic-r oot.squashfs -rw-r--r-- 1 i i 2.4M :45 openwrt ar71xx-generic-r oot.squashfs-64k $ scp openwrt ar71xx-generic-tl-wr703n-v1-squashfs-sysupgrade.bin r oot@ :/tmp root@wr703n:/tmp# sysupgrade -v openwrt ar71xx-generic-tl-wr703n-v1 -squashfs-sysupgrade.bin reference 163
164 HOW :openwrt 使用 Image Builder 编译自动翻墙 OpenWrt 固件 OpenWrt 固件安装的软件包 : conf_url= echo $(wget -qo - "$conf_url" sed -ne 's/^config_package_\([a-z0-9-]*\)=y /\1/ip') 使用 OpenWrt Image Generator 为 WR703N 路由器定制固件 有两个命令可以升级固件 : sysupgrade -n -v /tmp/firmware.bin mtd -r write /tmp/firmware.bin firmware -n 不保存配置 -v 输出详细信息 source build 源码编译 : 1. OpenWrt's build system About 2. OpenWrt build system Installation 3. OpenWrt build system Usage 4. OpenWrt build system Patches 编译集成了 shadowsocks 的 openwrt 固件编译适用于 8M Flash 的固件, 需修改 Makefile 和 mktplinkfw.c 文件 Network ---> <M> ipset <M> ipset-dns 164
165 UCI UCI about [UCI] OpenWrt-uci 命令系统 : mod=viewthread&tid= UCI 命令一个众所周知的原因, 在 Linux 下各种软件包有各种不同的配置脚本, 每个配置脚本的语法格式和操作方式不同, 这样的设计虽然可以体现出各软件包自身的优势, 同时也增加了学习曲线 在这一点上 OpenWrt 的 UCI 无疑处理的更胜一筹 UCI 是集中式配置信息管理接口 (Unified Configuration Interface) 的缩写, 他是 OpenWrt 引进的一套配置参数管理系统 UCI 管理了 OpenWrt 下最主要的系统配置参数并且提供了简单 容易 标准化的人机交互接口 UCI 中已经包含了网络配置 无线配置 系统信息配置等作为基本路由器所需的主要配置参数 同时 UCI 也可以帮助开发人员快速的建立一套基于 OpenWrt 的智能路由产品控制界面 1. UCI 的文件和流程 UCI 的配置文件全部存储在 /etc/config 目录下 ls /etc/config/ dhcp dropbear firewall network system wireless 日前已有大量软件包支持 UCI 模式管理, 但不是所有的软件包, 支持的软件包是这样来完成启动的 ( 以 samba 举例 ): 1. 启动脚本 /etc/init.d/samba 2. 启动脚本通过 UCI 分析库从 /etc/config/samba 获得启动参数 3. 启动脚本完成正常启动 165
166 UCI 由于 UCI 的数据文件较为简单, 并且具备了很 nice 的直接观感, 所以配置文件既可以使用 UCI 命令进行修改, 也可以使用 VI 编辑器直接修改文件 但如果两种方式都是用时需要注意 UCI 命令修改会产生缓存, 每次修改好要尽快确认保存避免出现冲突 最常见的几个 UCI 配置作用说明 文件 /etc/config/dhcp /etc/config/dropbear /etc/config/firewall /etc/config/network /etc/config/system /etc/config/wireless 作用 DHCP 服务配置, 为 LAN 口提供 IP SSH 服务配置路由转发, 端口转发, 防火墙规则自身网络接口配置时间服务器时区配置无线网络配置 syntax 1. UCI 的文件语法 keyword UCI 文件语法举例 config 'section-type' 'section' option 'key' 'value' list 'list_key' 'list_value' 关键字 含义 config section-type section 节点 节点类型 节点名称 166
167 UCI config 'example' 'test' option 'string' 'some value' option 'boolean' '1' list 'collection' 'first item' list 'collection' 'second item' Openwrt 开发与 Luci 介绍注意 :UCI 的文件名和标识符 ( option example test 中的 example 即为标识符, test 为 option 的值 ) 可以使用 a-z, 0-9 和下划线 _ 组合的任意字符串, 不允许使用横杠线 -, 而 option 的值可以使用任意字符 关键字 含义 option 选项 ( 节点中的一个元素 ) key value list list_key list_value 键值列表选项列表形式的一组参数列表键列表值 config 节点语法格式 config 'section-type' 'section' config 节点 ( 后文统一称为节点 ) 原则 : UCI 允许只有节点类型的匿名节点存在节点类型和名字建议使用单引号包含以免引起歧义节点中可以包含多个 option 选项或 list 列表选项节点遇到文件结束或遇到下一个节点代表完成 option 选项语法格式 : option 'key' 'value' option 选项 ( 后文统一称为选项 ) 原则 : 167
168 UCI 选项的键与值建议使用单引号包含 避免相同的选项键存在于同一个节点, 否则只有一个生效 list 列表选项语法格式 : list 'list_key' 'list_value' list 列表选项 ( 后文统一称为列表 ) 原则 : 选项的键与值建议使用单引号包含列表键的名字如果相同, 则相同键的值将会被当作数组传递给相应软件 UCI 的语法容错 : option example value option 'example' value option example "value" option "example" 'value' option 'example' "value" UCI 无法容忍的语法 : option 'example" "value' option example some value with space 尽量使用常规字符去处理器 UCI, 特殊字符有可能会破坏数据结构的完整性 1. UCI 命令读写配置 语法格式 uci [<options>] <command> [<arguments>] 读写规则 UCI 读取总是先读取内存中的缓存, 然后再读取文件中的 进行过增加, 修改, 删除操作后要执行生效指令, 否则所做修改只存留在缓存中 168
169 UCI read 取得节点类型 : uci get <config>.<section> 取得一个值 : uci get <config>.<section>.<option> 显示全部 UCI 配置 uci show 显示指定文件配置 uci show <config> 显示指定节点名字配置 uci show <config>.<section> 显示指定选项配置 uci show <config>.<section>.<option> 显示尚未生效的修改记录 uci changes <config> 匿名节点显示 ( 如果所显示内容有匿名节点, 使用 -X 参数可以显示出匿名节点的 ID ) uci show -X <config>.<section>.<option> 169
170 UCI write 增加一个匿名节点到文件 uci add <config> <section-type> 增加一个节点到文件中 uci set <config>.<section>=<section-type> 增加一个选项和值到节点中 uci set <config>.<section>.<option>=<value> 增加一个值到列表中 uci add_list <config>.<section>.<option>=<value> 修改一个节点的类型 uci set <config>.<section>=<section-type> 修改一个选项的值 uci set <config>.<section>.<option>=<value> 删除指定名字的节点 uci delete <config>.<section> 删除指定选项 uci delete <config>.<section>.<option> 170
171 UCI 删除列表 uci delete <config>.<section>.<list> 删除列表中一个值 uci del_list <config>.<section>.<option>=<string> 生效修改 ( 任何写入类的语法, 最终都要执行生效修改, 否则所做修改只在缓存中 ) uci commit <config> example [UCI+ 入门 ] FireWRT 新手教程 uci 设置网络命令 : mod=viewthread&tid=1014 在我们将 FireWRT 固件刷上 openwrt 系统后, 如果 openwrt 未安装 WEB 管理界面, 所以我们需要先通过 SSH 或者 telnet 对路由器进行网络设置, 设置完成后可通过 openwrt 的软件包管理 opkg 安装 web 设置界面 Luci 设置 LAN IP ( 即访问路由的 ip) uci set network.lan.ipaddr=[lan_ip] 使用 pppoe 设置 uci set network.wan.proto=pppoe uci set network.wan.username=[user] uci set network.wan.password=[password] // 设置 WAN 口类型为 pppoe // 这两行设置 pppoe 用户名和密码 如果要挂在上级路由下面, 就需要进行下面的设置 171
172 UCI uci set network.wan.proto=none uci set network.lan.gateway=[ip] uci set network.lan.dns=[ip] uci set dhcp.lan.ignore=1 // 关掉 wan // 网关指向上级路由 // DNS 指向上级路由 // 关掉 LAN 的 DHCP 最后对无线网络进行配置 uci set // 打开无线 uci set // 设置功率为 17dbm 太高 会烧无线模块 uci set // 设置无线信道为 6 uci set wireless.@wifi-iface[0].mode=ap // 设置无线模式为 AP uci set wireless.@wifi-iface[0].ssid=[ssid] // 设置无线 SSID uci set wireless.@wifi-iface[0].network=lan // 无线链接到 LAN 上 uci set wireless.@wifi-iface[0].encryption=psk2 // 设置加密为 WPA2-PSK uci set wireless.@wifi-iface[0].key=[password] // 设置无线密码 提交应用配置 uci commit /etc/init.d/network restart // 应用 // 重启网络服务 安装 LUCI 管理界面 opkg update // 更新软件列表 opkg list-installed // 查看已安装软件 opkg install luci // 安装 LUCI opkg install luci-i18n-chinese // 支持中文 即可完成 LUCI 的安装 输入以下命令开启支持 web 服务的 uhttpd 并设置其为自启动 : /etc/init.d/uhttpd enable /etc/init.d/uhttpd start 172
173 UCI keep practice shadowsocks UCI 使用手册 : 查看当前的 UCI 配置文件 uci export shadowsocks 修改 / 增加 option uci set shadowsocks.@shadowsocks[-1].option='value' 删除 option uci delete shadowsocks.@shadowsocks[-1].option 提交对 UCI 配置文件的修改, 提交后配置才能生效 uci commit shadowsocks 173
174 ChinaDNS + Shadowsocks WHAT 各个服务的依赖关系 : dns-forwarder 通过 TCP 查询 作为 ChinaDNS 的上游替代 ss-tunnel 使用 UDP 查询 的旧方案 GFW 干扰 UDP 丢包较严重 repo OpenWrt-dist is a depot of OpenWrt/LEDE device. OpenWrt-dist 提供 ChinaDNS dns-forwarder shadowsocks-libev simpleobfs 软件包但 被墙了, 需要自建软件源 : 174
175 ChinaDNS + Shadowsocks 1. 安装 WEB 服务 httpd 软件包 2. 下载对应 CPU 架构的软件包 so easy VPS 安装并启动 httpd 服务 : yum install -y httpd && service httpd start 查询路由器 CPU 架构 : root@openwrt:~# opkg print-architecture arch all 1 arch noarch 1 arch ar71xx 10 root@openwrt:~# opkg print-architecture tail -n 1 awk '{print $2}' ar71xx 下载 openwrt 对应 CPU 架构的源及公钥到 httpd 目录下 : arch=ar71xx opkg_key=" luci_repo=" base_repo=" }/" cd /var/www/html/ wget -c -m -np -nv -nh -e robots=off -R html --reject-regex "\?.=.;.=." "$l uci_repo" wget -c -m -np -nv -nh -e robots=off -R html --reject-regex "\?.=.;.=." "$b ase_repo" wget -c -nv "$opkg_key"-o /var/www/html/packages/openwrt-dist.pub # du -sh /var/www/html/packages/ 744K /var/www/html/packages/ # tree /var/www/html/packages/ /var/www/html/packages/ OpenWrt 175
176 ChinaDNS + Shadowsocks base ar71xx ChinaDNS_ _ar71xx.ipk dns-forwarder_ _ar71xx.ipk libmbedtls_ _ar71xx.ipk libsodium_ _ar71xx.ipk libudns_0.4-1_ar71xx.ipk Packages Packages.gz Packages.sig shadowsocks-libev_ _ar71xx.ipk shadowsocks-libev-server_ _ar71xx.ipk ShadowVPN_ _ar71xx.ipk simple-obfs_ _ar71xx.ipk simple-obfs-server_ _ar71xx.ipk luci luci-app-chinadns_ _all.ipk luci-app-dns-forwarder_ _all.ipk luci-app-shadowsocks_ _all.ipk luci-app-shadowsocks-without-ipset_ _all.ipk luci-app-shadowvpn_ _all.ipk Packages Packages.gz Packages.sig openwrt-dist.pub 4 directories, 22 files 下载 LEDE 对应 CPU 架构的源及公钥到 httpd 目录下 : root@lede:~# arch=$(opkg print-architecture tail -n 1 awk '{print $2}') root@lede:~# echo $arch mipsel_24kc arch=mipsel_24kc opkg_key=" luci_repo=" base_repo=" cd /var/www/html wget -c -m -np -nv -nh -e robots=off -R html --reject-regex "\?.=.;.=." "$l 176
177 ChinaDNS + Shadowsocks uci_repo" wget -c -m -np -nv -nh -e robots=off -R html --reject-regex "\?.=.;.=." "$b ase_repo" wget -c -nv "$opkg_key"-o /var/www/html/packages/openwrt-dist.pub # tree /var/www/html/packages/lede/ /var/www/html/packages/lede/ base mipsel_24kc ChinaDNS_ _mipsel_24kc.ipk dns-forwarder_ _mipsel_24kc.ipk libcares_ _mipsel_24kc.ipk libmbedtls_ _mipsel_24kc.ipk libsodium_ _mipsel_24kc.ipk libudns_0.4-1_mipsel_24kc.ipk Packages Packages.gz Packages.manifest Packages.sig shadowsocks-libev_ _mipsel_24kc.ipk shadowsocks-libev-server_ _mipsel_24kc.ipk ShadowVPN_ _mipsel_24kc.ipk simple-obfs_ _mipsel_24kc.ipk simple-obfs-server_ _mipsel_24kc.ipk luci luci-app-chinadns_ _all.ipk luci-app-dns-forwarder_ _all.ipk luci-app-shadowsocks_ _all.ipk luci-app-shadowsocks-without-ipset_ _all.ipk luci-app-shadowvpn_ _all.ipk Packages Packages.gz Packages.manifest Packages.sig 3 directories, 24 files TP Link WR703N 177
178 ChinaDNS + Shadowsocks opkg 导入 openwrt-dist.pub 公钥 : wget -O /tmp/openwrt-dist.pub cat /tmp/openwrt-dist.pub opkg-key add /tmp/openwrt-dist.pub root@openwrt:/# wget -O /tmp/o penwrt-dist.pub Connecting to fuckgfw.com ( :80) openwrt-dist.pub 100% **************************************** 104 0:00:00 ETA root@openwrt:/# cat /tmp/openwrt-dist.pub untrusted comment: public key 5c d305bc RWRcQiUGJ9MFvK9/3ma8yAZebnrCfGvZJN/qbjaVozu6Ey9+Ihgnggae root@openwrt:/# opkg-key add /tmp/openwrt-dist.pub 更新软件源 : root@openwrt:/tmp# cat /etc/opkg.conf dest root / dest ram /tmp lists_dir ext /var/opkg-lists option overlay_root /overlay option check_signature 1 src/gz openwrt_dist src/gz openwrt_dist_luci root@openwrt:~# opkg update Downloading Updated list of available packages in /var/opkg-lists/openwrt_dist. Downloading Signature check passed. Downloading Updated list of available packages in /var/opkg-lists/openwrt_dist_luci. Downloading Signature check passed. 178
179 ChinaDNS + Shadowsocks Downloading c/packages/base/packages.gz. Updated list of available packages in /var/opkg-lists/chaos_calmer_base. Downloading c/packages/base/packages.sig. Signature check passed. Downloading c/packages/luci/packages.gz. Updated list of available packages in /var/opkg-lists/chaos_calmer_luci. Downloading c/packages/luci/packages.sig. Signature check passed. Downloading c/packages/packages/packages.gz. Updated list of available packages in /var/opkg-lists/chaos_calmer_packages. Downloading c/packages/packages/packages.sig. Signature check passed. Downloading c/packages/routing/packages.gz. Updated list of available packages in /var/opkg-lists/chaos_calmer_routing. Downloading c/packages/routing/packages.sig. Signature check passed. Downloading c/packages/telephony/packages.gz. Updated list of available packages in /var/opkg-lists/chaos_calmer_telephon y. Downloading c/packages/telephony/packages.sig. Signature check passed. Downloading c/packages/management/packages.gz. Updated list of available packages in /var/opkg-lists/chaos_calmer_manageme nt. Downloading c/packages/management/packages.sig. Signature check passed. 安装软件包 : 179
180 ChinaDNS + Shadowsocks root@openwrt:~# opkg install curl bind-dig ChinaDNS luci-app-chinadns dns-f orwarder luci-app-dns-forwarder shadowsocks-libev luci-app-shadowsocks Installing curl ( ) to root... Downloading c/packages/base/curl_ _ar71xx.ipk. Installing libcurl ( ) to root... Downloading c/packages/base/libcurl_ _ar71xx.ipk. Installing libpolarssl ( ) to root... Downloading c/packages/base/libpolarssl_ _ar71xx.ipk. Installing bind-dig (9.9.8-P3-1) to root... Downloading c/packages/packages/bind-dig_9.9.8-p3-1_ar71xx.ipk. Installing bind-libs (9.9.8-P3-1) to root... Downloading c/packages/packages/bind-libs_9.9.8-p3-1_ar71xx.ipk. Installing libopenssl (1.0.2g-1) to root... Downloading c/packages/base/libopenssl_1.0.2g-1_ar71xx.ipk. Installing zlib ( ) to root... Downloading c/packages/base/zlib_ _ar71xx.ipk. Installing ChinaDNS ( ) to root... Downloading Installing luci-app-chinadns ( ) to root... Downloading 1-1_all.ipk. Installing dns-forwarder ( ) to root... Downloading Installing luci-app-dns-forwarder ( ) to root... Downloading _ _all.ipk. Installing shadowsocks-libev ( ) to root... Downloading ev_ _ar71xx.ipk. Installing libev (4.19-1) to root... Downloading c/packages/packages/libev_4.19-1_ar71xx.ipk. 180
181 ChinaDNS + Shadowsocks Installing libudns (0.4-1) to root... Downloading r71xx.ipk. Installing libpcre (8.38-1) to root... Downloading c/packages/packages/libpcre_8.38-1_ar71xx.ipk. Installing libpthread ( ) to root... Downloading c/packages/base/libpthread_ _ar71xx.ipk. Installing libsodium ( ) to root... Downloading 2-1_ar71xx.ipk. Installing libmbedtls ( ) to root... Downloading 1-2_ar71xx.ipk. Installing luci-app-shadowsocks ( ) to root... Downloading Installing ipset (6.24-1) to root... Downloading c/packages/base/ipset_6.24-1_ar71xx.ipk. Installing kmod-ipt-ipset ( ) to root... Downloading c/packages/base/kmod-ipt-ipset_ _ar71xx.ipk. Installing kmod-nfnetlink ( ) to root... Downloading c/packages/base/kmod-nfnetlink_ _ar71xx.ipk. Installing libmnl ( ) to root... Downloading c/packages/base/libmnl_ _ar71xx.ipk. Configuring zlib. Configuring libev. Configuring libudns. Configuring libpcre. Configuring libpthread. Configuring libsodium. Configuring libmbedtls. Configuring shadowsocks-libev. Configuring kmod-nfnetlink. Configuring libpolarssl. Configuring libcurl. Configuring libmnl. 181
182 ChinaDNS + Shadowsocks Configuring ChinaDNS. Configuring luci-app-chinadns. Configuring curl. Configuring dns-forwarder. Configuring kmod-ipt-ipset. Configuring ipset. Configuring libopenssl. Configuring bind-libs. Configuring luci-app-dns-forwarder. Configuring bind-dig. Configuring luci-app-shadowsocks. 软件包占用大概 3M 空间 : root@openwrt:~# df -ht Filesystem Type Size Used Available Use% Mounted on rootfs rootfs 12.5M 3.3M 9.2M 26% / /dev/root squashfs 2.3M 2.3M 0 100% /rom tmpfs tmpfs 29.8M 664.0K 29.2M 2% /tmp tmpfs tmpfs 29.8M 44.0K 29.8M 0% /tmp/roo t tmpfs tmpfs 512.0K K 0% /dev /dev/mtdblock3 jffs2 12.5M 3.3M 9.2M 26% /overlay overlayfs:/overlay overlay 12.5M 3.3M 9.2M 26% / ss-redir 支持 UDP 代理依赖 ip 和 iptables-mod-tproxy 软件包 : 182
183 ChinaDNS + Shadowsocks root@openwrt:~# opkg find ip ip Routing control utility (Minimal) root@openwrt:~# opkg find ip-full ip-full Routing control utility (Full) root@openwrt:~# opkg find *tproxy* iptables-mod-tproxy Transparent proxy iptables extensions. Matches: - socket Targets: - TPROXY kmod-ipt-tproxy Kernel modules for Transparent Proxying root@openwrt:~# opkg install ip iptables-mod-tproxy Installing ip ( ) to root... Downloading c/packages/base/ip_ _ar71xx.ipk. Installing iptables-mod-tproxy ( ) to root... Downloading c/packages/base/iptables-mod-tproxy_ _ar71xx.ipk. Installing kmod-ipt-tproxy ( ) to root... Downloading c/packages/base/kmod-ipt-tproxy_ _ar71xx.ipk. Configuring ip. Configuring kmod-ipt-tproxy. failed to find a module named nf_tproxy_core Configuring iptables-mod-tproxy. config 默认配置 : root@openwrt:~# uci show dhcp dhcp.@dnsmasq[0]=dnsmasq dhcp.@dnsmasq[0].domainneeded='1' 183
184 ChinaDNS + Shadowsocks dhcp.@dnsmasq[0].boguspriv='1' dhcp.@dnsmasq[0].filterwin2k='0' dhcp.@dnsmasq[0].localise_queries='1' dhcp.@dnsmasq[0].rebind_protection='1' dhcp.@dnsmasq[0].rebind_localhost='1' dhcp.@dnsmasq[0].local='/lan/' dhcp.@dnsmasq[0].domain='lan' dhcp.@dnsmasq[0].expandhosts='1' dhcp.@dnsmasq[0].nonegcache='0' dhcp.@dnsmasq[0].authoritative='1' dhcp.@dnsmasq[0].readethers='1' dhcp.@dnsmasq[0].leasefile='/tmp/dhcp.leases' dhcp.@dnsmasq[0].resolvfile='/tmp/resolv.conf.auto' dhcp.@dnsmasq[0].localservice='1' dhcp.lan=dhcp dhcp.lan.interface='lan' dhcp.lan.start='100' dhcp.lan.limit='150' dhcp.lan.leasetime='12h' dhcp.lan.dhcpv6='server' dhcp.lan.ra='server' dhcp.lan.ra_management='1' dhcp.wan=dhcp dhcp.wan.interface='wan' dhcp.wan.ignore='1' dhcp.odhcpd=odhcpd dhcp.odhcpd.maindhcp='0' dhcp.odhcpd.leasefile='/tmp/hosts/odhcpd' dhcp.odhcpd.leasetrigger='/usr/sbin/odhcpd-update' root@openwrt:~# cat /etc/config/dhcp config dnsmasq option domainneeded '1' option boguspriv '1' option filterwin2k '0' option localise_queries '1' option rebind_protection '1' option rebind_localhost '1' option local '/lan/' option domain 'lan' option expandhosts '1' 184
185 ChinaDNS + Shadowsocks option nonegcache '0' option authoritative '1' option readethers '1' option leasefile '/tmp/dhcp.leases' option resolvfile '/tmp/resolv.conf.auto' option localservice '1' config dhcp 'lan' option interface 'lan' option start '100' option limit '150' option leasetime '12h' option dhcpv6 'server' option ra 'server' option ra_management '1' config dhcp 'wan' option interface 'wan' option ignore '1' config odhcpd 'odhcpd' option maindhcp '0' option leasefile '/tmp/hosts/odhcpd' option leasetrigger '/usr/sbin/odhcpd-update' root@openwrt:/tmp# uci show dns-forwarder dns-forwarder.@dns-forwarder[0]=dns-forwarder dns-forwarder.@dns-forwarder[0].enable='0' dns-forwarder.@dns-forwarder[0].listen_addr=' ' dns-forwarder.@dns-forwarder[0].listen_port='5300' dns-forwarder.@dns-forwarder[0].dns_servers=' ' root@openwrt:/tmp# uci show chinadns chinadns.@chinadns[0]=chinadns chinadns.@chinadns[0].enable='0' chinadns.@chinadns[0].bidirectional='0' chinadns.@chinadns[0].chnroute='/etc/chinadns_chnroute.txt' chinadns.@chinadns[0].port='5353' chinadns.@chinadns[0].server=' , ' root@openwrt:/tmp# uci show shadowsocks shadowsocks.@general[0]=general 185
186 ChinaDNS + Shadowsocks shadowsocks.@general[0].startup_delay='0' shadowsocks.@transparent_proxy[0]=transparent_proxy shadowsocks.@transparent_proxy[0].main_server='nil' shadowsocks.@transparent_proxy[0].udp_relay_server='nil' shadowsocks.@transparent_proxy[0].local_port='1234' shadowsocks.@socks5_proxy[0]=socks5_proxy shadowsocks.@socks5_proxy[0].server='nil' shadowsocks.@socks5_proxy[0].local_port='1080' shadowsocks.@port_forward[0]=port_forward shadowsocks.@port_forward[0].server='nil' shadowsocks.@port_forward[0].local_port='5300' shadowsocks.@port_forward[0].destination=' :53' shadowsocks.@servers[0]=servers shadowsocks.@servers[0].alias='sample' shadowsocks.@servers[0].fast_open='0' shadowsocks.@servers[0].server=' ' shadowsocks.@servers[0].server_port='8388' shadowsocks.@servers[0].timeout='60' shadowsocks.@servers[0].password='barfoo!' shadowsocks.@servers[0].encrypt_method='rc4-md5' shadowsocks.@access_control[0]=access_control shadowsocks.@access_control[0].self_proxy='1' root@openwrt:~# cat /etc/config/dns-forwarder config dns-forwarder option enable '0' option listen_addr ' ' option listen_port '5300' option dns_servers ' ' root@openwrt:~# cat /etc/config/chinadns config chinadns option enable '0' option bidirectional '0' option chnroute '/etc/chinadns_chnroute.txt' option port '5353' option server ' , ' root@openwrt:~# cat /etc/config/shadowsocks 186
187 ChinaDNS + Shadowsocks config general option startup_delay '0' config transparent_proxy list main_server 'nil' option udp_relay_server 'nil' option local_port '1234' config socks5_proxy list server 'nil' option local_port '1080' config port_forward list server 'nil' option local_port '5300' option destination ' :53' config servers option alias 'sample' option fast_open '0' option server ' ' option server_port '8388' option timeout '60' option password 'barfoo!' option encrypt_method 'rc4-md5' config access_control option self_proxy '1' 配置 DNSmasq 服务 : 187
188 ChinaDNS + Shadowsocks uci set dhcp.@dnsmasq[0].nohosts=1 uci set dhcp.@dnsmasq[0].noresolv=1 uci set dhcp.@dnsmasq[0].local= #5353 uci changes uci commit root@openwrt:~# uci set dhcp.@dnsmasq[0].nohosts=1 root@openwrt:~# uci set dhcp.@dnsmasq[0].noresolv=1 root@openwrt:~# uci set dhcp.@dnsmasq[0].local= #5353 root@openwrt:~# uci changes dhcp.cfg02411c.nohosts='1' dhcp.cfg02411c.noresolv='1' dhcp.cfg02411c.local=' #5353' root@openwrt:~# uci commit TODO : 关闭 Use DNS servers advertised by peer 避免 WAN 接口连接外网时被上层路由 器指定 DNS 服务器 : 参考 :OpenWrt Router uci set network.wan.peerdns=0 配置 shadowsocks 服务 : 188
189 ChinaDNS + Shadowsocks uci set shadowsocks.@servers[0].server= uci set shadowsocks.@servers[0].server_port=12345 uci set shadowsocks.@servers[0].password=ss_srv_pass uci set shadowsocks.@servers[0].encrypt_method=rc4-md5 uci set shadowsocks.@transparent_proxy[0].main_server=cfg0a4a8f uci set shadowsocks.@access_control[0].lan_target=ss_spec_wan_ac uci set shadowsocks.@access_control[0].wan_bp_list=/etc/chinadns_chnroute.t xt uci changes uci commit root@openwrt:~# uci set shadowsocks.@servers[0].server= root@openwrt:~# uci set shadowsocks.@servers[0].server_port=12345 root@openwrt:~# uci set shadowsocks.@servers[0].password=ss_srv_pass root@openwrt:~# uci set shadowsocks.@servers[0].encrypt_method=rc4-md5 root@openwrt:~# root@openwrt:~# uci set shadowsocks.@transparent_proxy[0].main_server=cfg0a 4a8f root@openwrt:~# root@openwrt:~# uci set shadowsocks.@access_control[0].lan_target=ss_spec_w AN_AC root@openwrt:~# uci set shadowsocks.@access_control[0].wan_bp_list=/etc/chi nadns_chnroute.txt root@openwrt:~# uci changes shadowsocks.cfg0a4a8f.server=' ' shadowsocks.cfg0a4a8f.server_port='12345' shadowsocks.cfg0a4a8f.password='v_vl_fuck_gfw' shadowsocks.cfg043a58.main_server='cfg0a4a8f' shadowsocks.cfg0c4417.lan_target='ss_spec_wan_ac' shadowsocks.cfg0c4417.wan_bp_list='/etc/chinadns_chnroute.txt' root@openwrt:~# uci commit 配置 dns-forwarder 服务 : 189
190 ChinaDNS + Shadowsocks uci set dns-forwarder.@dns-forwarder[0].enable=1 uci set dns-forwarder.@dns-forwarder[0].listen_addr=' ' uci set dns-forwarder.@dns-forwarder[0].listen_port='5300' uci set dns-forwarder.@dns-forwarder[0].dns_servers=' ' uci changes uci commit root@openwrt:/tmp# uci set dns-forwarder.@dns-forwarder[0].enable=1 root@openwrt:/tmp# uci changes dns-forwarder.cfg02e1e3.enable='1' root@openwrt:/tmp# uci commit 配置 ChinaDNS 服务 : uci set chinadns.@chinadns[0].enable=1 uci set chinadns.@chinadns[0].server=' , :5300' uci changes uci commit root@openwrt:/tmp# uci set chinadns.@chinadns[0].enable=1 root@openwrt:/tmp# uci set chinadns.@chinadns[0].server=' , :5300' root@openwrt:/tmp# uci changes chinadns.cfg0265ad.enable='1' chinadns.cfg0265ad.server=' , :5300' root@openwrt:/tmp# uci commit 启动 shadowsocks 服务 : 190
191 ChinaDNS + Shadowsocks /etc/init.d/shadowsocks enable /etc/init.d/shadowsocks start pgrep -lf ss netstat -lntpu grep ss root@openwrt:~# /etc/init.d/shadowsocks enable root@openwrt:~# /etc/init.d/shadowsocks start :14:01 INFO: set MTU to 1492 root@openwrt:~# pgrep -lf ss 296 ss-redir -c /var/etc/shadowsocks.cfg0a4a8f.json -l mtu f / var/run/ss-redir-cfg0a4a8f.pid root@openwrt:~# netstat -lntpu grep ss Proto Recv-Q Send-Q Local Address Foreign Address State PID/Progr am name tcp : :* LISTEN 296/ss-re dir 启动 dns-forwarder 服务 : /etc/init.d/dns-forwarder enable /etc/init.d/dns-forwarder start pgrep -lf dns-forwarder netstat -lntpu grep dns-forwarder root@openwrt:~# /etc/init.d/dns-forwarder enable root@openwrt:~# /etc/init.d/dns-forwarder start root@openwrt:~# pgrep -lf dns-forwarder 3180 /usr/bin/dns-forwarder -b p s root@openwrt:~# netstat -lntpu grep dns-for Proto Recv-Q Send-Q Local Address Foreign Address State PID/Progr am name udp : :* 3180/dnsforwarder 启动 ChinaDNS 服务 : 191
192 ChinaDNS + Shadowsocks /etc/init.d/chinadns enable /etc/init.d/chinadns start pgrep -lf chinadns netstat -lntpu grep chinadns root@openwrt:~# /etc/init.d/chinadns enable root@openwrt:~# /etc/init.d/chinadns start root@openwrt:~# pgrep -lf chinadns 3241 /usr/bin/chinadns -m -p s , :5300 -c /etc/china dns_chnroute.txt root@openwrt:~# netstat -lntpu grep chinadns Proto Recv-Q Send-Q Local Address Foreign Address State PID/Progr am name udp : :* 3241/chin adns 测试 DNS 解析 : root@openwrt:~# dig +short root@openwrt:~# dig +short -p root@openwrt:~# dig +short -p root@openwrt:~# dig +short dropbox.com 重启 dnsmasq 服务 : root@openwrt:~# cat /var/etc/dnsmasq.conf # auto-generated config file from /etc/config/dhcp conf-file=/etc/dnsmasq.conf dhcp-authoritative domain-needed 192
193 ChinaDNS + Shadowsocks localise-queries read-ethers bogus-priv expand-hosts local-service domain=lan server=/lan/ dhcp-leasefile=/tmp/dhcp.leases resolv-file=/tmp/resolv.conf.auto addn-hosts=/tmp/hosts conf-dir=/tmp/dnsmasq.d stop-dns-rebind rebind-localhost-ok dhcp-broadcast=tag:needs-broadcast dhcp-range=lan, , , ,12h no-dhcp-interface=eth0 root@openwrt:~# /etc/init.d/dnsmasq restart root@openwrt:~# cat /var/etc/dnsmasq.conf # auto-generated config file from /etc/config/dhcp conf-file=/etc/dnsmasq.conf dhcp-authoritative domain-needed no-hosts no-resolv localise-queries read-ethers bogus-priv expand-hosts local-service domain=lan server= #5353 dhcp-leasefile=/tmp/dhcp.leases resolv-file=/tmp/resolv.conf.auto addn-hosts=/tmp/hosts conf-dir=/tmp/dnsmasq.d stop-dns-rebind rebind-localhost-ok dhcp-broadcast=tag:needs-broadcast dhcp-range=lan, , , ,12h 193
194 ChinaDNS + Shadowsocks no-dhcp-interface=eth0 xiaomi nano repo 注意 : 网线插在 LAN 口才能 SSH $ ssh root@ BusyBox v () built-in shell (ash) / /\ / LE / \ \ / DE / \ _ ) _ / / LE \ / lede-project.o rg \ \ DE / \ LE \ / \ DE \ / Reboot ( , r eec8bd5f) \ \/ === WARNING! ===================================== There is no root password defined on this device! Use the "passwd" command to set up a new password in order to prevent unauthorized SSH logins root@lede:~# netstat -lntp Active Internet connections (only servers) Proto Recv-Q Send-Q Local Address Foreign Address State PID/Program name tcp : :* LISTEN 842/uhttpd tcp : :* LISTEN 1005/dnsmasq 194
195 ChinaDNS + Shadowsocks tcp : :* LISTEN 1027/dropbear tcp 0 0 :::80 :::* LISTEN 842/uhttpd tcp 0 0 :::53 :::* LISTEN 1005/dnsmasq tcp 0 0 :::22 :::* LISTEN 1027/dropbear root@lede:~# df -ht Filesystem Type Size Used Available Use% Mounted on /dev/root squashfs 2.3M 2.3M 0 100% /rom tmpfs tmpfs 29.8M 428.0K 29.4M 1% /tmp tmpfs tmpfs 29.8M 52.0K 29.8M 0% /tmp/roo t tmpfs tmpfs 512.0K K 0% /dev /dev/mtdblock6 jffs2 4.3M 276.0K 4.0M 6% /overlay overlayfs:/overlay overlay 4.3M 276.0K 4.0M 6% / 安装软件包 : arch=mipsel_24kc echo "src/gz openwrt_dist src/gz openwrt_dist_luci >> /etc/opk g.conf cat /etc/opkg.conf root@lede:~# cat /etc/opkg.conf dest root / dest ram /tmp lists_dir ext /var/opkg-lists option overlay_root /overlay option check_signature 1 src/gz openwrt_dist src/gz openwrt_dist_luci root@lede:~# wget -O /tmp/open wrt-dist.pub Downloading ' Connecting to :80 195
196 ChinaDNS + Shadowsocks Writing to '/tmp/openwrt-dist.pub' /tmp/openwrt-dist.pu 100% ******************************* 104 0:00:00 ETA Download completed (104 bytes) root@lede:~# opkg-key add /tmp/openwrt-dist.pub root@lede:~# opkg update Downloading Updated list of available packages in /var/opkg-lists/openwrt_dist Downloading Signature check passed. Downloading Updated list of available packages in /var/opkg-lists/openwrt_dist_luci Downloading Signature check passed. Downloading ps/mt7628/packages/packages.gz Updated list of available packages in /var/opkg-lists/reboot_core Downloading ps/mt7628/packages/packages.sig Signature check passed. Downloading sel_24kc/base/packages.gz Updated list of available packages in /var/opkg-lists/reboot_base Downloading sel_24kc/base/packages.sig Signature check passed. Downloading sel_24kc/luci/packages.gz Updated list of available packages in /var/opkg-lists/reboot_luci Downloading sel_24kc/luci/packages.sig Signature check passed. Downloading sel_24kc/packages/packages.gz Updated list of available packages in /var/opkg-lists/reboot_packages Downloading sel_24kc/packages/packages.sig Signature check passed. Downloading sel_24kc/routing/packages.gz 196
197 ChinaDNS + Shadowsocks Updated list of available packages in /var/opkg-lists/reboot_routing Downloading sel_24kc/routing/packages.sig Signature check passed. Downloading sel_24kc/telephony/packages.gz Updated list of available packages in /var/opkg-lists/reboot_telephony Downloading sel_24kc/telephony/packages.sig Signature check passed. root@lede:~# opkg install bind-dig ChinaDNS luci-app-chinadns dns-forwarder luci-app-dns-forwarder shadowsocks-libev luci-app-shadowsocks simple-obfs ip-full iptables-mod-tproxy Installing bind-dig ( P5-1) to root... Downloading sel_24kc/packages/bind-dig_ p5-1_mipsel_24kc.ipk Installing zlib ( ) to root... Downloading sel_24kc/base/zlib_ _mipsel_24kc.ipk Installing libopenssl (1.0.2k-1) to root... Downloading sel_24kc/base/libopenssl_1.0.2k-1_mipsel_24kc.ipk Installing bind-libs ( P5-1) to root... Downloading sel_24kc/packages/bind-libs_ p5-1_mipsel_24kc.ipk Installing ChinaDNS ( ) to root... Downloading 2-5_mipsel_24kc.ipk Installing luci-app-chinadns ( ) to root... Downloading _all.ipk Installing dns-forwarder ( ) to root... Downloading _ _mipsel_24kc.ipk Installing luci-app-dns-forwarder ( ) to root... Downloading _all.ipk Installing shadowsocks-libev ( ) to root... Downloading ibev_ _mipsel_24kc.ipk Installing libev (4.22-1) to root
198 ChinaDNS + Shadowsocks Downloading sel_24kc/packages/libev_4.22-1_mipsel_24kc.ipk Installing libcares ( ) to root... Downloading Installing libpcre (8.41-2) to root... Downloading sel_24kc/packages/libpcre_8.41-2_mipsel_24kc.ipk Installing libsodium ( ) to root... Downloading Installing libmbedtls ( ) to root... Downloading sel_24kc/base/libmbedtls_ _mipsel_24kc.ipk Installing luci-app-shadowsocks ( ) to root... Downloading 1-1_all.ipk Installing kmod-nfnetlink ( ) to root... Downloading ps/mt7628/packages/kmod-nfnetlink_ _mipsel_24kc.ipk Installing kmod-ipt-ipset ( ) to root... Downloading ps/mt7628/packages/kmod-ipt-ipset_ _mipsel_24kc.ipk Installing libmnl ( ) to root... Downloading sel_24kc/base/libmnl_ _mipsel_24kc.ipk Installing ipset (6.30-1) to root... Downloading sel_24kc/base/ipset_6.30-1_mipsel_24kc.ipk Installing simple-obfs ( ) to root... Downloading Installing ip-full ( ) to root... Downloading sel_24kc/base/ip-full_ _mipsel_24kc.ipk Installing iptables-mod-tproxy ( ) to root... Downloading sel_24kc/base/iptables-mod-tproxy_ _mipsel_24kc.ipk Installing kmod-ipt-tproxy ( ) to root... Downloading ps/mt7628/packages/kmod-ipt-tproxy_ _mipsel_24kc.ipk Configuring zlib. 198
199 ChinaDNS + Shadowsocks Configuring libev. Configuring libcares. Configuring libpcre. Configuring libsodium. Configuring libmbedtls. Configuring shadowsocks-libev. Configuring ip-full. Configuring kmod-nfnetlink. Configuring kmod-ipt-tproxy. Configuring libmnl. Configuring ChinaDNS. Configuring luci-app-chinadns. Configuring dns-forwarder. Configuring kmod-ipt-ipset. Configuring ipset. Configuring iptables-mod-tproxy. Configuring libopenssl. Configuring bind-libs. Configuring simple-obfs. Configuring luci-app-dns-forwarder. Configuring bind-dig. Configuring luci-app-shadowsocks. 配置 shadowsocks-libev 服务 : root@lede:~# uci set shadowsocks.@servers[0]=servers root@lede:~# uci set shadowsocks.@servers[0].server=' ' root@lede:~# uci set shadowsocks.@servers[0].server_port=12345 root@lede:~# uci set shadowsocks.@servers[0].password=your_ss_password root@lede:~# uci set shadowsocks.@servers[0].encrypt_method='rc4-md5' root@lede:~# uci changes shadowsocks.cfg0a4a8f='servers' shadowsocks.cfg0a4a8f.server=' ' shadowsocks.cfg0a4a8f.server_port='12345' shadowsocks.cfg0a4a8f.password='your_ss_password' root@lede:~# SS_CFGID=$(uci show shadowsocks.@servers[0].alias awk -F '.' ' {print $2}') root@lede:~# uci set shadowsocks.@transparent_proxy[0].main_server="$ss_cfg ID" 199
200 ChinaDNS + Shadowsocks root@lede:~# uci changes shadowsocks.cfg0a4a8f='servers' shadowsocks.cfg0a4a8f.server=' ' shadowsocks.cfg0a4a8f.server_port='12345' shadowsocks.cfg0a4a8f.password='your_ss_password' shadowsocks.cfg043a58.main_server='cfg0a4a8f' root@lede:~# uci set shadowsocks.@access_control[0].lan_target='ss_spec_wan _AC' root@lede:~# uci set shadowsocks.@access_control[0].wan_bp_list='/etc/china dns_chnroute.txt' root@lede:~# uci changes shadowsocks.cfg0a4a8f='servers' shadowsocks.cfg0a4a8f.server=' ' shadowsocks.cfg0a4a8f.server_port='12345' shadowsocks.cfg0a4a8f.password='your_ss_password' shadowsocks.cfg043a58.main_server='cfg0a4a8f' shadowsocks.cfg0c4417.lan_target='ss_spec_wan_ac' shadowsocks.cfg0c4417.wan_bp_list='/etc/chinadns_chnroute.txt' root@lede:~# uci show shadowsocks shadowsocks.@general[0]=general shadowsocks.@general[0].startup_delay='0' shadowsocks.@transparent_proxy[0]=transparent_proxy shadowsocks.@transparent_proxy[0].udp_relay_server='nil' shadowsocks.@transparent_proxy[0].local_port='1234' shadowsocks.@transparent_proxy[0].main_server='cfg0a4a8f' shadowsocks.@socks5_proxy[0]=socks5_proxy shadowsocks.@socks5_proxy[0].server='nil' shadowsocks.@socks5_proxy[0].local_port='1080' shadowsocks.@port_forward[0]=port_forward shadowsocks.@port_forward[0].server='nil' shadowsocks.@port_forward[0].local_port='5300' shadowsocks.@port_forward[0].destination=' :53' shadowsocks.@servers[0]=servers shadowsocks.@servers[0].alias='sample' shadowsocks.@servers[0].fast_open='0' shadowsocks.@servers[0].timeout='60' shadowsocks.@servers[0].encrypt_method='rc4-md5' shadowsocks.@servers[0].server=' ' 200
201 ChinaDNS + Shadowsocks shadowsocks.@servers[0].server_port='12345' shadowsocks.@servers[0].password='your_ss_password' shadowsocks.@access_control[0]=access_control shadowsocks.@access_control[0].self_proxy='1' shadowsocks.@access_control[0].lan_target='ss_spec_wan_ac' shadowsocks.@access_control[0].wan_bp_list='/etc/chinadns_chnroute.txt' root@lede:~# /etc/init.d/shadowsocks enable root@lede:~# /etc/init.d/shadowsocks start :28:43 INFO: set MTU to 1492 root@lede:~# pgrep -lf ss 379 ss-redir -c /var/etc/shadowsocks.cfg0a4a8f.json -l mtu f / var/run/ss-redir-cfg0a4a8f.pid root@lede:~# netstat -lntpu grep ss Proto Recv-Q Send-Q Local Address Foreign Address State PID/Program name tcp : :* LISTEN 379/ss-redir 配置 dns-forwarder 服务 : 201
202 ChinaDNS + Shadowsocks root@lede:~# uci set dns-forwarder.@dns-forwarder[0]=dns-forwarder root@lede:~# uci set dns-forwarder.@dns-forwarder[0].listen_addr=' ' root@lede:~# uci set dns-forwarder.@dns-forwarder[0].listen_port='5300' root@lede:~# uci set dns-forwarder.@dns-forwarder[0].dns_servers=' ' root@lede:~# uci set dns-forwarder.@dns-forwarder[0].enable='1' root@lede:~# uci changes dns-forwarder.cfg02e1e3='dns-forwarder' dns-forwarder.cfg02e1e3.enable='1' root@lede:~# uci commit root@lede:~# uci show dns-forwarder dns-forwarder.@dns-forwarder[0]=dns-forwarder dns-forwarder.@dns-forwarder[0].listen_addr=' ' dns-forwarder.@dns-forwarder[0].listen_port='5300' dns-forwarder.@dns-forwarder[0].dns_servers=' ' dns-forwarder.@dns-forwarder[0].enable='1' root@lede:~# /etc/init.d/dns-forwarder enable root@lede:~# /etc/init.d/dns-forwarder start root@lede:~# pgrep -lf dns-for 3763 /usr/bin/dns-forwarder -b p s root@lede:~# netstat -lntpu grep dns-for udp : :* 3763/dns-forwarder 配置 ChinaDNS 服务 : 202
203 ChinaDNS + Shadowsocks root@lede:~# uci set chinadns.@chinadns[0]=chinadns root@lede:~# uci set chinadns.@chinadns[0].bidirectional='0' root@lede:~# uci set chinadns.@chinadns[0].chnroute='/etc/chinadns_chnroute.txt' root@lede:~# uci set chinadns.@chinadns[0].port='5353' root@lede:~# uci set chinadns.@chinadns[0].enable='1' root@lede:~# uci set chinadns.@chinadns[0].server=' , :5300 ' root@lede:~# uci changes chinadns.cfg0265ad='chinadns' chinadns.cfg0265ad.enable='1' chinadns.cfg0265ad.server=' , :5300' root@lede:~# uci commit root@lede:~# /etc/init.d/chinadns enable root@lede:~# /etc/init.d/chinadns start root@lede:~# pgrep -lf chinadns 3895 /usr/bin/chinadns -m -p s , :5300 -c /etc/china dns_chnroute.txt root@lede:~# netstat -lntpu grep chinadns udp : :* 3895/chinadns 配置 WIFI : 203
204 ChinaDNS + Shadowsocks uci set wireless.@wifi-device[0].country='cn' uci set wireless.@wifi-device[0].disabled='0' uci set wireless.@wifi-device[0].txpower='17' uci set wireless.@wifi-iface[0].ssid='fuckgfw' uci set wireless.@wifi-iface[0].encryption='psk2' uci set wireless.@wifi-iface[0].key='your_wifi_password' root@lede:~# uci changes wireless.radio0.disabled='0' wireless.radio0.country='cn' wireless.radio0.txpower='17' wireless.default_radio0.ssid='fuckgfw' wireless.default_radio0.encryption='psk2' wireless.default_radio0.key='your_wifi_password' root@lede:~# uci commit root@lede:~# uci show wireless wireless.radio0=wifi-device wireless.radio0.type='mac80211' wireless.radio0.channel='11' wireless.radio0.hwmode='11g' wireless.radio0.path='platform/ wmac' wireless.radio0.htmode='ht20' wireless.radio0.disabled='0' wireless.radio0.country='cn' wireless.radio0.txpower='17' wireless.default_radio0=wifi-iface wireless.default_radio0.device='radio0' wireless.default_radio0.network='lan' wireless.default_radio0.mode='ap' wireless.default_radio0.ssid='fuckgfw' wireless.default_radio0.encryption='psk2' wireless.default_radio0.key='your_wifi_password' 使用 wifi 命令启动无线 : root@lede:~# wifi status { "radio0": { 204
205 ChinaDNS + Shadowsocks } } "up": false, "pending": false, "autostart": true, "disabled": true, "retry_setup_failed": false, "config": { "channel": "11", "hwmode": "11g", "path": "platform\/ wmac", "htmode": "HT20", "disabled": true }, "interfaces": [ { "section": "default_radio0", "config": { "mode": "ap", "ssid": "LEDE", "encryption": "none", "network": [ "lan" ], "mode": "ap" } } ] root@lede:~# wifi root@lede:~# wifi status { "radio0": { "up": true, "pending": false, "autostart": true, "disabled": false, "retry_setup_failed": false, "config": { "channel": "11", "hwmode": "11g", 205
206 ChinaDNS + Shadowsocks } } "path": "platform\/ wmac", "htmode": "HT20", "country": "CN", "disabled": false }, "interfaces": [ { "section": "default_radio0", "ifname": "wlan0", "config": { "mode": "ap", "ssid": "fuckgfw", "encryption": "psk2", "key": "YOUR_WIFI_PASSWORD", "network": [ "lan" ], "mode": "ap" } } ] 配置 network : root@lede:~# uci delete network.globals.ula_prefix root@lede:~# uci delete network.wan6 root@lede:~# uci set network.wan.peerdns=0 root@lede:~# uci set network.lan.ipaddr=' ' root@lede:~# uci changes -network.globals.ula_prefix -network.wan6 network.wan.peerdns='0' network.lan.ipaddr=' ' root@lede:~# uci commit 配置 DNSmasq 服务 : 206
207 ChinaDNS + Shadowsocks root@lede:~# pgrep -lf dnsmasq 1069 /usr/sbin/dnsmasq -C /var/etc/dnsmasq.conf.cfg02411c -k -x /var/run/dn smasq/dnsmasq.cfg02411c.pid root@lede:~# cat /var/etc/dnsmasq.conf.cfg02411c sed -e '/^#/d' -e '/^$/d' conf-file=/etc/dnsmasq.conf dhcp-authoritative domain-needed localise-queries read-ethers bogus-priv expand-hosts local-service domain=lan server=/lan/ dhcp-leasefile=/tmp/dhcp.leases resolv-file=/tmp/resolv.conf.auto stop-dns-rebind rebind-localhost-ok dhcp-broadcast=tag:needs-broadcast addn-hosts=/tmp/hosts conf-dir=/tmp/dnsmasq.d user=dnsmasq group=dnsmasq dhcp-range=lan, , , ,12h no-dhcp-interface=eth0.2 uci set dhcp.@dnsmasq[0].nohosts='1' uci set dhcp.@dnsmasq[0].noresolv='1' uci set dhcp.@dnsmasq[0].local=' #5353' uci changes uci commit root@lede:~# uci set dhcp.@dnsmasq[0].nohosts='1' root@lede:~# uci set dhcp.@dnsmasq[0].noresolv='1' root@lede:~# uci set dhcp.@dnsmasq[0].local=' #5353' root@lede:~# uci changes dhcp.cfg02411c.nohosts='1' dhcp.cfg02411c.noresolv='1' dhcp.cfg02411c.local=' #5353' 207
208 ChinaDNS + Shadowsocks root@lede:~# uci commit 重启网络服务和 DNSmasq 服务 ( 备份 history 记录 ): root@lede:~# /etc/init.d/network restart && /etc/init.d/dnsmasq restart root@lede:~# cat /var/etc/dnsmasq.conf.cfg02411c sed -e '/^#/d' -e '/^$/d' conf-file=/etc/dnsmasq.conf dhcp-authoritative domain-needed no-hosts no-resolv localise-queries read-ethers bogus-priv expand-hosts local-service domain=lan server= #5353 dhcp-leasefile=/tmp/dhcp.leases stop-dns-rebind rebind-localhost-ok dhcp-broadcast=tag:needs-broadcast addn-hosts=/tmp/hosts conf-dir=/tmp/dnsmasq.d user=dnsmasq group=dnsmasq dhcp-range=lan, , , ,12h root@lede:~# dig +short dropbox.com DNSmasq 配置 no-resolv 没有生效 : 208
209 ChinaDNS + Shadowsocks root@lede:~# cat /etc/resolv.conf # Interface wan nameserver search lan # Interface wan6 nameserver fe80::e695:6eff:fe40:6576%eth0.2 search lan root@lede:~# dig +short root@lede:~# dig +short dropbox.com 需要 : 禁用 IPv6 禁用上游 DHCP 分配的 nameserver 禁用 IPv6 [OpenWrt-Users] how to switch off IPV6 completely [on a BB (r42625) - final release] I set the dhcp server ipv6 settings all to disabled on both wan and lan (i.e. Router Advertisement-Service -> disabled, DHCPv6-Service -> disabled, NDP-Proxy -> disabled) Disable IPv6 with OpenWRT Network > Interfaces blank out the IPv6 ULA-Prefix box 清空 IPv6 ULA-Prefix : root@lede:~# uci show network.globals network.globals=globals network.globals.ula_prefix='fdd3:b9a9:2288::/48' uci delete network.globals.ula_prefix 删除 wan6 网卡设备 : 209
210 ChinaDNS + Shadowsocks uci delete network.wan6 禁用上游 DHCP 分配的 nameserver uci set network.wan.peerdns=0 排障过程 : root@lede:~# uci set network.wan.peerdns=0 root@lede:~# uci changes network.wan.peerdns='0' root@lede:~# cat /etc/resolv.conf # Interface wan # Interface wan6 nameserver fe80::e695:6eff:fe40:6576%eth0.2 ## ---+ search lan root@lede:~# dig dropbox.com ; <<>> DiG P5 <<>> dropbox.com ;; global options: +cmd ;; Got answer: ;; ->>HEADER<<- opcode: QUERY, status: NOERROR, id: ;; flags: qr rd ra; QUERY: 1, ANSWER: 1, AUTHORITY: 0, ADDITIONAL: 1 ;; OPT PSEUDOSECTION: 210
211 ChinaDNS + Shadowsocks ; EDNS: version: 0, flags:; udp: 1280 ;; QUESTION SECTION: ;dropbox.com. IN A ;; ANSWER SECTION: dropbox.com. 227 IN A ;; Query time: 13 msec ;; SERVER: fe80::e695:6eff:fe40:6576%6#53(fe80::e695:6eff:fe40:6576%6) ## ---+ 上游 IPv6 DNS ;; WHEN: Wed Aug 30 00:38:57 UTC 2017 ;; MSG SIZE rcvd: 56 root@lede:~# dig +short root@lede:~# dig +short dropbox.com root@lede:~# uci show network.globals network.globals=globals network.globals.ula_prefix='fdd3:b9a9:2288::/48' root@lede:~# uci delete network.globals.ula_prefix root@lede:~# uci delete network.wan6 root@lede:~# uci changes -dhcp.lan.ra -dhcp.lan.dhcpv6 -network.globals.ula_prefix -network.wan6 root@lede:~# cat /etc/resolv.conf # Interface wan 211
212 ChinaDNS + Shadowsocks root@lede:~# dig +short dropbox.com ChinaDNS release date v v 源码 : 下载 : 原理 : 关于线路优化的问题 #59 ChinaDNS 需要设置两组上游 DNS 服务器 : 国内 DNS 和 国外 DNS 或者可信 DNS 是否是国内 DNS 是根据 chnroute 判断的 国内 DNS 通过当前 ISP 提供的流量解析 ( 不经过代理 ), 如果返回的结果也是国内 IP, 则采用此结果, 否则采用 国外 DNS 或者可信 DNS 的解析结果 国外 DNS 通过所使用的代理流量解析, 而访问解析的目标站点也是提供代理流量 另外 国外 DNS 或者可信 DNS 的结果优先级是高于国内 DNS 的, 所以一旦先返回的结果是 国外 DNS 或者可信 DNS 的, 就直接采用了, 导致国内 DNS 的解析结果被忽略, 导致访问国内站点速度变慢 ( 因为是 国外 DNS 或者可信 DNS 的解析结果), 所以 ChinaDNS 上游服务器是不能在本地做缓存的 ChinaDNS 默认是国内 DNS 比 国外 DNS 或者可信 DNS 响应速度要快 ChinaDNS 每次都会向所有上游 DNS 同时发送解析请求使用 pdnsd 作为 国外 DNS 或者可信 DNS 时, 第一次请求的确是这样, 这时 ChinaDNS 可以正确处理, 但是当第二次请求时, 因为 pdnsd 缓存的作用,pdnsd 比国内 DNS 先响应, 这样的结果就是解析国内站点时也采用的是 pdnsd 的结果, 可能会导致国内站点解析到国外影响访问速度 一个域名解析请求会同时向国内 DNS 和国外 DNS(ChinaDNS 设置的上游 DNS) 发送, 请求的结果如果是国外 DNS 先返回, 那么采用国外 DNS 的结果 ( 你上面说国外 DNS 结果有优先 ); 请求的结果如果是国内 DNS 先返回, 又分两种情况 :1 如果国内 DNS 返回的结果是国 212
213 ChinaDNS + Shadowsocks 内的 IP 地址, 那么采用 ;2 如果返回的是国外的地址, 那么不采用国内 DNS 的结果而采用国外 DNS 的结果 pdnsd 不适合做上游是因为有缓存, 有缓存会出现上游设置的国外 DNS (pdnsd) 的返回结果速度永远比国内 DNS 返回快可信 DNS 比国内 DNS 先返回结果 #48 不要在可信 DNS 上面使用缓存, 应该在 ChinaDNS 下游使用缓存 ChinaDNS 不能使用国外 IP #55 如果国内 DNS 返回的结果是国内的 IP, 且比国外 DNS 返回的要快, 是会采用国内 DNS 的结果, 建议不要使用运营商提供的 DNS 服务器, 改用 114 或者其他公共 DNS 使用 -v 调试 : root@openwrt:~# ps awk '$5 == "\/usr\/bin\/chinadns"{for(i=5;i<=nf;i++)pr intf $i" ";print "-v"}' /usr/bin/chinadns -p s , :5353 -c /etc/shadowsocks/i gnore.list -m -v 使用 # 分开 IP 和 port 的 DNS 服务器即被认为是可信 DNS, 如 : -s , #5353 此处的 即可信 DNS 服务器, 当指定了可信 DNS 后其他国外 IP 的 DNS 将被忽略, 且压缩指针功能也不再生效 ( 但是 -m 参数依然需要加 ) 可信 DNS 服务器不论 IP 是否国外, 一律被当做国外 DNS 处理国外 DNS 和可信 DNS 至少指定一个配置 : 213
214 ChinaDNS + Shadowsocks root@openwrt:~# opkg files ChinaDNS Package ChinaDNS ( ) is installed on root and has the following files : /etc/init.d/chinadns /usr/bin/chinadns /etc/config/chinadns /etc/chinadns_chnroute.txt root@openwrt:~# uci show chinadns chinadns.@chinadns[0]=chinadns chinadns.@chinadns[0].enable=1 chinadns.@chinadns[0].compression=1 chinadns.@chinadns[0].bidirectional=0 chinadns.@chinadns[0].port=5354 chinadns.@chinadns[0].chnroute=/etc/shadowsocks/ignore.list chinadns.@chinadns[0].server= , :5353 使用一段时间后只有国内 DNS 在工作 #14 不需要使用 ChinaDNS 查询的域名可以在 dnsmasq 中设置 server=/.microsoft.com/ 国内小运营商网络访问 cdn 节点 #42 没错, 这小运营商的网络极不稳定, 连 baidu.com 的延迟变化幅度极大 也就是说查询 CDN 节点时, 国内 DNS 返回时间可能比国外要长, 然后 chinadns 直接使用了先返回的国外节点 OpenWRT 自动翻墙路由器 DNS 解析的改善 ( 旧 ) 解析 Google 域名的问题 #68 此应为 ChinaDNS 误判, 是 FAKE IP 在现在污染 IP 完全随机的情况下会有各种 bug 注意 : 使用 ChinaDNS 做防污染并不是他主要的作用, 并且在当前的环境下, 尽量不要单纯使用 CHinaDNS 作为防污染手段, 一来有 bug, 二来 DNS 服务器是根据你的实际 IP 返回的解析结果而不是根据代理服务器的 IP 这样造成解析出的 IP 可能离你的实际位置近但是离代理较远, 214
215 ChinaDNS + Shadowsocks 反而速度慢 比如说服务器在美国, 但是单纯使用 chinadns 就可能造成解析 google.com 到香港的情况 ChinaDNS 的主要作用是优选解析结果, 国外 DNS 一定要通过代理走 ; 这样既杜绝了污染也可以获取最佳的解析结果 dns-forwarder 是走 TCP 的吗? #4 向上游 DNS 查询时使用的是 TCP :5300 是内网的监听端口当然是 UDP 了, 不然怎么接受 DNS 查询 DNS-Forwarder 的作用就是将下游的 UDP 协议的 DNS 查询转换成 TCP 协议的 DNS 查询后发送到上游服务器 抛弃 UDP, 用 TCP 查询 DNS 我的 DNS 查询的流程就是 : dnsmasq -> ChinaDNS -> DNS- Forwarder -> SS (TCP) -> 国外 DNS 服务器 (e.g: ) shadowsocks-libev release date v 源码 : 下载 : crontab 更新 IP 列表 : root@openwrt:~# crontab -l 0 5 * * 1 sh -x /root/update.apnic.ip.sh > /tmp/update.apinic.ip.log 2>&1 更新脚本 : #!/bin/sh apnic_url=' #wget -c -O- "$apnic_url" awk -F\ '/CN\ ipv4/ { printf("%s/%d\n", $4, 32-l og($5)/log(2)) }' > /etc/shadowsocks/ignore.list.new 215
216 ChinaDNS + Shadowsocks curl -s "$apnic_url" awk -F\ '/CN\ ipv4/{ printf("%s/%d\n", $4, 32-log($5) /log(2)) }' > /etc/shadowsocks/ignore.list.new service_stop () { echo " STOP: $ " local service="$1" local count=0 while [ $count -le 5 ] do if pgrep -lf "$service" then [ x"$service" = x'ss' ] && service='shadowsocks' echo "/etc/init.d/$service stop" /etc/init.d/$service stop sleep 1s count=`expr $count + 1` continue else break fi done } service_start () { echo " START: $ " local service="$1" local count=0 while [ $count -le 5 ] do if pgrep -lf "$service" then break else [ x"$service" = x'ss' ] && service='shadowsocks' echo "/etc/init.d/$service start" /etc/init.d/$service start sleep 1s count=`expr $count + 1` continue fi done } 216
217 ChinaDNS + Shadowsocks pgrep -lf 'dns ss' if [ -s /etc/shadowsocks/ignore.list.new ] then ls -l /etc/shadowsocks/ignore.list* wc -l /etc/shadowsocks/ignore.list* mv -f /etc/shadowsocks/ignore.list /etc/shadowsocks/ignore.list.bak mv -f /etc/shadowsocks/ignore.list.new /etc/shadowsocks/ignore.list service_stop dnsmasq service_stop chinadns service_stop ss sleep 2s service_start ss service_start chinadns service_start dnsmasq else echo " ERROR: download apnic IP list FAILED" fi TODO: curl 下载优化备份日期 ss 黑名单 (Bypassed IP) : shadowsocks.cfg0c4417.wan_bp_ips+= 用 OpenWRT + Shadowsocks 实现全自动爬梯子指南 分析 iptables + ipset 匹配规则 如何让路由器科学上网
218 ChinaDNS + Shadowsocks Name: ss_spec_lan_no # 局域网禁止访问的 IP 段集合 Name: ss_spec_lan_bp # 局域网可以直连的 IP 段集合 Name: ss_spec_lan_fw # 局域网需要转发的 IP 段集合 Name: ss_spec_wan_sp # 局域网或者是 shadowsocks 服务器等 IP 段集合 Name: ss_spec_wan_bp # 外网需要直连的 IP 段集合这个集合非常大 Name: ss_spec_wan_fw # 外网需要转发的 IP 段集合 为 ar71 xx 版 为 arm 版 为 armv7 版 为 7620 A(N) 和 7621 潘多拉专用版 为 7620A(N) 和 7621OPENWRT 官版专用版 为 X64 版 为 X86 版 ipk 为最新潘多拉专用版 ( 之后 ) 为 7620A(N) 和 7621 潘多拉小闪存专用版 ( 每次开机时下载主程序到内存中运行 ) _dsp.ipk 为最新潘多拉小闪存专用版 ( 之后 ) opkg install nk.ipk reference openwrt-dist 项目介绍的防 DNS 劫持 : 防 DNS 劫持 - 方案五 ( 已过时, 但原理一致 ): 抛弃 UDP 用 TCP 查询 DNS
219 ChinaDNS + Shadowsocks DNS 查询流程 : DNSmasq -> ChinaDNS -> dns-forwarder -> SS (TCP) -> 国外 DNS 服务器 ( ) 通过抓包介绍 DNS 污染 : 科学上网的一些原理 x86_64 服务器翻墙翻案 :ss-redir 透明代理 openwrt 下 shadowsocks + chinadns 自动分流的补遗 目前污染源采用了随机污染的手段, 将目标导引到随机的外国网站去 ( 这是一种恐怖主义行为! 大炮 ) 当查询结果不是中国地址时, 选择国际服务器的那个结果, 但要求这个查询结果必须至少 0.3 秒后才有效 ( 防止污染 ) 对于 SS 中转 DNS 请求, 这个想法很好, 但是性能也堪忧 就算是亚太地区的 SS 服务器 100ms 延迟总是有的, 一个查询 0.1 秒来再 0.1 秒去, 再加上 SS 服务器到 DNS 的时间 ( 双向 ), 速度也几乎等同于直接连接 使用 EdgeMax 路由器自动翻墙 参数 含义 -d 双向过滤 : 默认开启 -m 启用压缩指针 : 默认开启 219
220 ChinaDNS + Shadowsocks 双向过滤 : 当国外 DNS 服务器返回的查询结果是国内 IP, 或者当国内 DNS 服务器返回的查询结果是国外 IP 则过滤掉这个结果 ( 较为严格的模式 ); 去掉勾选的话只是过滤国内 DNS 的国外 IP 结果利用 GFW 遇到压缩指针时的一个 bug 来精确识别来自 GFW 的抢答污染, 从而极大提高识别的准确性和识别的效率, 推荐启用, 启用后 IPList 和等待时间将禁用 ( 因为用不到了 ) 图文教程 : OpenWRT 编译 Shadowsocks 实现透明代理 从头到尾, 通过 OpenWrt 固件实现路由器智能代理及建立访客网络流量控制 ipset + iptables root@lede:~# sysctl net.ipv4.ip_forward net.ipv4.ip_forward = 1 root@lede:~# ipset -L grep Name Name: ss_spec_src_ac Name: ss_spec_src_bp Name: ss_spec_src_fw Name: ss_spec_dst_sp Name: ss_spec_dst_bp Name: ss_spec_dst_fw root@lede:~# iptables -t nat -nvl Chain PREROUTING (policy ACCEPT packets, 2136K bytes) pkts bytes target prot opt in out source destina tion K SS_SPEC_LAN_DG tcp -- * * / / K prerouting_rule all -- * * / /0 /*!fw3: user chain for prerouting */ K zone_lan_prerouting all -- br-lan * / /0 /*!fw3 */ K zone_wan_prerouting all -- eth0.2 * / /0 /*!fw3 */ Chain INPUT (policy ACCEPT 7919 packets, 577K bytes) 220
221 ChinaDNS + Shadowsocks pkts bytes target prot opt in out source destina tion Chain OUTPUT (policy ACCEPT packets, 1106K bytes) pkts bytes target prot opt in out source destina tion K SS_SPEC_WAN_DG tcp -- * * / /0 Chain POSTROUTING (policy ACCEPT packets, 885K bytes) pkts bytes target prot opt in out source destina tion K postrouting_rule all -- * * / /0 /*!fw3: user chain for postrouting */ zone_lan_postrouting all -- * br-lan / /0 /*!fw3 */ K zone_wan_postrouting all -- * eth / /0 /*!fw3 */ Chain SS_SPEC_LAN_AC (1 references) pkts bytes target prot opt in out source destina tion 0 0 RETURN all -- * * / /0 match-set ss_spec_src_bp src 0 0 SS_SPEC_WAN_FW all -- * * / /0 match-set ss_spec_src_fw src 0 0 SS_SPEC_WAN_AC all -- * * / /0 match-set ss_spec_src_ac src K SS_SPEC_WAN_AC all -- * * / /0 Chain SS_SPEC_LAN_DG (1 references) pkts bytes target prot opt in out source destina tion RETURN all -- * * / /0 match-set ss_spec_dst_sp dst K SS_SPEC_LAN_AC tcp -- * * / /0 Chain SS_SPEC_WAN_AC (3 references) pkts bytes target prot opt in out source destina tion 221
222 ChinaDNS + Shadowsocks 0 0 SS_SPEC_WAN_FW all -- * * / /0 match-set ss_spec_dst_fw dst K RETURN all -- * * / /0 match-set ss_spec_dst_bp dst K SS_SPEC_WAN_FW all -- * * / /0 Chain SS_SPEC_WAN_DG (1 references) pkts bytes target prot opt in out source destina tion K RETURN all -- * * / /0 match-set ss_spec_dst_sp dst K SS_SPEC_WAN_AC tcp -- * * / /0 Chain SS_SPEC_WAN_FW (3 references) pkts bytes target prot opt in out source destina tion K REDIRECT tcp -- * * / /0 redir ports 1234 Chain postrouting_lan_rule (1 references) pkts bytes target prot opt in out source destina tion Chain postrouting_rule (1 references) pkts bytes target prot opt in out source destina tion Chain postrouting_wan_rule (1 references) pkts bytes target prot opt in out source destina tion Chain prerouting_lan_rule (1 references) pkts bytes target prot opt in out source destina tion Chain prerouting_rule (1 references) pkts bytes target prot opt in out source destina tion Chain prerouting_wan_rule (1 references) 222
223 ChinaDNS + Shadowsocks pkts bytes target prot opt in out source destina tion Chain zone_lan_postrouting (1 references) pkts bytes target prot opt in out source destina tion postrouting_lan_rule all -- * * / /0 /*!fw3: user chain for postrouting */ Chain zone_lan_prerouting (1 references) pkts bytes target prot opt in out source destina tion K prerouting_lan_rule all -- * * / /0 /*!fw3: user chain for prerouting */ Chain zone_wan_postrouting (1 references) pkts bytes target prot opt in out source destina tion K postrouting_wan_rule all -- * * / /0 /*!fw3: user chain for postrouting */ K MASQUERADE all -- * * / /0 /*!fw3 */ Chain zone_wan_prerouting (1 references) pkts bytes target prot opt in out source destina tion K prerouting_wan_rule all -- * * / /0 /*!fw3: user chain for prerouting */ 223
224 HOW : 收集 openwrt entware-ng is a software repository for network attached storages, routers and other embedded devices. Browse through packages for different platforms: arch armv5 armv7 mipsel URL x x project Village Telco The Village Telco aims to provide affordable voice and data services for the billions of people who are currently unconnected to either a phone or the Internet. By lowering the cost of entry for users, it also seeks to make calling and access to the Internet cheaper for existing users. But it will not only offer affordable access but put the power to provide it in the hands of local communities, creating a new generation of communications entrepreneurs in developing countries. Router UBNT 就爱非主流, 从 MikroTik 玩到 UBNT 入手 EdgeMAX ER-X EdgeMax 可玩性比 Routerboard 高多了 EdgeOS 系统就是个 Debian 很主流的 Linux 发行版, 所以基本上电脑里的 Debian 能怎么玩它就能怎么玩 224
225 HOW : 收集 UBNT ER-X 与 Mikrotik RB750Gr3 纠结买哪个 功能的话是 ROS 会好一些, 稳定性 UBNT 更好 ;ROS 每次更新都有奇怪的问题 ; 转发性能是 UBNT 好, 有硬件加速,ROS 纯靠软件 ; 如果你用 ROS 又希望瓶颈小一些, 直接上 X86 的, 其它都是浮云 另 : 开启硬件加速后 QOS 防火墙什么的会失效, 所以加速是有利有弊的 要性能就没什么可玩性 ERX 胜在稳定, 资料是 ROS 的多稳定性还是 ER-X 胜出 Ubnt UniFi 产品开箱 VPN shadowsocks 地瓜 SS QuickTun QuickTun Simple and secure VPN software SigmaVPN SigmaVPN Light-weight, secure and modular VPN solution 225
226 HOW : 赞助 推广赞助 想自己买 VPS 搭建 ss 服务的, 可以使用我的推广链接注册 : VPS 主机商 推广链接 DigitalOcean Vultr Linode 搬瓦工 ( 镜像 ) 谢谢支持! 假如你真的要给我钱 打开微信 点击扫一扫 扫描下面的二维码 226

227 HOW : 赞助 227
MASQUERADE # iptables -t nat -A POSTROUTING -s / o eth0 -j # sysctl net.ipv4.ip_forward=1 # iptables -P FORWARD DROP #
 iptables 默认安全规则脚本 一 #nat 路由器 ( 一 ) 允许路由 # iptables -A FORWARD -i eth0 -o eth1 -j ACCEPT ( 二 ) DNAT 与端口转发 1 启用 DNAT 转发 # iptables -t nat -A PREROUTING -p tcp -d 192.168.102.37 dprot 422 -j DNAT to-destination
一.NETGEAR VPN防火墙产品介绍
 NETGEAR VPN NETGEAR 6 http://www.netgear.com.cn - 1 - NETGEAR VPN... 4 1.1 VPN...4 1.2 Dynamic Domain Name Service...4 1.3 Netgear VPN...4 Netgear VPN... 6 2.1 FVS318 to FVS318 IKE Main...7 2.1.1 A VPN
Chapter #
 第三章 TCP/IP 协议栈 本章目标 通过本章的学习, 您应该掌握以下内容 : 掌握 TCP/IP 分层模型 掌握 IP 协议原理 理解 OSI 和 TCP/IP 模型的区别和联系 TCP/IP 介绍 主机 主机 Internet TCP/IP 早期的协议族 全球范围 TCP/IP 协议栈 7 6 5 4 3 应用层表示层会话层传输层网络层 应用层 主机到主机层 Internet 层 2 1 数据链路层
Symantec™ Sygate Enterprise Protection 防护代理安装使用指南
 Symantec Sygate Enterprise Protection 防 护 代 理 安 装 使 用 指 南 5.1 版 版 权 信 息 Copyright 2005 Symantec Corporation. 2005 年 Symantec Corporation 版 权 所 有 All rights reserved. 保 留 所 有 权 利 Symantec Symantec 徽 标 Sygate
ebook140-9
 9 VPN VPN Novell BorderManager Windows NT PPTP V P N L A V P N V N P I n t e r n e t V P N 9.1 V P N Windows 98 Windows PPTP VPN Novell BorderManager T M I P s e c Wi n d o w s I n t e r n e t I S P I
untitled
 年度 路 IVI 劉 隆 年 597 598 IVI 錄... 601 行... 601... 601 1.... 601 2. 路... 602 3.... 603... 604 1.IPv4 to IPv6... 604 2.IPv6 to IPv4... 605 -... 606 ( )IVI Server... 606 ( )IVI Server... 610 ( )IVI DNS Server...
ebook140-8
 8 Microsoft VPN Windows NT 4 V P N Windows 98 Client 7 Vintage Air V P N 7 Wi n d o w s NT V P N 7 VPN ( ) 7 Novell NetWare VPN 8.1 PPTP NT4 VPN Q 154091 M i c r o s o f t Windows NT RAS [ ] Windows NT4
自由軟體教學平台
 NCHC Opensource task force DRBL steven@nchc.gov.tw, c00hkl00@nchc.gov.tw National Center for High-Performance Computing http://www.nchc.gov.tw Jan, 2003 1 2003/1/28 ( ) 09:00-10:30 10:40-12:00 Linux 13:00-14:30
本文由筱驀釹贡献
 本 文 由 筱 驀 釹 贡 献 ppt 文 档 可 能 在 WAP 端 浏 览 体 验 不 佳 建 议 您 优 先 选 择 TXT, 或 下 载 源 文 件 到 本 机 查 看 Linux 操 作 系 统 Linux 操 作 系 统 第 一 部 分 介 绍 与 安 装 Linux 的 由 来 : Linux 的 由 来 : 的 由 来 Linus Torvalds 1.Linux 的 版 本 1.Linux
 VIDEOJET connect 7000 VJC-7000-90 zh- CHS Operation Manual VIDEOJET connect 7000 zh-chs 3 目 录 1 浏 览 器 连 接 7 1.1 系 统 要 求 7 1.2 建 立 连 接 7 1.2.1 摄 像 机 中 的 密 码 保 护 7 1.3 受 保 护 的 网 络 7 2 系 统 概 述 8 2.1 实 况
網路安全:理論與實務 第二版
 第 10 章 :Wireshark 封 包 分 析 軟 體 10-1 Wireshark 簡 介 10-2 Wireshark 的 安 裝 方 法 10-3 Wireshark 的 使 用 Wireshark 簡 介 - 發 展 歷 史 Wireshark (http://www.wireshark.org/) 是 一 個 開 放 原 始 碼 (open source software) 軟 體,
PowerPoint 演示文稿
 Linux 操 作 系 统 基 础 介 绍 课 程 目 标 及 要 求 了 解 Linux 操 作 系 统 的 登 入 方 式 掌 握 常 用 命 令 的 基 本 用 法 能 够 熟 练 在 各 个 目 录 转 换 Outline 1. Linux 操 作 系 统 简 介 2. Linux 操 作 系 统 的 登 录 3. Linux 操 作 系 统 的 目 录 结 构 4. 常 用 命 令 5.
SAPIDO GR-1733 無線寬頻分享器
 1 版 權 聲 明... 4 產 品 保 固 說 明... 4 保 固 期 限... 4 維 修 辦 法... 5 服 務 條 款... 5 注 意 事 項... 6 低 功 率 電 波 輻 射 性 電 機 管 理 辦 法... 6 CE 標 誌 聲 明... 6 無 線 功 能 注 意 事 項... 6 1 產 品 特 點 介 紹... 7 1.1 LED 指 示 燈 功 能 說 明... 8 1.2
PowerPoint Presentation
 立 97 年度 SNMG 練 DNS & BIND enc1215@gmail.com DNS BIND Resolver Named 理 Named 更 DNS DNS Reference 2 DNS DNS 料 domain ip DNS server DNS server 理 DNS server DNS DNS 狀. root name server 理 3 DNS 狀 DNS (2). com
epub 61-2
 2 Web Dreamweaver UltraDev Dreamweaver 3 We b We b We Dreamweaver UltraDev We b Dreamweaver UltraDev We b We b 2.1 Web We b We b D r e a m w e a v e r J a v a S c r i p t We b We b 2.1.1 Web We b C C +
WebSphere Studio Application Developer IBM Portal Toolkit... 2/21 1. WebSphere Portal Portal WebSphere Application Server stopserver.bat -configfile..
 WebSphere Studio Application Developer IBM Portal Toolkit... 1/21 WebSphere Studio Application Developer IBM Portal Toolkit Portlet Doug Phillips (dougep@us.ibm.com),, IBM Developer Technical Support Center
P4V88+_BIOS_CN.p65
 1 Main H/W Monitor Boot Security Exit System Overview System Time System Date [ 17:00:09] [Wed 12/22/2004] BIOS Version : P4V88+ BIOS P1.00 Processor Type : Intel (R) Pentium (R) 4 CPU 2.40 GHz Processor
1 SQL Server 2005 SQL Server Microsoft Windows Server 2003NTFS NTFS SQL Server 2000 Randy Dyess DBA SQL Server SQL Server DBA SQL Server SQL Se
 1 SQL Server 2005 DBA Microsoft SQL Server SQL ServerSQL Server SQL Server SQL Server SQL Server SQL Server 2005 SQL Server 2005 SQL Server 2005 o o o SQL Server 2005 1 SQL Server 2005... 3 2 SQL Server
Kubenetes 系列列公开课 2 每周四晚 8 点档 1. Kubernetes 初探 2. 上 手 Kubernetes 3. Kubernetes 的资源调度 4. Kubernetes 的运 行行时 5. Kubernetes 的 网络管理理 6. Kubernetes 的存储管理理 7.
 Kubernetes 包管理理 工具 Helm 蔺礼强 Kubenetes 系列列公开课 2 每周四晚 8 点档 1. Kubernetes 初探 2. 上 手 Kubernetes 3. Kubernetes 的资源调度 4. Kubernetes 的运 行行时 5. Kubernetes 的 网络管理理 6. Kubernetes 的存储管理理 7. Kubernetes
联想天工800R路由器用户手册 V2.0
 LSA-800R V2.0 2 0 0 4 l e n o v o 0755-33306800 www.lenovonetworks.com support@lenovonet.com 1 1 1.1 1 1.2 1 2 2 2.1 2 2.2 2 3 2 3.1 2 3.2 3 3.3 4 3.4 5 4 TCP/IP 5 4.1 Windows 95/98/ME 5 4.2 Windows 2000/XP
HOL-CHG-1695
 Table of Contents 练 习 概 述 - - vsphere 挑 战 练 习... 2 练 习 指 导... 3 第 1 单 元 : 在 实 践 中 学 习 (15 分 钟 )... 5 剪 贴 板 复 制 和 粘 贴 功 能 无 法 使 用?... 6 虚 拟 机 性 能 不 佳... 17 第 2 单 元 : 基 本 运 维 挑 战 (30 分 钟 )... 32 无 法 登 录
ebook62-1
 1 Red Hat Linux R e d Hat Linux L i n u x X Wi n d o w Red Hat L i n u x 1.1 Red Hat Linux Red Hat 16 M 120 M 3. 5 Intel 386 C D - R O M C D - R O M We b / 1.1.1 L i n u x L i n u 4 Primary Partition Extended
《计算机网络》实验指导书
 1 实 验 一 网 络 组 建 与 管 理 一. 实 验 目 的 1. 掌 握 平 行 双 绞 线 和 交 叉 双 绞 线 的 制 作 方 法 ( 初 级 ) 2. 掌 握 对 等 网 和 代 理 服 务 器 网 络 的 组 建 ( 初 级 ) 3. 会 用 ipconfig 和 ping 命 令 ( 初 级 ) 4. 掌 握 网 络 中 文 件 夹 共 享 和 打 印 机 共 享 ( 初 级 )
¶C¶L§§¬_™¨ A.PDF
 1 9 3 1 9 4 / 7.1 / 1 9 5 7.2 % netstat -rn Routing tables Destination Gateway Flags Refcnt Use Interface 127.0.0.1 127.0.0.1 UH 1 132 lo0 172.16.12.0 172.16.12.2 U 26 49041 le0 1 9 6 / % ping -s almond
文件1
 iptables log rule policy ( ) 1. (Packet Filter) OSI IP (Router) router router access control list ACL (Transparency) 2. Proxy store-and-forward proxy filter " " 3. Application internet java script 4. Hardware
QVM330 多阜寬頻路由器
 俠 諾 神 捕 QnoSniff 專 業 版 2.0 繁 體 中 文 使 用 手 冊 目 錄 一 簡 介... 4 二 QnoSniff 專 業 版 系 統 安 裝 與 配 置... 6 2.1 開 始 之 前 的 準 備... 6 2.2 QnoSniff 專 業 版 安 裝 過 程 中 所 需 元 件... 6 2.3 佈 署 連 接 範 例 拓 樸... 7 2.4 開 始 安 裝... 7
(UTM???U_935_938_955_958_959 V2.1.9.1)
") 192.16 www.sharetech.com.tw UTM 多 功 能 防 火 牆 管 理 者 手 冊 V 2.1.9.1 目 錄 第 一 章 安 裝 與 訊 息... 7 1-1 建 議 的 安 裝 設 定 圖... 8 1-2 軟 體 安 裝 設 定... 9 1-3 首 頁 訊 息... 14 1-4 型 號 與 功 能 對 照 表... 17 第 二 章 系 統 設 定... 19 2-1
192.16 www.sharetech.com.tw UTM 多 功 能 防 火 牆 管 理 者 手 冊 V 2.1.9.1 目 錄 第 一 章 安 裝 與 訊 息... 7 1-1 建 議 的 安 裝 設 定 圖... 8 1-2 軟 體 安 裝 設 定... 9 1-3 首 頁 訊 息... 14 1-4 型 號 與 功 能 對 照 表... 17 第 二 章 系 統 設 定... 19 2-1
untitled
 TS-411U Turbo Server TS-411U Turbo Server ( : 1.0.0) 2005 2005 12 8-2 - 1. 2. TS-411U Turbo Server - 3 - ... 7 1.1... 7 1.2... 8 1.3... 9 TS-411U... 10 2.1... 10 2.2... 14 2.3 TS-411U... 15 LCD... 17...
Microsoft Word - PS2_linux_guide_cn.doc
 Linux For $ONY PlayStatioin2 Unofficall General Guide Language: Simplified Chinese First Write By Beter Hans v0.1 Mail: hansb@citiz.net Version: 0.1 本 人 是 菜 鸟 + 小 白 欢 迎 指 正 错 误 之 处, 如 果 您 有 其 他 使 用 心 得
QVM330 多阜寬頻路由器
 侠 诺 神 捕 QnoSniff 专 业 版 2.0 简 体 中 文 使 用 手 册 目 录 一 简 介... 4 二 QnoSniff 专 业 版 系 统 安 装 与 配 置... 5 2.1 开 始 之 前 的 准 备... 5 2.2 QnoSniff 专 业 版 安 装 过 程 中 所 需 组 件... 5 2.3 布 署 连 接 范 例 拓 朴... 6 2.4 开 始 安 装... 6
 http://panweizeng.com http://meituan.com http://meituan.com hosts http://meituan.com hosts localhost 127.0.0.1 /etc/nsswitch.conf /etc/hosts /etc/resolv.conf Mail Client Web Browser cache 1-30mins Clients
untitled
 MeetingPlaza Version7.0 License Package NTT IT 2013 7 10 I _Toc360091693 1... 4 1-1 Web...4 1-2 MeetingPlaza...4 1-3...4 1-4...5 2... 7 2-1...7 2-2...9 3... 11 3-1...12 3-1-1... 13 3-1-2... 15 3-1-3...
Abstract arm linux tool-chain root NET-Start! 2
 Lab III - Embedding Linux 1 Abstract arm linux tool-chain root NET-Start! 2 Part 1.4 Step1. tool-chain 4 Step2. PATH 4 Part 2 kernel 5 Step1. 5 Step2... 6 Step3...8 Part 3 root. 8 Step1. 8 Step2. 8 Part
RunPC2_.doc
 PowerBuilder 8 (5) PowerBuilder Client/Server Jaguar Server Jaguar Server Connection Cache Thin Client Internet Connection Pooling EAServer Connection Cache Connection Cache Connection Cache Connection
Web
 Email: tian@dr.com http://www.digiark.com/tian Web 1. 2. 3. 4. 5. 6. Internet Internet (Hacker) Internet web IP 1 Internet UNIX Windows VLAN Internet IP 2 Internet FTP TELNET PING IP 8 telnet FTP RLOGIN
湖北省政府采购中心
 湖 北 省 省 级 政 府 采 购 招 标 文 件 项 目 编 号 :EZC-2014-ZX1026 项 目 名 称 : 湖 北 省 测 绘 成 果 档 案 馆 测 绘 服 务 云 平 台 配 套 设 备 购 置 招 标 内 容 : 五 台 精 密 空 调 两 台 核 心 交 换 设 备 一 台 上 网 行 为 管 理 设 备 一 台 安 全 VPN 设 备 湖 北 省 政 府 采 购 中 心 二
ext-web-auth-wlc.pdf
 使 用 无 线 局 域 网 控 制 器 的 外 部 Web 身 份 验 证 配 置 示 例 目 录 简 介 先 决 条 件 要 求 使 用 的 组 件 规 则 背 景 信 息 外 部 Web 身 份 验 证 过 程 网 络 设 置 配 置 为 来 宾 用 户 创 建 动 态 接 口 创 建 预 先 身 份 验 证 ACL 在 WLC 上 为 来 宾 用 户 创 建 本 地 数 据 库 配 置 外 部
D-link用户手册.doc
 声 明 Copyright 1986-2013 版 权 所 有, 保 留 一 切 权 利 非 经 本 公 司 书 面 许 可, 任 何 单 位 和 个 人 不 得 擅 自 摘 抄 复 制 本 书 内 容 的 部 分 或 全 部, 并 不 得 以 任 何 形 式 传 播 由 于 产 品 版 本 升 级 或 其 它 原 因, 本 手 册 内 容 会 不 定 期 进 行 更 新, 为 获 得 最 新 版
飞鱼星多WAN防火墙路由器用户手册
 WAN VER: 20110218 Copyright 2002-2011 VOLANS WAN VR4600 VR4900 VR7200 VR7500 VR7600 1.1 1.2 IP 1.3 2.1 2.2 2.2.1 2.2.2 3.1 3.2 3.2.1 3.2.2 3.2.3 4.1 4.2 4.2.1 4.2.2 4.2.3 4.2.4 4.2.5 4.2.6 4.3 4.3.1 4.3.2
C3_ppt.PDF
 C03-101 1 , 2 (Packet-filtering Firewall) (stateful Inspection Firewall) (Proxy) (Circuit Level gateway) (application-level gateway) (Hybrid Firewall) 2 IP TCP 10.0.0.x TCP Any High Any 80 80 10.0.0.x
ebook 185-6
 6 Red Hat Linux DB2 Universal Database 6.1 D B 2 Red Hat D B 2 Control Center D B 2 D B 2 D B 2 6.1 DB2 Universal Database [DB2]6.1 D B 2 O LT P O L A P D B 2 I B M P C We e k D B 2 D B 2 L i n u x Windows
Bus Hound 5
 Bus Hound 5.0 ( 1.0) 21IC 2007 7 BusHound perisoft PC hound Bus Hound 6.0 5.0 5.0 Bus Hound, IDE SCSI USB 1394 DVD Windows9X,WindowsMe,NT4.0,2000,2003,XP XP IRP Html ZIP SCSI sense USB Bus Hound 1 Bus
ch09.PDF
 9-1 / (TCP/IP) TCP/IP TCP/IP ( ) ICMP ARP RARP 9.1 TCP/IP 9.1.1 TCP/IP OSI TCP/IP (DARPA) DARPA TCP/IP UNIX Berkeley Software DistributionTCP/IP TCP/IP TCP/IP TCP/IP TCP/IP TCP/IP OSI - TCP/IP ( ) ( )
untitled
 V3041A-J/V3042A-J IP-SAN/NAS Infinova Infinova Infinova Infinova www.infinova.com.cn Infinova Infinova Infinova 1 2 1 2 V3041A-16R-J V3041A-24R-J V3042A-16R-J V3042A-24R-J V3049-EXD-R16 V3049-EXD-R24 ...
2Office 365 Microsoft Office 365 Microsoft Office Microsoft Office Microsoft Office 365 Office (Office Web Apps) Office WindowsMAC OS Office 365 Offic
 Office WindowsMAC OS Office 365 Offic") 2.1 Office 365 Office 365 Office 365 Microsoft Office Microsoft Office Office 365 Office WordExcelPowerPointOutlookAccessOneNote Publisher Office 365 Office365 Office Online ( Office Web Apps)Skype for
2.1 Office 365 Office 365 Office 365 Microsoft Office Microsoft Office Office 365 Office WordExcelPowerPointOutlookAccessOneNote Publisher Office 365 Office365 Office Online ( Office Web Apps)Skype for
.. 3 N
 1 .. 3 N9.. 4 5.. 6 7.. 8 20.. 21 23.. 24.. 25 26.. 27.. 28.. 29 2 (Cyber Café) Linux (LAN) Linux Public Home 3 K12LTSP K12LTSPFedora Core 4 (Linux)LTSP Linux (command line interface) (Graphical User Interface,
快 速 入 门 (Linux) 概 述 文 档 目 的 本 文 档 介 绍 了 如 何 快 速 创 建 Linux 系 统 实 例 远 程 连 接 实 例 部 署 环 境 等 旨 在 引 导 您 一 站 式 完 成 实 例 的 创 建 登 录 和 快 速 环 境 部 署 云 服 务 器 ECS 实
 概 述 文 档 目 的 本 文 档 介 绍 了 如 何 快 速 创 建 Linux 系 统 实 例 远 程 连 接 实 例 部 署 环 境 等 旨 在 引 导 您 一 站 式 完 成 实 例 的 创 建 登 录 和 快 速 环 境 部 署 云 服 务 器 ECS 实") 云 服 务 器 ECS 快 速 入 门 (Linux) 快 速 入 门 (Linux) 概 述 文 档 目 的 本 文 档 介 绍 了 如 何 快 速 创 建 Linux 系 统 实 例 远 程 连 接 实 例 部 署 环 境 等 旨 在 引 导 您 一 站 式 完 成 实 例 的 创 建 登 录 和 快 速 环 境 部 署 云 服 务 器 ECS 实 例, 有 时 候 也 被 称 为 阿 里 云
云 服 务 器 ECS 快 速 入 门 (Linux) 快 速 入 门 (Linux) 概 述 文 档 目 的 本 文 档 介 绍 了 如 何 快 速 创 建 Linux 系 统 实 例 远 程 连 接 实 例 部 署 环 境 等 旨 在 引 导 您 一 站 式 完 成 实 例 的 创 建 登 录 和 快 速 环 境 部 署 云 服 务 器 ECS 实 例, 有 时 候 也 被 称 为 阿 里 云
CANVIO_AEROCAST_CS_EN.indd
 简 体 中 文...2 English...4 SC5151-A0 简 体 中 文 步 骤 2: 了 解 您 的 CANVIO AeroCast CANVIO AeroCast 无 线 移 动 硬 盘 快 速 入 门 指 南 欢 迎 并 感 谢 您 选 择 TOSHIBA 产 品 有 关 您 的 TOSHIBA 产 品 的 详 情, 请 参 阅 包 含 更 多 信 息 的 用 户 手 册 () 安
Important Notice SUNPLUS TECHNOLOGY CO. reserves the right to change this documentation without prior notice. Information provided by SUNPLUS TECHNOLO
 Car DVD New GUI IR Flow User Manual V0.1 Jan 25, 2008 19, Innovation First Road Science Park Hsin-Chu Taiwan 300 R.O.C. Tel: 886-3-578-6005 Fax: 886-3-578-4418 Web: www.sunplus.com Important Notice SUNPLUS
UDP 8.2 TCP/IP OSI OSI 3 OSI TCP/IP IP TCP/IP TCP/IP Transport Control Protocol TCP User Datagram Protocol UDP TCP TCP/IP IP TCP TCP/IP TC
 8 TCP/IP TCP/IP TCP OSI 8.1 OSI 4 end to end A B FTP OSI Connection Management handshake Flow Control Error Detection IP Response to User s Request TCP/IP TCP 181 UDP 8.2 TCP/IP OSI OSI 3 OSI 3 8.1 TCP/IP
1 WLAN 接 入 配 置 本 文 中 的 AP 指 的 是 LA3616 无 线 网 关 1.1 WLAN 接 入 简 介 WLAN 接 入 为 用 户 提 供 接 入 网 络 的 服 务 无 线 服 务 的 骨 干 网 通 常 使 用 有 线 电 缆 作 为 线 路 连 接 安 置 在 固 定
 目 录 1 WLAN 接 入 配 置 1-1 1.1 WLAN 接 入 简 介 1-1 1.1.1 无 线 扫 描 1-1 1.1.2 关 联 1-3 1.2 WLAN 客 户 端 接 入 控 制 1-4 1.2.1 基 于 AP 组 的 接 入 控 制 1-4 1.2.2 基 于 SSID 的 接 入 控 制 1-4 1.3 零 漫 游 1-5 1.4 WLAN 接 入 配 置 任 务 简 介 1-6
1
 SDT Uclinux SDT.alf.c 44blib.alf 44blib.c jtag ADS.alf.c make menuconfig make dep make clean make lib_only make user_only make romfs make image make uclinux ext2 cash lcd frambuffer 1 armsys-c uclinux
Microsoft Word - template.doc
 HGC efax Service User Guide I. Getting Started Page 1 II. Fax Forward Page 2 4 III. Web Viewing Page 5 7 IV. General Management Page 8 12 V. Help Desk Page 13 VI. Logout Page 13 Page 0 I. Getting Started
puppet 简介 3 puppet 是什么 3 Hello world 4 puppet 安装 5 debian 系发行版安装 puppet 5 redhat 系发行版安装 puppet 5 源代码安装 puppet 6 配置 c/s 模式的 puppet 试验环境 6 puppet 语法 8 资
 puppet 入门 puppet 简介 3 puppet 是什么 3 Hello world 4 puppet 安装 5 debian 系发行版安装 puppet 5 redhat 系发行版安装 puppet 5 源代码安装 puppet 6 配置 c/s 模式的 puppet 试验环境 6 puppet 语法 8 资源 8 类和函数 10 节点 11 变量和数组 12 模块 13 几个常用的资源
C6_ppt.PDF
 C01-202 1 2 - (Masquerade) (Replay) (Message Modification) (Denial of Service) - ( ) (Eavesdropping) (Traffic Analysis) 8 1 2 7 3 6 5 4 3 - TCP SYN (SYN flood) Smurf Ping of Death LAND Attack Teardrop
第 7 章 下 一 代 网 际 协 议 IPv6 141 足 的 措 施 只 能 是 权 宜 之 计 (3) 路 由 表 膨 胀 早 期 IPv4 的 地 址 结 构 也 造 成 了 路 由 表 的 容 量 过 大 IPv4 地 址 早 期 为 网 络 号 + 主 机 号 结 构, 后 来 引 入
 路 由 表 膨 胀 早 期 IPv4 的 地 址 结 构 也 造 成 了 路 由 表 的 容 量 过 大 IPv4 地 址 早 期 为 网 络 号 + 主 机 号 结 构, 后 来 引 入") 第 7 章 下 一 代 网 际 协 议 IPv6 本 章 是 有 关 下 一 代 网 际 协 议 IPv6 的 描 述, 重 点 介 绍 IPv6 的 产 生 原 因 IPv6 的 地 址 与 IPv6 首 部 格 式 等 通 过 本 章 的 学 习, 读 者 应 重 点 掌 握 和 理 解 以 下 内 容 : IPv4 向 IPv6 发 展 的 必 然 性 IPv6 的 新 特 性 IPv6 地
第 7 章 下 一 代 网 际 协 议 IPv6 本 章 是 有 关 下 一 代 网 际 协 议 IPv6 的 描 述, 重 点 介 绍 IPv6 的 产 生 原 因 IPv6 的 地 址 与 IPv6 首 部 格 式 等 通 过 本 章 的 学 习, 读 者 应 重 点 掌 握 和 理 解 以 下 内 容 : IPv4 向 IPv6 发 展 的 必 然 性 IPv6 的 新 特 性 IPv6 地
EPSON
 NPD5265-00 TC .... 5....5....5....6 SSL/TLS....7....7 IP....8....8....8.... 9 Web Config...10 Web Config....11 EpsonNet Config...12 EpsonNet Config Windows...13 EpsonNet Config Windows...13 EpsonNet Config
2005 3
 Text 2009.4 hongqn@douban.com 2005 3 2.8M 1/4 20M / 500~600/sec 23 PC (1U*15/2U*8) 12 38G memcached 1U (frodo) AMD Athlon 64 1.8GHz 1G 160G SATA*2 Gentoo Linux MySQL 5 Quixote (a Python web framework)
 1500XA Daniel Danalyzer 1500XA Rosemount Analytical 1500XA P/N 3-9000-757 A 2010 5 ii 1500XA 1500XA iii iv 1500XA : 1-2 1500XA - 1500XA 1-3 1-4 1500XA 1500XA 1-5 1-6 1500XA 1500XA 1-7 1-8 1500XA
active phisical rp address: backup phisical rp address: 截取部分 TOPO 图说明到 不通的问题 : internet internet tengige 0/0/0/0 tengige
 ASR9000 ping 丢包 troubleshooting 目录 硬件平台软件版本案例介绍问题分析思路问题总结经验总结相关命令 硬件平台 ASR9000 软件版本 4.2.0 案例介绍 拓扑示例 : 问题, 客户从外网 internet ping 3 个 vrrp subnet 的地址时候始终只能通一个 IP 地址 : vrrp virtual IP :2.2.2.129 其他不能 ping 通的
(Load Project) (Save Project) (OffLine Mode) (Help) Intel Hex Motor
 (Save Project) (OffLine Mode) (Help) Intel Hex Motor") 1 4.1.1.1 (Load) 14 1.1 1 4.1.1.2 (Save) 14 1.1.1 1 4.1.2 (Buffer) 16 1.1.2 1 4.1.3 (Device) 16 1.1.3 1 4.1.3.1 (Select Device) 16 2 4.1.3.2 (Device Info) 16 2.1 2 4.1.3.3 (Adapter) 17 2.1.1 CD-ROM 2 4.1.4
1 4.1.1.1 (Load) 14 1.1 1 4.1.1.2 (Save) 14 1.1.1 1 4.1.2 (Buffer) 16 1.1.2 1 4.1.3 (Device) 16 1.1.3 1 4.1.3.1 (Select Device) 16 2 4.1.3.2 (Device Info) 16 2.1 2 4.1.3.3 (Adapter) 17 2.1.1 CD-ROM 2 4.1.4
投影片 1
 類 Linux 理 理 理 (, VBird) 2008/03/31 Linux 理 1 錄 Tarball Linux distributions / 例 2008/03/31 Linux 理 2 錄 2008/03/31 Linux 理 3 錄 錄 錄 錄 ( samba, xinetd ) ( libpam..) 料 錄 令 syslogd logrotate 行 錄 輪 令 2008/03/31
audiogram3 Owners Manual
 USB AUDIO INTERFACE ZH 2 AUDIOGRAM 3 ( ) * Yamaha USB Yamaha USB ( ) ( ) USB Yamaha (5)-10 1/2 AUDIOGRAM 3 3 MIC / INST (XLR ) (IEC60268 ): 1 2 (+) 3 (-) 2 1 3 Yamaha USB Yamaha Yamaha Steinberg Media
Ác Åé å Serial ATA ( Sil3132) S A T A (1) SATA (2) BIOS SATA (3)* RAID BIOS RAID (4) SATA (5) SATA (a) S A T A ( S A T A R A I D ) (b) (c) Windows XP
 S A T A (1) SATA (2) BIOS SATA (3)* RAID BIOS RAID (4) SATA (5) SATA (a) S A T A ( S A T A R A I D ) (b) (c) Windows XP") Serial ATA ( Sil3132)...2 (1) SATA... 2 (2) B I O S S A T A... 3 (3) RAID BIOS RAID... 6 (4) S A T A... 10 (5) S A T A... 12 Ác Åé å Serial ATA ( Sil3132) S A T A (1) SATA (2) BIOS SATA (3)* RAID BIOS
Serial ATA ( Sil3132)...2 (1) SATA... 2 (2) B I O S S A T A... 3 (3) RAID BIOS RAID... 6 (4) S A T A... 10 (5) S A T A... 12 Ác Åé å Serial ATA ( Sil3132) S A T A (1) SATA (2) BIOS SATA (3)* RAID BIOS
翻 墙 问 答 享 受 互 联 网 所 带 来 的 便 利, 以 及 私 隐 保 障, 本 来 就 如 其 他 许 多 天 赋 权 利, 这 已 是 一 个 人 应 该 享 有, 无 分 国 界 和 种 族 很 不 幸, 在 中 国 引 入 互 联 网 不 久, 中 国 就 滥 用 很 多 本 来
 翻 墙 问 答 助 你 翻 越 中 国 防 火 墙 作 者 : 李 建 军 自 由 亚 洲 电 台 2014 年 9 月 版 权 2014 自 由 亚 洲 电 台 翻 墙 问 答 享 受 互 联 网 所 带 来 的 便 利, 以 及 私 隐 保 障, 本 来 就 如 其 他 许 多 天 赋 权 利, 这 已 是 一 个 人 应 该 享 有, 无 分 国 界 和 种 族 很 不 幸, 在 中 国 引
<4D6963726F736F667420576F7264202D20383439342D352DBED6D3F2CDF8D7E9BDA8D3EBB9DCC0EDCFEEC4BFBDCCB3CCD5FDCEC42E646F63>
 第 4 单 元 搭 建 自 己 的 Web 站 点 本 单 元 通 过 学 习 架 构 Web 服 务 器, 实 现 Web 服 务, 管 理 Web 站 点, 了 解 Web 站 点 服 务 器 的 架 构 个 人 空 间 和 虚 拟 主 机 的 概 念, 掌 握 IIS 组 件 的 安 装 Web 站 点 的 创 建 管 理 站 点 属 性 选 项 卡 的 配 置 管 理 等 知 识,Web 网
中文朗科AirTrackTM T600 迷你无线路由器用户手册.doc
 AirTrack T600 http://www.netac.com.cn Netac Netac AirTrack OnlyDisk Netac Netac Netac http://www.netac.com.cn Netac 800-830-3662 FCC 15 B 1 2 3 4 / FCC 20cm 1 2 3 / / ...1 1.1...1 1.2...1 1.3...1 1.4...3...4
keystore weblogic.jks certreq.pem CA server.cer
 \\\\\\\\\\\\ 2005 6 17 Windows 2000 Server WebLogic server 8.1 SP2 JDK1.4.2; IE 5.0 WebLogic8.1 www.cnca.net Guangdong Electronic Certification Authority 1...4 2...5 3...5 3.1...5 3.2 keystore weblogic.jks...5
投影片 1
 FreeBSD A 95/10/11 19:00~21:00 95/10/11 FreeBSD 練 1 Services Setup SSH, lighttpd, PHP, MySQL, FTP, Postfix, phpmyadmin, Blog, Gallery 95/10/11 FreeBSD 練 2 1. 2. # FreeBSD # 3. vi ee joe nano etc 95/10/11
2005 Sun Microsystems, Inc Network Circle, Santa Clara, CA U.S.A. Sun Sun Berkeley BSD UNIX X/Open Company, Ltd. / Sun Sun Microsystems Su
 Java Desktop System Sun Microsystems, Inc. 4150 Network Circle Santa Clara, CA 95054 U.S.A. : 819 0675 10 2005 2 2005 Sun Microsystems, Inc. 4150 Network Circle, Santa Clara, CA 95054 U.S.A. Sun Sun Berkeley
PL600 IPPBX 用户手册_V2.0_.doc
 VoIP 网 络 交 换 机 PL-600 IPPBX 用 户 手 册 深 圳 普 联 讯 电 子 科 技 有 限 公 司 版 权 所 有 2009 深 圳 市 普 联 讯 电 子 科 技 有 限 公 司 第 1 共 1 目 录 1. 前 言...3 2. 安 装 前 准 备...3 3. 硬 件 安 装...4 4. 登 陆 及 一 般 操 作 介 绍...4 5. 基 本 配 置...6 6.
epub83-1
 C++Builder 1 C + + B u i l d e r C + + B u i l d e r C + + B u i l d e r C + + B u i l d e r 1.1 1.1.1 1-1 1. 1-1 1 2. 1-1 2 A c c e s s P a r a d o x Visual FoxPro 3. / C / S 2 C + + B u i l d e r / C
A API Application Programming Interface 见 应 用 程 序 编 程 接 口 ARP Address Resolution Protocol 地 址 解 析 协 议 为 IP 地 址 到 对 应 的 硬 件 地 址 之 间 提 供 动 态 映 射 阿 里 云 内
 A API Application Programming Interface 见 应 用 程 序 编 程 接 口 ARP Address Resolution Protocol 地 址 解 析 协 议 为 IP 地 址 到 对 应 的 硬 件 地 址 之 间 提 供 动 态 映 射 阿 里 云 内 容 分 发 网 络 Alibaba Cloud Content Delivery Network 一
Desktop Management Guide
 Ĵ* 商 用 台 式 机 文 档 部 件 号 312947-AA1 2003 詤 3 本 指 南 介 绍 了 预 装 在 某 些 机 型 上 的 安 全 保 护 功 能 和 智 能 管 理 功 能 的 定 义 及 使 用 说 明 2002 Hewlett-Packard Company 2002 Hewlett-Packard Development Company, L.P. HP Hewlett
Guide to Install SATA Hard Disks
 SATA RAID 1. SATA. 2 1.1 SATA. 2 1.2 SATA 2 2. RAID (RAID 0 / RAID 1 / JBOD).. 4 2.1 RAID. 4 2.2 RAID 5 2.3 RAID 0 6 2.4 RAID 1.. 10 2.5 JBOD.. 16 3. Windows 2000 / Windows XP 20 1. SATA 1.1 SATA Serial
EPSON
 NPD5668-00 TC .... 6....6....6....8....8....10....11....11....12....12....12....12 IP....13 DNS....13....13....15....15.... 18....21 Web Config ( )...21....23....23....24....27.... 27 Web Config.... 28....30....30....31
ebook70-5
 5 / 5.1 L i n u x L i n u x X L i n u x 5.1.1 touch t o u c h t o u c h G N U t o u c h # touch newfile # ls -l newfile - r w - r - - r - - 1 bball users 0 Jan 5 12 : 40 n e w f i l e t o u c h 0 # > newfile2
Applied Biosystems StepOne™ Real-Time PCR System Quick Reference Card for Installation
 Applied Biosystems StepOne Real-Time PCR System StepOne 系统安装 快速参考卡 本文档提供在并置布局中安装 StepOne 系统的简明指导 有关 完整步骤或独立安装步骤 请参阅 Applied Biosystems StepOne Real-Time PCR System 安装 联网和维护指南 目录 1. 安装准备........................................
目 錄 版 次 變 更 記 錄... 2 原 始 程 式 碼 類 型 之 使 用 手 冊... 3 一 安 裝 軟 體 套 件 事 前 準 備... 3 二 編 譯 流 程 說 明... 25 1
 科 技 部 自 由 軟 體 專 案 原 始 程 式 碼 使 用 手 冊 Source Code Manual of NSC Open Source Project 可 信 賴 的 App 安 全 應 用 框 架 -App 應 用 服 務 可 移 轉 性 驗 證 Trusted App Framework -Transferability Verification on App MOST 102-2218-E-011-012
RUN_PC連載_10_.doc
 PowerBuilder 8 (10) Jaguar CTS ASP Jaguar CTS PowerDynamo Jaguar CTS Microsoft ASP (Active Server Pages) ASP Jaguar CTS ASP Jaguar CTS ASP Jaguar CTS ASP Jaguar CTS ASP Jaguar CTS ASP Jaguar Server ASP
電子商業伺服器管理(終極版).doc
.doc") 2 3 4 5 Chinese Linux Documentation Project / 6 7 8 9 10 #!/bin/sh # # named This shell script takes care of starting and stopping # named (BIND DNS server). # # Source function library.. /etc/rc.d/init.d/functions
2 3 4 5 Chinese Linux Documentation Project / 6 7 8 9 10 #!/bin/sh # # named This shell script takes care of starting and stopping # named (BIND DNS server). # # Source function library.. /etc/rc.d/init.d/functions
(CSR)...2 CA CA CA CA Base64 CA CA SSL
...2 CA CA CA CA Base64 CA CA SSL") 2005 6 17 Red Hat Linux 7.2 apache 1.3.20-16 IE 5.0 Apache1.3.20-16 www.cnca.net Guangdong Electronic Certification Authority ...1...1 (CSR)...2 CA...3 4.1...3 4.2...5...5 5.1...5 5.2 CA...6 5.2.1 CA...6
2005 6 17 Red Hat Linux 7.2 apache 1.3.20-16 IE 5.0 Apache1.3.20-16 www.cnca.net Guangdong Electronic Certification Authority ...1...1 (CSR)...2 CA...3 4.1...3 4.2...5...5 5.1...5 5.2 CA...6 5.2.1 CA...6
未命名 -1
 BV8188M 使 用 说 明 INSTRUCTIONS 使 用 之 前 请 仔 细 阅 读 此 手 册 Please read before using this manual 深 圳 市 碧 维 视 科 技 有 限 公 司 2013 年 碧 维 视 印 刷, 版 权 所 有, 翻 版 必 究, 本 手 册 内 所 有 图 文, 未 经 授 权, 严 谨 与 任 何 方 式 之 全 面 或 部 分
Cisco WebEx Meetings Server 2.6 版常见问题解答
 Cisco WebEx Meetings Server 2.6 版 常 见 问 题 解 答 介 绍 2 应 用 程 序 和 文 档 共 享 2 主 持 加 入 和 设 置 会 议 2 在 Chrome 和 Firefox 上 加 入 WebEx 会 议 或 播 放 会 议 录 制 文 件 4 适 用 于 移 动 设 备 的 Cisco WebEx 4 下 载 Cisco WebEx 应 用 程 序
EMC® VNX® Series VNX8000™ Block 安装指南
 EMC VNX Series VNX8000 Block 安 装 指 南 300-999-791 REV 05 版 权 所 有 2014-2015 EMC Corporation 保 留 所 有 权 利 中 国 印 刷 发 布 日 期 : 2015 年 2 月 EMC 确 信 本 出 版 物 在 发 布 之 日 内 容 准 确 无 误 本 出 版 物 中 的 信 息 可 随 时 更 改 而 不 另
Logitech Wireless Combo MK45 English
 Logitech Wireless Combo MK45 Setup Guide Logitech Wireless Combo MK45 English................................................................................... 7..........................................
untitled
 DOP www.deltaww.com DOP (RS232/RS485/ RS422) DOP USB SD 30 100 PLC Best Performance Huma Beautiful Display Beneficial Feature 1 DOP LED 65536 2D n Machine Interface s 2 DOP-B DOP-B 4.3 inches Wide B03S211
目 錄 第 一 章 weberp 簡 介... 6 第 一 節 概 述... 6 第 二 節 安 全 性... 7 第 三 節 功 能... 7 一 銷 售 及 訂 單... 7 二 稅... 8 三 應 收 帳 款... 8 四 存 貨... 8 五 購 買... 9 六 應 付 帳 款... 9
 東 吳 大 學 企 研 所 資 訊 管 理 期 末 報 告 weberp 使 用 說 明 書 指 導 教 授 : 尚 榮 安 教 授 第 一 組 童 偉 哲 01353025 劉 彥 澧 01353028 史 璦 禎 01353031 吳 采 紋 98153143 1 目 錄 第 一 章 weberp 簡 介... 6 第 一 節 概 述... 6 第 二 節 安 全 性... 7 第 三 節 功
1 1 大概思路 创建 WebAPI 创建 CrossMainController 并编写 Nuget 安装 microsoft.aspnet.webapi.cors 跨域设置路由 编写 Jquery EasyUI 界面 运行效果 2 创建 WebAPI 创建 WebAPI, 新建 -> 项目 ->
 目录 1 大概思路... 1 2 创建 WebAPI... 1 3 创建 CrossMainController 并编写... 1 4 Nuget 安装 microsoft.aspnet.webapi.cors... 4 5 跨域设置路由... 4 6 编写 Jquery EasyUI 界面... 5 7 运行效果... 7 8 总结... 7 1 1 大概思路 创建 WebAPI 创建 CrossMainController
ebook70-13
 1 3 I S P O p e n L i n u x Point to Point Protocol P P P I S P L i n u x 10 L i n u x World Wide We b 13.1 We b f t p ( ) f t p (File Transfer Protocol F T P ) F T P g e t p u t 13. 1. 1 F T P f t p n
(Methods) Client Server Microsoft Winsock Control VB 1 VB Microsoft Winsock Control 6.0 Microsoft Winsock Control 6.0 1(a). 2
 Client Server Microsoft Winsock Control VB 1 VB Microsoft Winsock Control 6.0 Microsoft Winsock Control 6.0 1(a). 2") (2005-01-26) (2005-01-26) (2005-02-27) PIC_SERVER (9) VB TCP/UDP Visual Basic Microsoft Winsock Control (MSWINSCK.OCX) UDP TCP Client Server Visual Basic UDP/TCP PIC_SERVER UDP/TCP 1. Microsoft Winsock
(2005-01-26) (2005-01-26) (2005-02-27) PIC_SERVER (9) VB TCP/UDP Visual Basic Microsoft Winsock Control (MSWINSCK.OCX) UDP TCP Client Server Visual Basic UDP/TCP PIC_SERVER UDP/TCP 1. Microsoft Winsock
Microsoft Word - 100118002.htm
 100 年 度 11800 電 腦 軟 體 應 用 乙 級 技 術 士 技 能 檢 定 學 科 測 試 試 題 本 試 卷 有 選 擇 題 80 題, 每 題 1.25 分, 皆 為 單 選 選 擇 題, 測 試 時 間 為 100 分 鐘, 請 在 答 案 卡 上 作 答, 答 錯 不 倒 扣 ; 未 作 答 者, 不 予 計 分 准 考 證 號 碼 : 姓 名 : 選 擇 題 : 1. (3)
ICD ICD ICD ICD ICD
 MPLAB ICD2 MPLAB ICD2 PIC MPLAB-IDE V6.0 ICD2 usb PC RS232 MPLAB IDE PC PC 2.0 5.5V LED EEDATA MPLAB ICD2 Microchip MPLAB-IDE v6.0 Windows 95/98 Windows NT Windows 2000 www.elc-mcu.com 1 ICD2...4 1.1 ICD2...4
Seagate_Dashboard_UG.book
 Seagate Dashboard Seagate Dashboard 2013 Seagate Technology LLC. Seagate Seagate Technology Wave FreeAgent Seagate Technology LLC 1 GB 10 1 TB 10000 Seagate Seagate Technology LLC 10200 S. De Anza Boulevard
项目采购需求编写模板
 金 税 三 期 工 程 第 二 阶 段 外 部 信 息 交 换 项 目 竞 争 性 磋 商 文 件 技 术 部 分 项 目 编 号 :0706-15410008N059 采 购 人 : 国 家 税 务 总 局 采 购 代 理 机 构 : 中 国 技 术 进 出 口 总 公 司 二 〇 一 五 年 十 二 月 1 / 91 目 录 第 一 章 金 税 三 期 工 程 项 目 背 景... 5 1.1
2
 2011 Ver. 1.2.0 2 3 P2P Tunnel BotNet Zero-Day 4 port port HTTP (TCP/80), HTTPS(TCP/443) SSL SSH IPSec Ex:TOR Protocol Obfuscation( ) P2P Protocol Obfuscation P2P 5 P2P 6 P2P P2P P2P 6 7 P2P Tunnel BotNet
User ID 150 Password - User ID 150 Password Mon- Cam-- Invalid Terminal Mode No User Terminal Mode No User Mon- Cam-- 2
 Terminal Mode No User User ID 150 Password - User ID 150 Password Mon- Cam-- Invalid Terminal Mode No User Terminal Mode No User Mon- Cam-- 2 Mon1 Cam-- Mon- Cam-- Prohibited M04 Mon1 Cam03 Mon1 Cam03
GPRS IP MODEM快速安装说明
 GF-3026D CDMA 无 线 路 由 器 用 户 手 册 北 京 嘉 复 欣 科 技 有 限 公 司 地 址 : 北 京 市 海 淀 区 阜 成 路 115 号 北 京 印 象 2 号 楼 213 室 电 话 :86-10-88122130 88153193 88153197 传 真 :86-10-88122129 网 站 :http://www.garefowl.com/ 目 录 一 产 品
2004 Sun Microsystems, Inc Network Circle, Santa Clara, CA U.S.A. Sun Sun Berkeley BSD UNIX X/Open Company, Ltd. / SunSun MicrosystemsSun
 SAP livecache Sun Cluster Solaris OS SPARC Sun Microsystems, Inc. 4150 Network Circle Santa Clara, CA 95054 U.S.A. : 817 7374 10 2004 4 A 2004 Sun Microsystems, Inc. 4150 Network Circle, Santa Clara, CA
Microsoft Word - 選擇_無解答2_.doc
 選 擇 題 : 1 ( ) 下 列 何 者 為 W W W 的 通 訊 協 定? (A)H T T P ( H y p e r T e x t T r a n s f e r P r o t o c o l ) (B)S M T P ( S i m p l e M a i l T r a n s f e r P r o t o c o l ) (C) F T P ( F i l e T r a n